
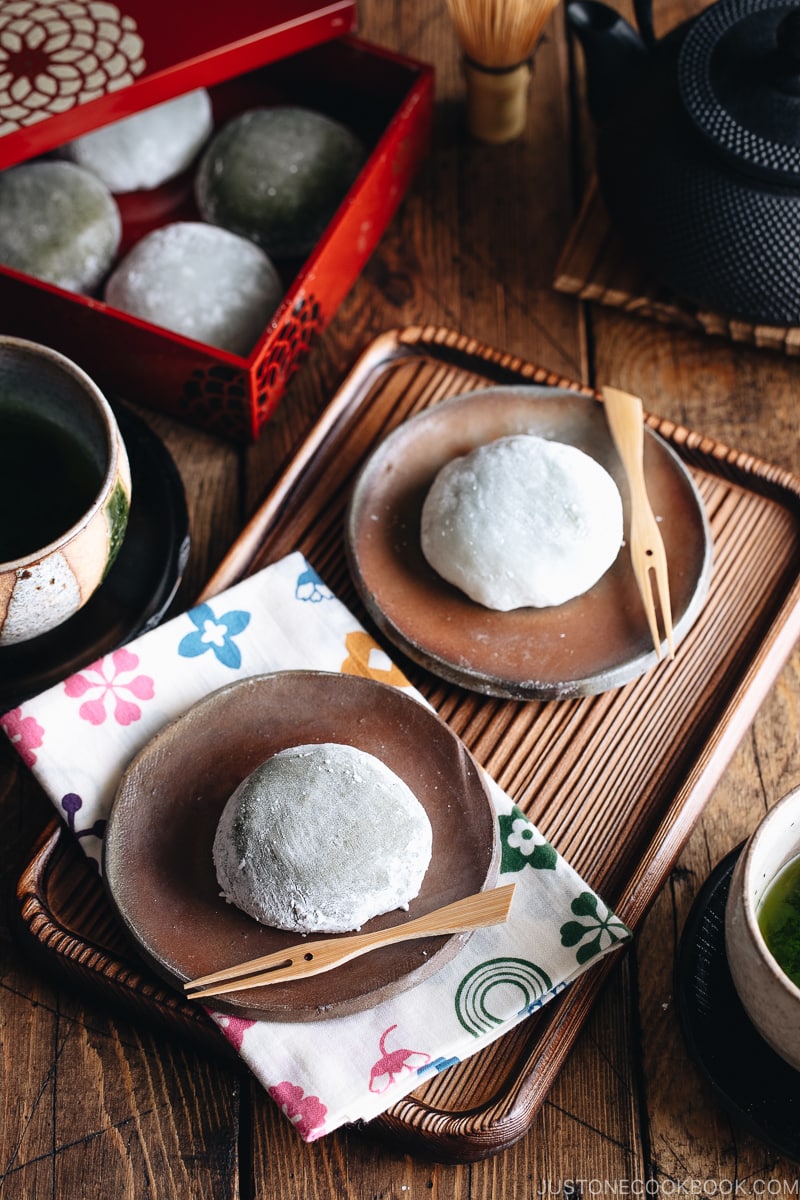
Perfectly chewy with a hint of sweetness, Green Tea Mochi is timeless Japanese sweet enjoyed by all ages. In this homemade recipe, we will make two versions of the mochi with brilliant contrasting colors. Serve the matcha-flavored mochi with green tea or hojicha for a delightful Japanese afternoon tea!
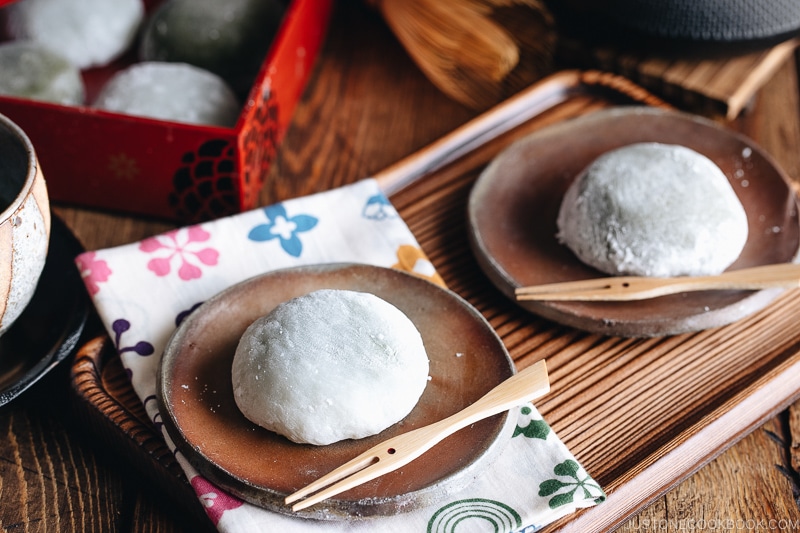
Many of you told me that you relish the soft and chewy texture of mochi. Come in a small squashy round cake shape, each bite of the mochi can feel like an indulgently sweet affair. In Japan, we have different styles of mochi and this particular kind is called Daifuku Mochi (大福餅).
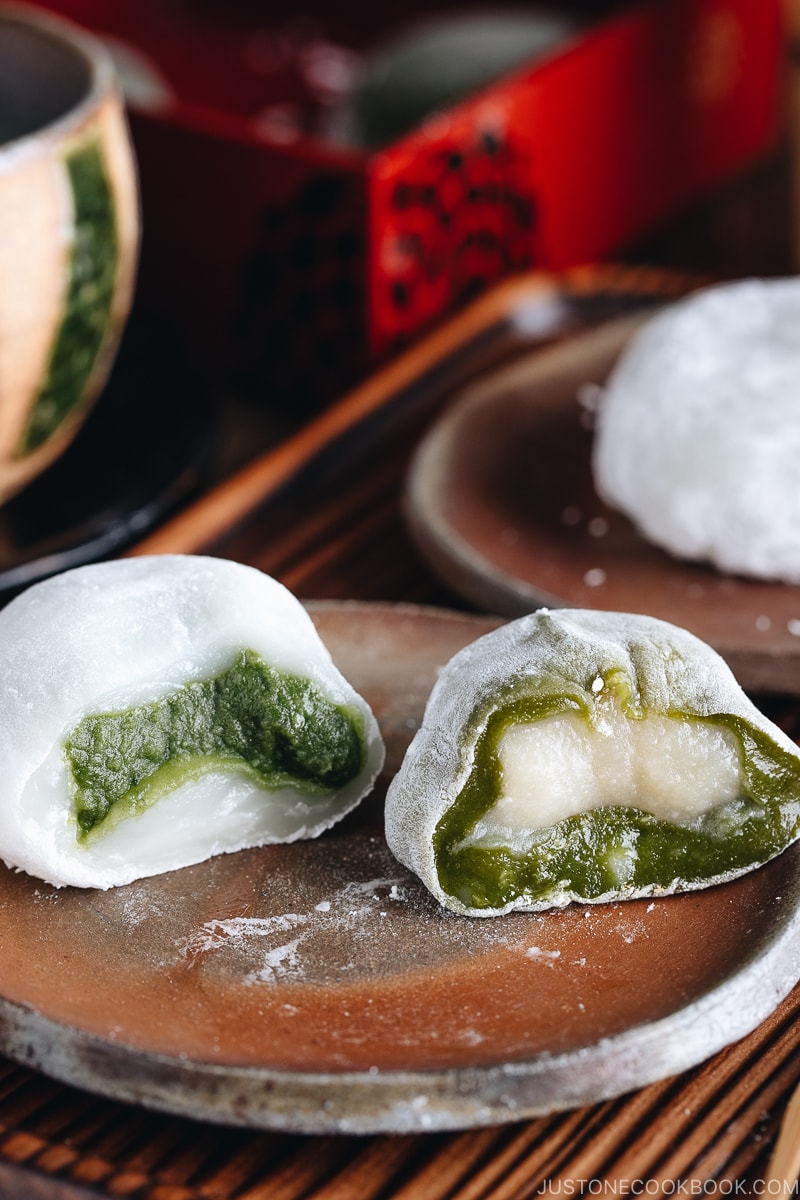
Today I’m going to share Green Tea Mochi (抹茶大福) in two ways – 1) White Mochi with Green Tea Filling and 2) Green Mochi with White Bean Filling.
Watch How to Make Green Tea Mochi
Perfectly chewy with a hint of sweetness, Green Tea Mochi is timeless Japanese sweet enjoyed by all ages.
How to Make Mochi Dough from Scratch
We have 2 ways to make mochi dough for daifuku at home.
- Steam glutinous rice (sweet rice) and pound it to make mochi dough. Traditionally, we use this wooden mill (usu 臼) and pestle (kine 杵), or a mochi making machine. However, I don’t have them so I figured out How to Make Mochi with Stand Mixer.
- Microwave or steam shiratamako (白玉粉) or mochiko (もち粉).
In this recipe, I’ll show you how to make the dough using the second method with shiratamako. It’s easier and quicker, and the result is wonderful.
In case you’re wondering, shiratamako and mochiko are both glutinous rice flours, however, it is different in taste and texture. The former goes through special processing which yields a very fine and elastic texture.
While mochiko is cheaper and more widely accessible, I always prefer shiratamako when comes to making Japanese sweets like daifuku mochi. It’s also the most commonly used ingredient to make daifuku at home in Japan. The flour is so much more flexible to work with, and you’ll get a really smooth and bouncy texture for the dough. Your local Japanese grocery store should carry shiratamako. (I’m asking one online shop to carry shiratamako and ship internationally for us… crossing fingers!)
3 Tips for Making Mochi Using Microwave
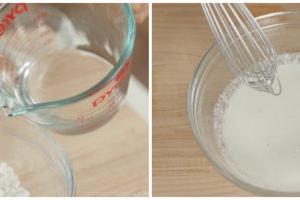
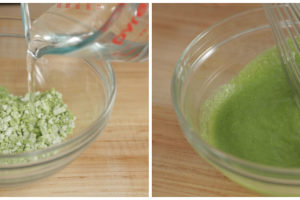
1. Mix the shiratamako and water thoroughly.
Whisk together shiratamako and water well until the mixture is homogeneous.
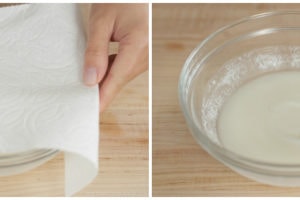
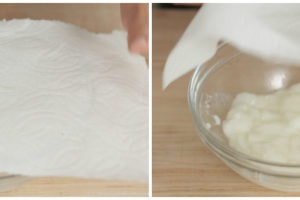
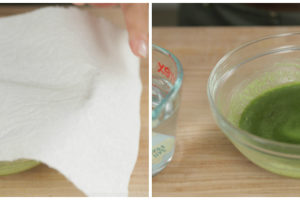
2. Cover the bowl with a paper towel.
In my old daifuku recipes, I’ve used a plastic wrap to cover the bowl when microwaving the dough. However, I’ve learned that a piece of paper towel works much better and less hazardous. You’ll less likely burn your hand with the hot steam when you open the cover.
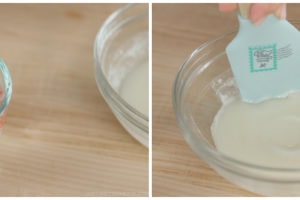
3. Microwave in short interval.
Each microwave has different wattage, so don’t follow my recipe unless it’s the same wattage. If you are not sure, start cooking in a short interval, such as 30 seconds at a time. Then check the progress by looking at the mixture. When the mochi is cooked through, it looks opaque than a solid color.
Green Tea Mochi 2 Ways!
Since the ingredients for 2 types of Green Tea Mochi are exactly the same, let’s make both! We’ll be making:
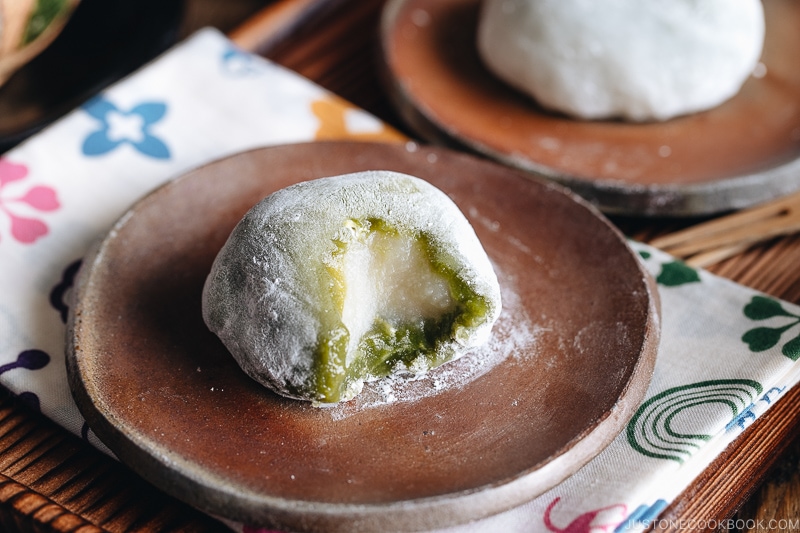
1. White Mochi with Green Tea Filling
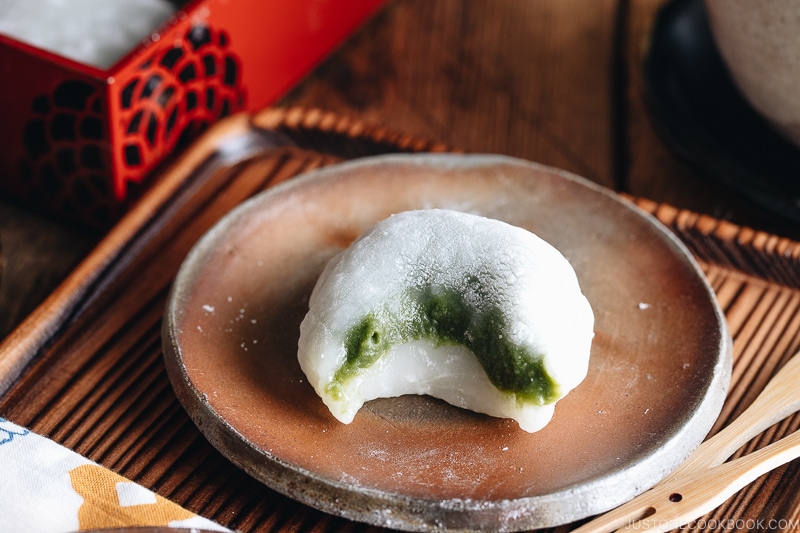
Mochi: We use unflavored, regular mochi made with shiratamako. You can also steam glutinous rice (sweet rice) and pound it to make mochi (See my How to Make Mochi with Stand Mixer post).
Filling: We mix matcha powder into the white bean paste (Shiroan) to make the green color paste with matcha flavor.
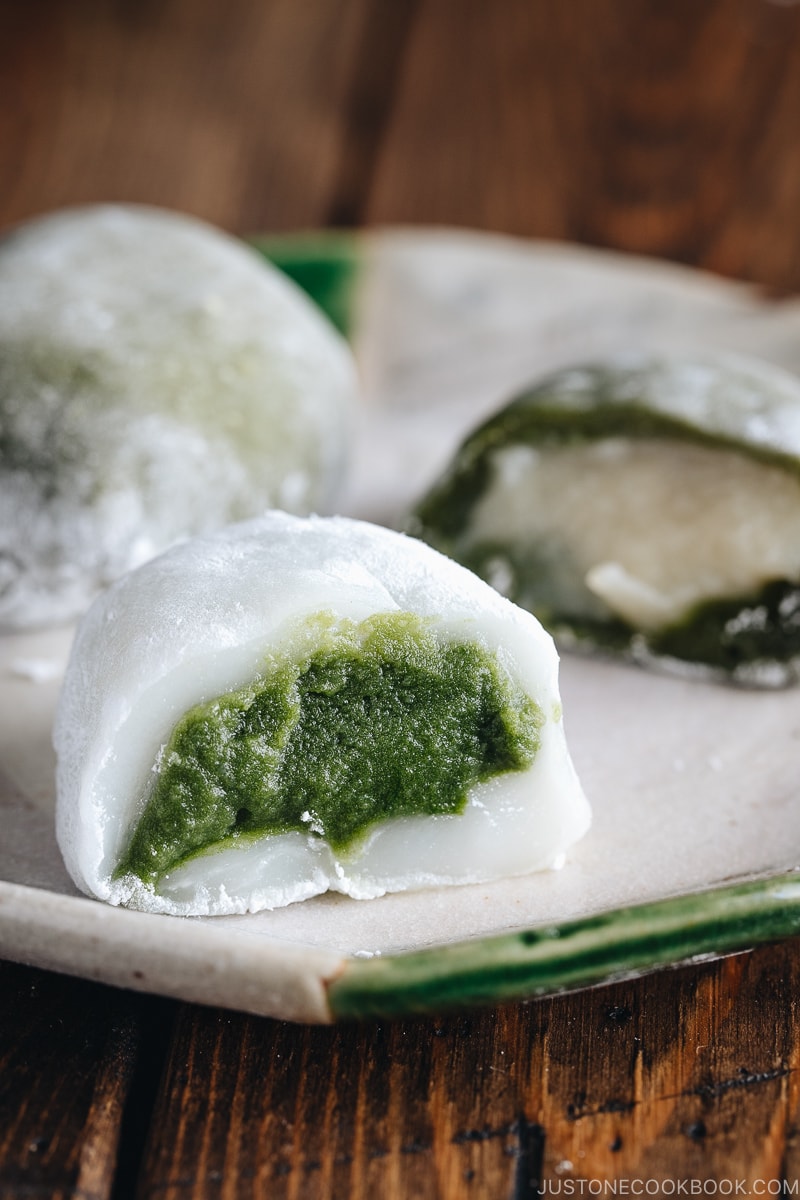
2. Green Mochi with White Bean Filling
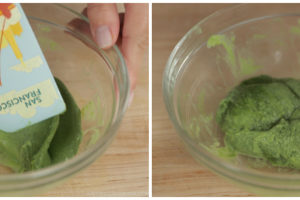
Mochi: We add matcha to the mochi dough to make it green.
Filling: We use unflavored white bean paste (Shiroan) to give contrast to the green outer layer.
Now that you see two kinds of Green Tea Mochi, you may wonder which one is better. My family prefers the White Mochi with Green Tea Filling version because the matcha flavor is more prominent than the other one.
5 Useful Tips for Wrapping Mochi
1. Make sure the filling is firm
When the filling is still warm and soft, it can be bothersome to wrap the mochi layer around. So make sure to chill the filling before you wrap so it’s not sticky or pliable.
2. Make the mochi dough into a round shape
Ideally, a balanced mochi will have a slightly thick center and a thinner outer layer. Nevertheless, homemade mochi tends to have a thick layer on the bottom. That’s because when we pull the dough and pinch to close the mochi, the layer concentrates at the bottom. By forming the mochi dough into a round allows you to reshape a few times and even out the thickness.
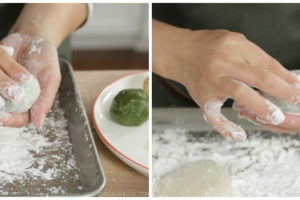
3. Coat the mochi dough evenly with potato/corn starch
Mochi is sticky. For handling purposes, you’ll need to dry it completely (= rice cake) or coat the surface with potato starch or cornstarch. Pay extra cautious when doing so. You want to make sure all areas are covered evenly in a thin layer of starch so it’s not a mouthful of white powder when you bite.
4. Pull the mochi dough and pinch tightly.
When the mochi dough is coated with starch, it can be hard to seal the seam. You can either remove the starch with a pastry brush or pull the dough so the new sticky mochi surface will appear for you to pinch. When the sticky surface appears, make sure to pinch tightly with fingers coated with the starch. Otherwise, your fingers will be a sticky mess!
5. Rotate the mochi to shape and close the mochi
Once you close the seam, you can flip the mochi and put the seam line on the palm. Turn the mochi on your palm a few times to reshape, apply the starch on the bottom to finish up the mochi making process.
Homemade Mochi vs. Storebought Mochi
The idea of making mochi at home may seem intimidating, but I can assure you that it is entirely manageable. No doubt it is an unavoidably sticky undertaking, but the process will bring you so much joy and fulfillment. For me, it is also about continuing the heritage of Japanese sweet making. Whenever I make mochi at home, I like to enlist my daughter to help. Her mochi may not turn out perfect, but it makes such a precious bonding time for us!
The homemade treat surpasses the storebought version in flavors, texture, and freshness anytime that you can never go back to the mass-produced storebought mochi. If you love matcha flavored sweets, give this Green Tea Mochi a try!

Other Japanese Sweets Recipes You May Enjoy
Japanese Ingredient Substitution: If you want to look for substitutes for Japanese condiments and ingredients, click here.
Sign up for the free Just One Cookbook newsletter delivered to your inbox! And stay in touch with me on Facebook, Pinterest, YouTube, and Instagram for all the latest updates.
Green Tea Mochi

Perfectly chewy with a hint of sweetness, Green Tea Mochi is timeless Japanese sweet enjoyed by all ages. In this homemade recipe, we will make two versions of the mochi with brilliant contrasting colors.
White Mochi with Green Tea Filling
- 100 g White Bean Paste (Shiroan) ((3.5 oz))
- 2 g matcha (green tea powder) ((1 tsp))
- 50 g Shiratamako (glutinous rice flour/sweet rice flour) ((⅜ cup, 6 Tbsp, or 1.8 oz))
- 25 g sugar ((⅛ cup or 2 Tbsp))
- 90 g water ((⅜ cup, 6 Tbsp, 3.2 oz, or 90 ml))
Green Mochi with White Bean Filling
- 100 g White Bean Paste (Shiroan) ((3.5 oz))
- 50 g Shiratamako (glutinous rice flour/sweet rice flour) ((⅜ cup, 6 Tbsp, or 1.8 oz))
- 25 g sugar ((⅛ cup or 2 Tbsp))
- 2 g matcha (green tea powder) ((1 tsp))
- 90 g water ((⅜ cup, 6 Tbsp, 3.2 oz, or 90 ml))
For dusting
- 100 g potato/corn starch ((½ cup))
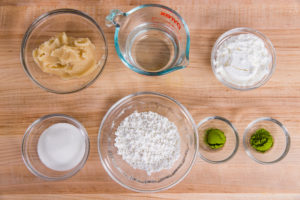
- Gather all the ingredients.
Prepare the Fillings
-
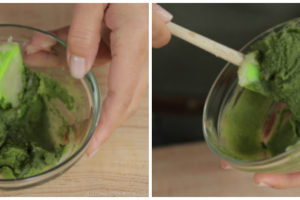
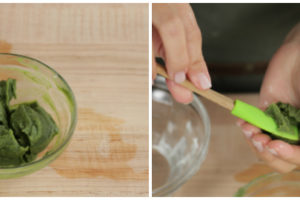
In a small bowl, combine 100 g white bean paste (Shiroan) with 2 g matcha (green tea powder).

-
Using a small spatula or spoon, blend the paste and matcha until the mixture is homogeneous.
-
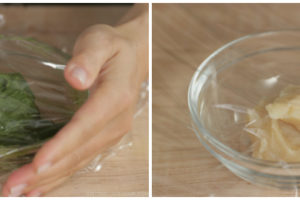
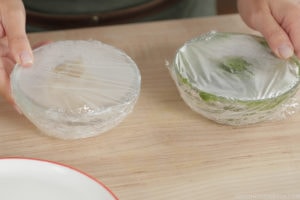
Cover the matcha paste with plastic. Do the same for 50 g white bean paste. Freeze the bowls of paste for 30 minutes (or refrigerate for 60 minutes) to firm up the texture.
-
After 30-60 minutes, take out the bowls.
-
We'll start with the white bean paste first by dividing it into thirds. Wet your hands with water.
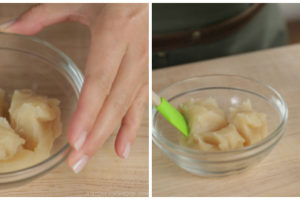
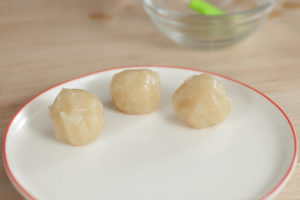
- Take ⅓ of the paste into your hands and roll into a ball. Continue with the rest.
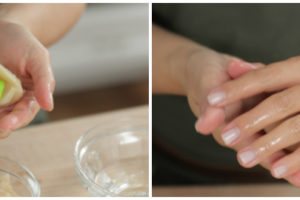
- Transfer to a plate. Don’t worry if they are not perfectly round.
-
Now we'll work on the matcha paste by dividing into thirds. Wet your hands with water and take ⅓ of the paste into your hands.
- Roll each third into a ball. Refrigerate until ready to use.

Make Mochi and Assemble
-
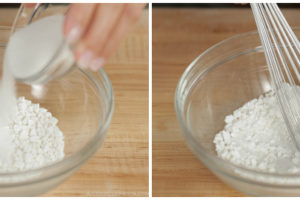
First, we make white mochi with matcha filling. In a bowl, combine 50 g Shiratamako and 25 g sugar and whisk well.
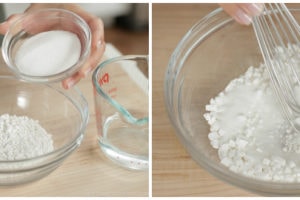
- Add 90 g water and whisk well until there is no lump.
- Cover the bowl with paper towel and microwave for 1 minute (my microwave is 1200W).
- Wet your silicone spatula with water.
- Mix the mochi dough so that it will be cooked evenly.
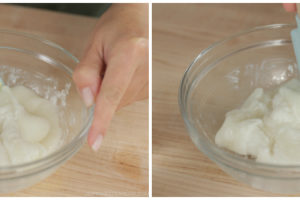
-
Cover and microwave for an additional 30 seconds (or more/less depends on your microwave strength). The cooked mochi dough will look opaque.
-
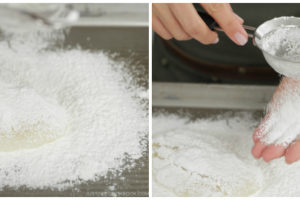
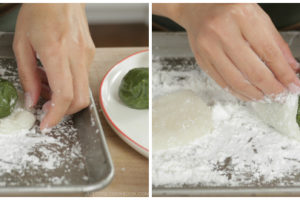
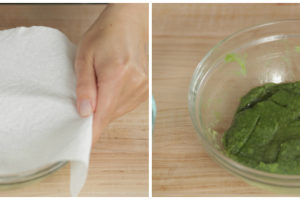
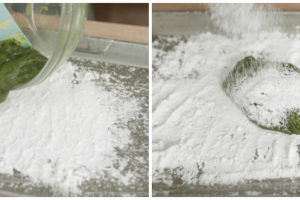
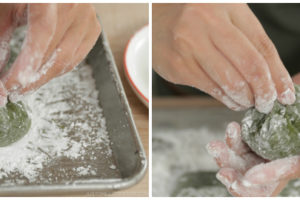
Spread the potato starch or corn starch well on a baking sheet. Remember, mochi dough will stick if the surface is not covered with starch. Transfer the mochi dough on top of the starch.
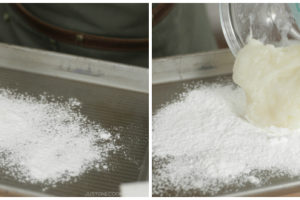
-
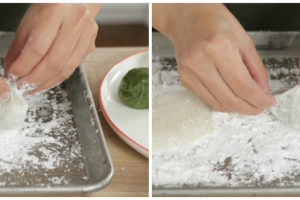
Sprinkle potato starch on top of the mochi dough and on your hands. Your hands must be well coated; otherwise, they will be very sticky.
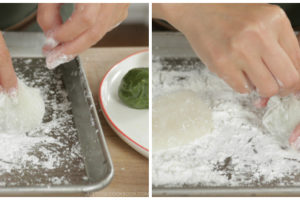
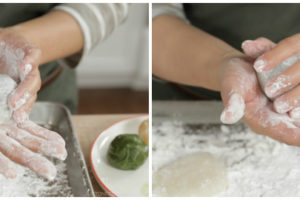
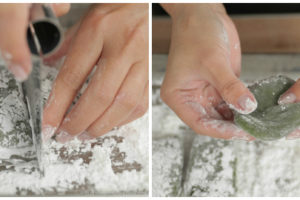
- Use a dough scraper, divide the mochi dough into equal thirds.

- If one is bigger than the other, cut off the edge and add to the center of the smaller dough. Flatten the dough into a circle shape.
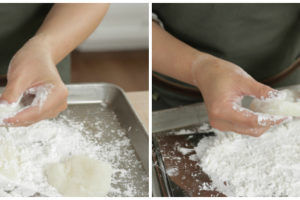
-
Place the matcha paste ball in the center of the dough. Bring all four corners of the dough over the ball.
-
Bring the rest of the edges to the top.
- Pinch the seam line by pulling the mochi dough.
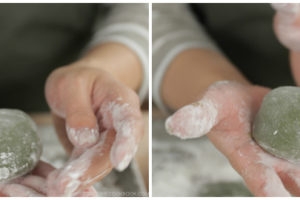
-
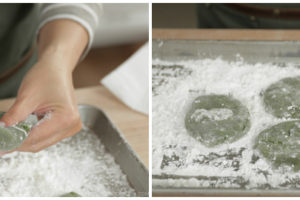
If the dough is too sticky, tap the seam line with potato starch. If the dough is covered with too much potato starch, dust it off and pull the dough at the seam so the sticky surface appears and you can seal the seam.
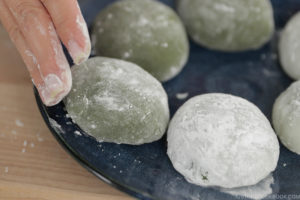
-
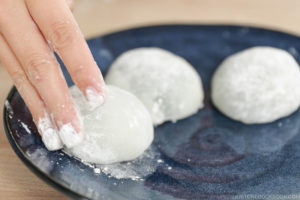
Once the seam is tightly closed, flip the mochi so the seam line is on the bottom. Twist the mochi a few times on your palm to reshape until even thickness.
- Repeat the same for the next 2 mochi dough.
-
Now, we make the green tea mochi with white bean filling. In a bowl, combine 50 g Shiratamako and 25 g sugar and whisk well.
- Add 2 g matcha into the mixture and whisk well.
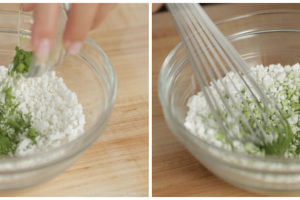
- Add 90 g water and whisk well until there is no lump.
- Cover the bowl with paper towel and microwave for 1 minute (my microwave is 1200W).
- Wet your silicone spatula with water. Mix the mochi dough so that it will be cooked evenly.
-
Cover and microwave for an additional 30 seconds (or more/less depends on your microwave strength). The cooked mochi dough will look opaque.
-
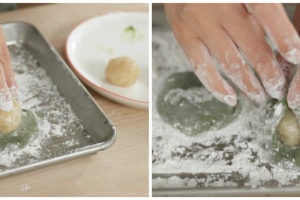
Spread the potato starch or cornstarch generously on a baking sheet. Remember, mochi dough will stick if the surface is not covered by the potato starch. Transfer the mochi dough on top of the starch. Sprinkle more starch on top of the mochi dough and on your hands. Your hands must be well coated; otherwise, they will be very sticky.
- Use a dough scraper, divide the mochi dough into equal thirds. If one is bigger than the other, cut off the edge and add to the center of the smaller dough.
- Flatten the dough into a circle shape.
-
Place the white bean paste ball in the center of the dough. Bring all four corners of the dough over the ball.
-
Then bring the rest of the edges to the top and pinch the seam line by pulling the mochi dough. If the dough is too sticky, tap the seam line with potato starch. If the dough is covered with too much potato starch, dust it off and pull the dough at the seam so the sticky mochi surface will appear and you can seal the seam.
-
Once the seam is tightly closed, flip the mochi so the seam line is on the bottom. Twist the mochi a few times on your palm to reshape.
- Repeat the same for the next 2 mochi dough.
To Serve and Keep
-
Serve mochi at room temperature. It goes well with green tea or hojicha.
To Store
-
The mochi will stay fresh for up to 2-3 days, but it's best to consume on the same day. On warm days, it's best to keep in the refrigerator. Make sure to individually covered so that the mochi will not become dry. You can freeze up to 2 weeks. Defrost first and enjoy or microwave for 10 seconds to make it softer.
Microwave: If you do not have a microwave, you can steam the mixture. Please see the Daifuku recipe and video for tutorial.
Recipe by Namiko Chen of Just One Cookbook. All images and content on this site are copyright protected. Please do not use my images without my permission. If you’d like to share this recipe on your site, please re-write the recipe and link to this post as the original source. Thank you.