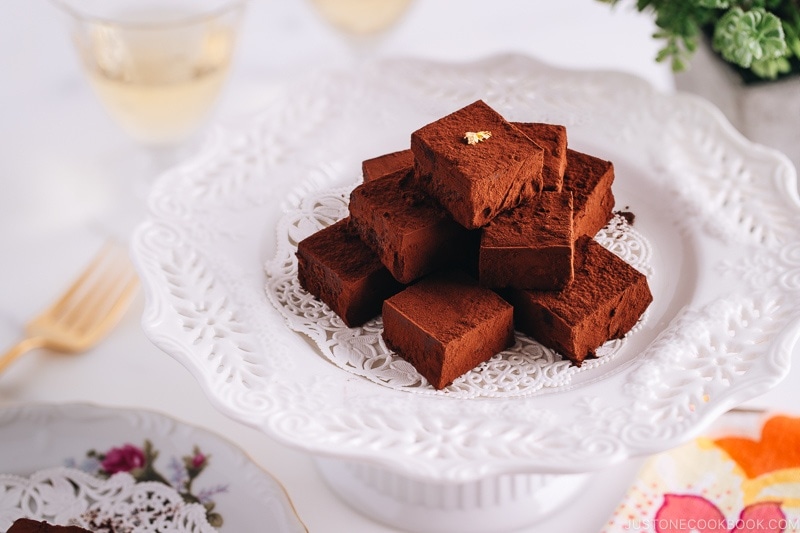
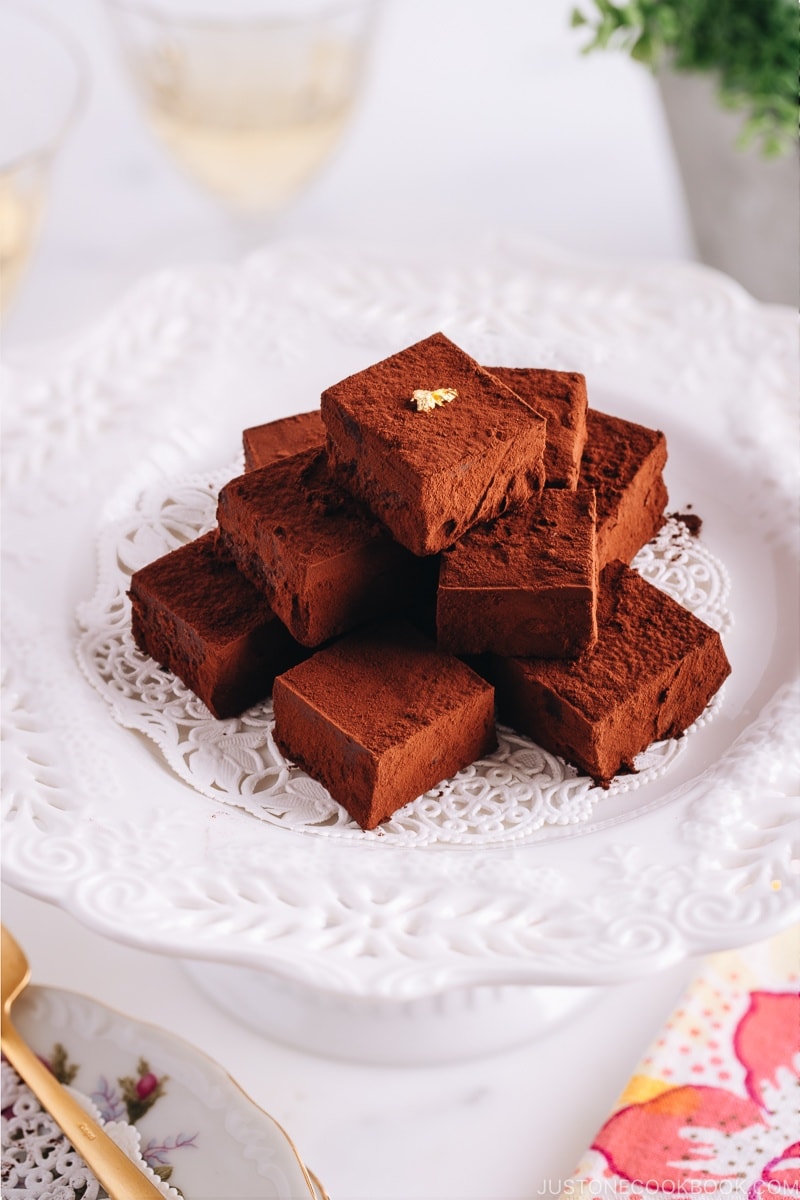
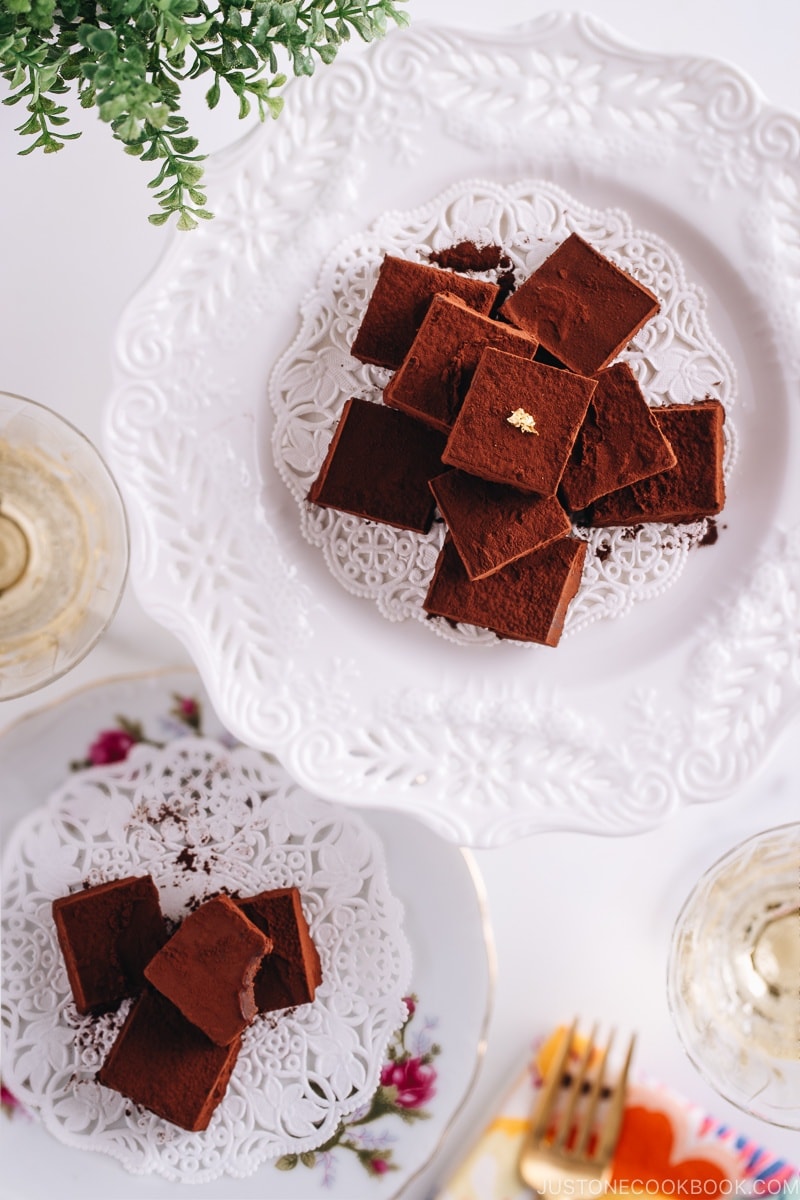
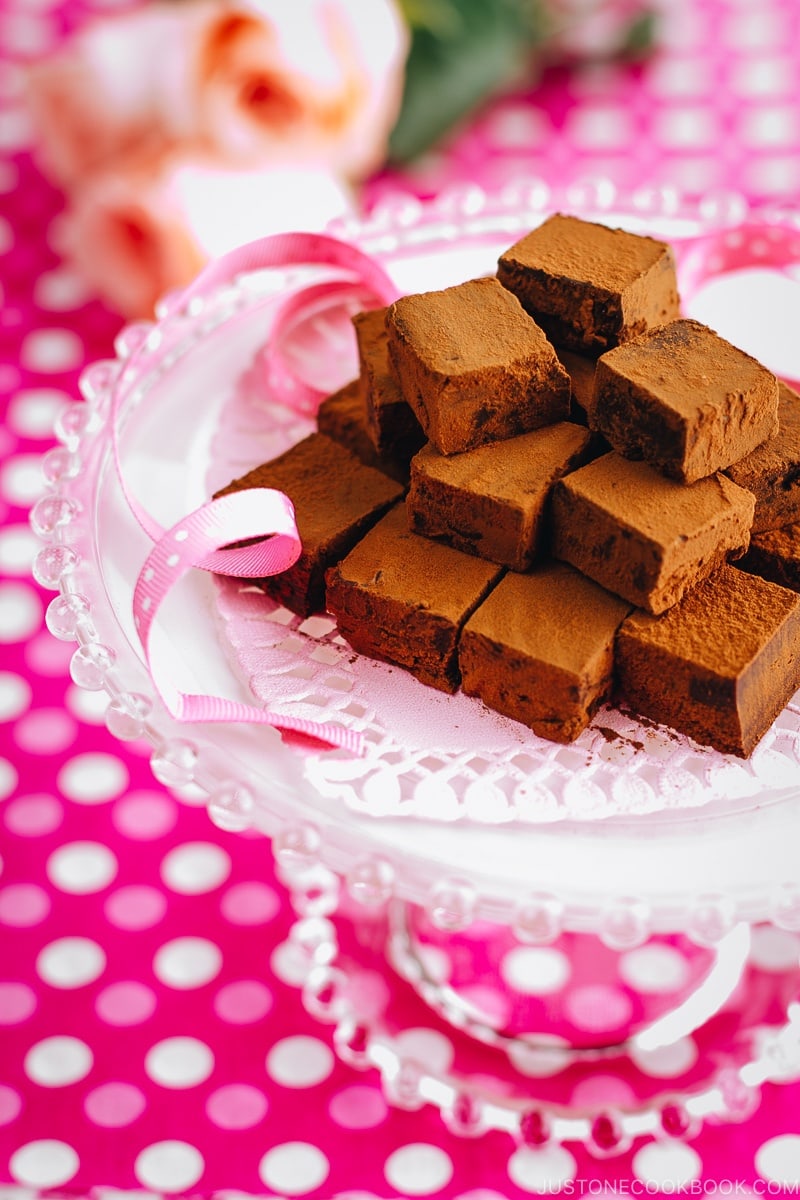
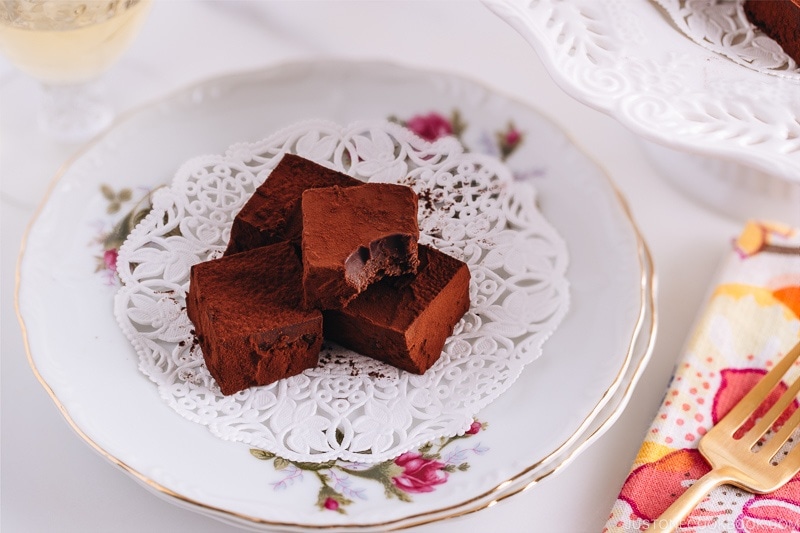
Rich, smooth, and decadent homemade Nama Chocolate! Made with quality dark chocolate and fresh cream, this ROYCE’s copycat chocolate is truly a special treat. It’s one of the most popular gifts from Japan, but you can easily make it at home.
If you are a frequent visitor to Japan, you probably have heard of or tasted this Japanese chocolate called Nama Chocolate (生チョコレート). You can’t really avoid it at the airport gift shops. They come in fancy packaging that makes them a popular gift item to bring home from Japan.
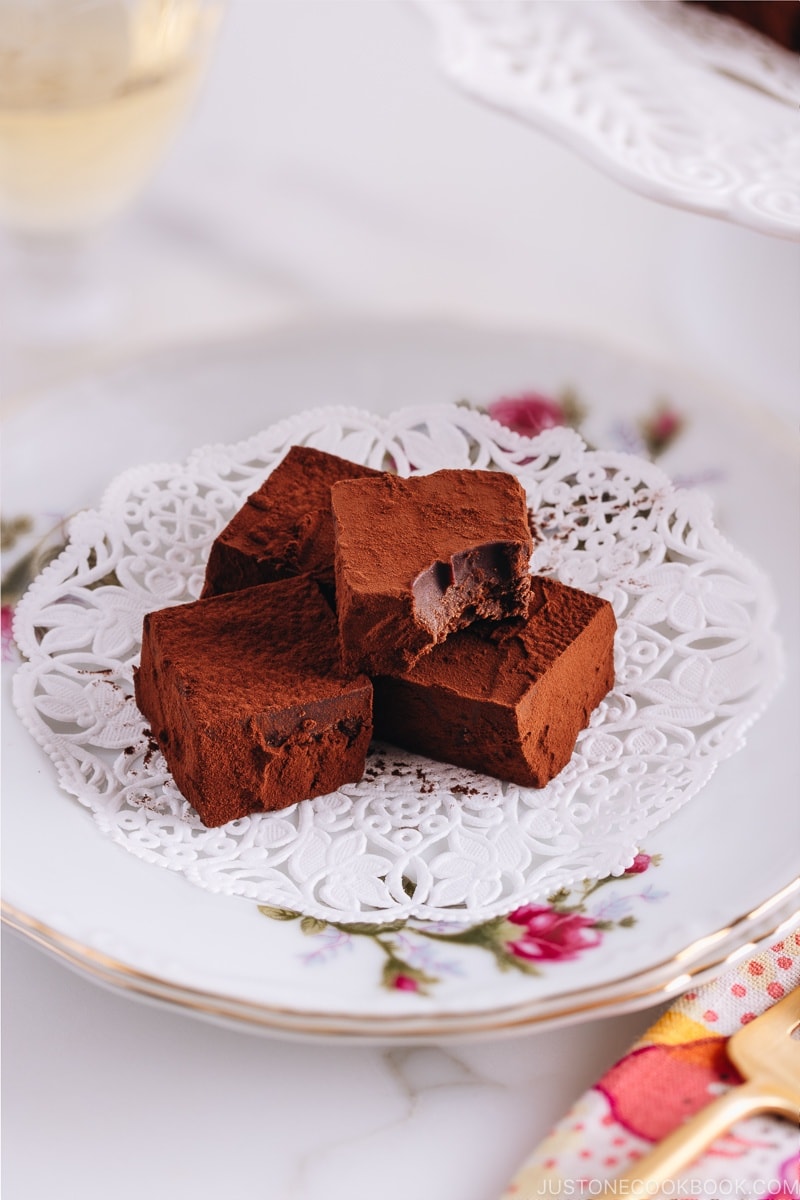
Nama Chocolate is rich, smooth, and moist, with a silky texture that literally melts in your mouth. Good news is you don’t have to fly to Japan to enjoy the luxurious sweet. With this recipe, you can make your chocolate dream comes true today!
Watch How to Make Nama Chocolate
Rich, smooth, and decadent homemade Nama Chocolate! Made with quality dark chocolate and fresh cream, this ROYCE’s copycat chocolate is truly a special treat. It’s one of the most popular gifts from Japan, but you can easily make it at home.
What is Nama Chocolate?
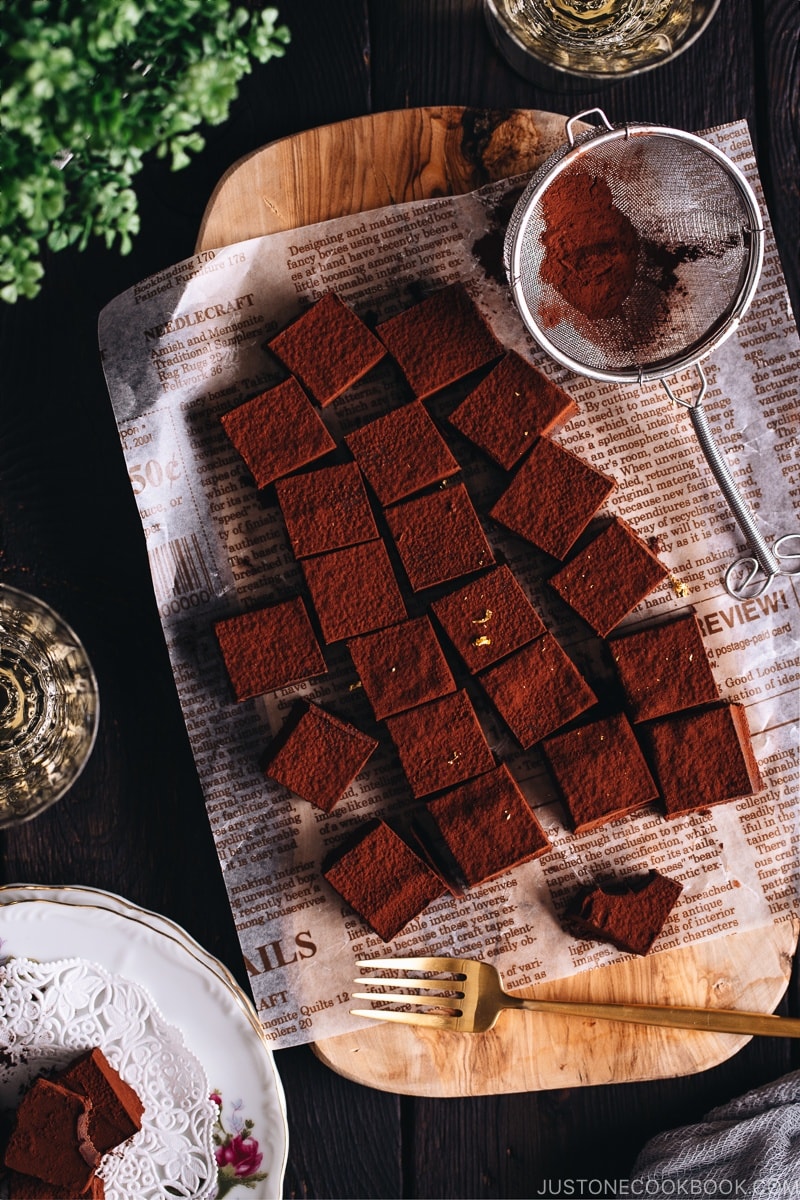
Nama Chocolate is a form of ganache, similar to the filling inside French truffles. It’s made of fresh cream and chocolate, cut into little cubes, and dusted with fine cocoa powder.
The chocolate can be called “Nama Chocolate” when it contains at least 40% chocolate and 10% cream by weight, and no more than 10% water.
Nama Chocolate is much easier to prepare than truffles because the chocolate is poured into a square pan, chilled until firm, then cut into mini squares. No messy hands since there’s no rolling required.
What Does Nama in “Nama Chocolate” Mean?
Nama (生, pronounce [na-ma]) means raw or fresh in Japanese. The name “Nama” Chocolate refers to the plentiful use of rich, fresh cream in the chocolate.
Because of the fresh cream, Nama Chocolate must be kept in the refrigerator at all times and it is best enjoyed fresh, within 4 days after being made. You can also keep in the freezer for up to a month.
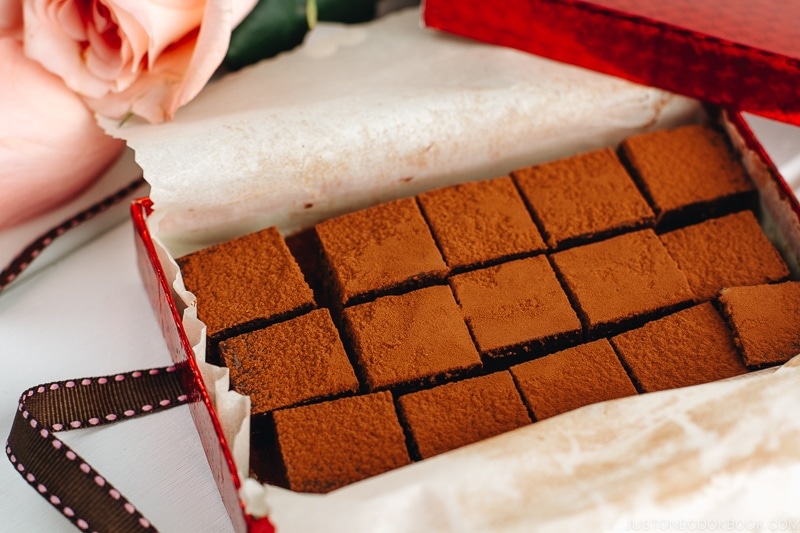
If you’re planning to give Nama Chocolate as a gift, make sure to let the gift receiver know to consume soon.
History of Nama Chocolate
In 1988, the owner and chef Masakazu Kobayashi at the sweet shop Sils Maria created a new type of chocolate, and he named this chocolate Nama Chocolate and Nama Choco (生チョコ) for short.
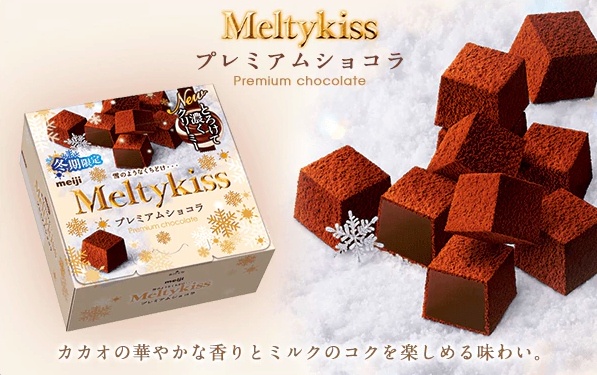
In 1993, Meiji, a snack company, released a chocolate product called Meltykiss (メルティーキッス) which was produced and supervised by chef Kobayashi. You can purchase a box of Meltykiss at Asian supermarkets, convenience stores and train kiosks in Japan. This chocolate is known for its limited time offering during the winter months as the chocolate melts quickly during the rest of seasons.
Since then, major confectionery manufacturers started to sell Nama Chocolate, and it became a huge trend all over the country.
In 1996, Hokkaido-based ROYCE’ (ロイズ) released ROYCE’ Nama Chocolate. Many of you probably spotted this chocolate at the airports or gift shops at sightseeing spots in Japan. Due to their popularity, this Nama Chocolate is known to visitors who have been to Japan.
Although “Nama Chocolate” was invented in Japan in the late ’80s, this specific type of chocolate called “Pave de Geneva” was born in Geneva, Switzerland in 1930’s. Pave de Geneva is made of chocolate and fresh cream, and cut into small cubes smeared with cocoa, just like Nama Chocolate.
I’m not sure whether the Japanese chef had traveled to Geneva and knew of Pave de Geneva, or he figured out the Nama Chocolate formula on his own. Regardless, this is not an original Japanese product as it existed in Switzerland.
If you’re a Genevan who tried both Pave de Geneva and Nama Chocolate, please share your thoughts in the comment below. Are they similar or exactly the same?
Tips for Making Nama Chocolate
1. Use Good Chocolate
High-quality chocolate is mandatory since that’s the most important ingredient for making delicious Nama Chocolate. Make sure the chocolate is made of 100% cocoa butter and does not include vegetable fat in the ingredient list.
2. Use Heavy Cream
American heavy cream or heavy whipping cream (they are the same thing) has 36%-38 fat content. The ratio of heavy (whipping) cream (gram/ml) and chocolate (gram) should be 1:2. For this recipe, please do not replace chocolate with white chocolate (which I used in Green Tea Chocolate).
3. Dry and Clean Utensils
Make sure the bowls and utensils you are using are perfectly dry. Even a small amount of water/steam can “seize” the chocolate melting process. It can happen all of the sudden from a smooth bowl of liquid chocolate to a lumpy, grainy mass of chocolate.
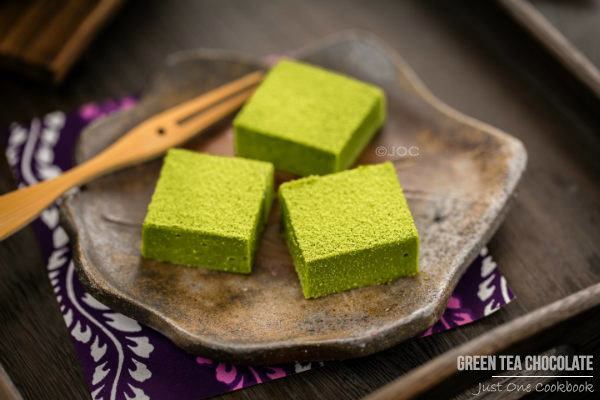
Here’s a Green Tea Matcha version!
These chocolate goodies are perfect for special occasions or as a hostess gift during the holiday season. I hope you enjoy making this Nama Chocolate recipe!
Sign up for the free Just One Cookbook newsletter delivered to your inbox! And stay in touch with me on Facebook, Pinterest, YouTube, and Instagram for all the latest updates.
Nama Chocolate

Rich, smooth, and decadent homemade Nama Chocolate! Made with chocolate and fresh cream, this ROYCE’s copycat chocolate is truly a special treat. It’s one of the most popular gifts from Japan, but you can easily make it at home.
- 400 g good quality dark chocolate (70% cacao) ((Semisweet for less bitter taste) (14 oz))
- 200 ml heavy (whipping) cream ((38% fat) (¾ cup + 1 Tbsp))
- 1 Tbsp liqueur of your choice ((optional; I use Brandy. Adjust the amount according to your liking.))
- Cocoa powder ((to coat the chocolate))
-
Gather all the ingredients.

-
With a sharp knife, chop the chocolate into smaller pieces so that they will melt faster and more evenly.

-
Line an 8″ x 8″ (20 x 20 cm baking dish with parchment paper. Choosing the right size tray is important for the height of chocolate (If you use a bigger tray, the chocolate will be flatter).

-
Add the heavy cream into a small saucepan and bring it to ALMOST boil over medium heat. Whisk to evenly distribute heat and keep an eye on the cream.

-
When you see small bubbles around the saucepan, remove from the heat.

-
Add the chocolate into the heavy cream and stir to combine with a silicone spatula.

-
Mix the chocolate and cream and make sure there is no lump. The chocolate should be completely smooth.

-
If you like, add liqueur of your choice.

-
Pour the mixture into the prepared baking dish and smooth the surface with the silicone spatula.

-
Tap the baking dish onto the counter a few times (to make sure the chocolate is evenly distributed). Refrigerate until firm, about 4-5 hours.

After Chilling 4-5 Hours…
-
Remove the chocolate from the baking dish.

-
Cut the excess chocolate around the edges to have nice sharp corners.

-
Warm up the sharp knife with a hot towel, and cut the chocolate into 1” strips. Make sure to clean/warm the knife before each cut to achieve a nice sharp cut.

-
Depending on your baking dish, the 4 sides of the chocolate may not look good (mine has curved edges and corners). If that’s the case, save these chocolate pieces for yourself to enjoy.

-
Then cut the strips into cubes. Remember to clean/warm up the knife before each cut.

-
Sprinkle the cocoa powder on the top. Optionally, if you prefer all sides to have cocoa powder, you can dip in cocoa powder to coat all sides.

To Serve
-
Serve Nama Chocolate on a plate, or put it in a box as a gift. If the chocolate just came out of the refrigerator, I recommend waiting for 5-10 minutes before serving so it’s soft enough to melt in the mouth instead of chilled and hard chocolate.

To Store
-
Keep in the airtight container and store in the refrigerator for up to 4 days. Or you can freeze the chocolate for up to a month.
IMPORTANT: PLEASE READ BEFORE MAKING!
Make sure the bowls and utensils you are using are perfectly dry. Even a small amount of water/steam can “seize” the chocolate melting process.
The ratio of heavy whipping cream (ml) and chocolate (gram) should be 1:2. Please do not replace chocolate with white chocolate for this recipe. The ratio is not the same.
TROUBLESHOOTING:
The two most common problems of working with chocolate are separating and seizing.
1) Separation (oil came out of the chocolate) happens when you get the chocolate too hot. Dark chocolate should never be heated above 120 degrees F (Milk chocolate and white chocolate should never be heated above 110 degrees F). When chocolate gets too hot, the cocoa butter separates from the solids, and there is no way to salvage it (although you can bake with it and it tastes fine). The best way to prevent separation is to use gentle heat (simmer on lowest heat) and stir frequently. Since we’re not using a double boiler in this recipe, make sure you do not bring the heavy whipping cream to a full boil. Remove from heat as soon as you saw bubbles around the edges of the saucepan.
2) Seizing happens when moisture is introduced to melted chocolate (even a tiny amount of liquid or steam). It happens all the sudden from a smooth bowl of liquid chocolate to a lumpy, grainy mass of chocolate.
To learn more details and how to fix the overheated or seized chocolate, please read HERE.
Recipe by Namiko Chen of Just One Cookbook. All images and content on this site are copyright protected. Please do not use my images without my permission. If you’d like to share this recipe on your site, please re-write the recipe in your own words and link to this post as the original source. Thank you.
Editor’s Note: The post was originally published on February 6, 2012. The content has been updated.