Wednesday 9 January 2019

Coconut Lentil Curry with Greens

A Couple Cooks
Coconut Lentil Curry with Greens

This coconut lentil curry has it all: it’s a fast and easy dinner idea that’s healthy and full of flavor. Perfect for weeknights!

Alex and I have been working on our repertoire of fast and easy dinner ideas for years. It’s a constant challenge, trying to figure out those standbys that are quick, healthy, and delicious at the same time! This coconut lentil curry comes from an idea I had one night trying to determine what to do with some kale from the garden. I ad-libbed with some lentils and a can of coconut milk we had on-hand, threw in some curry paste, and voila! It turned out so tasty that we decided to share it here. Keep reading for this coconut lentil curry recipe.

How to make coconut lentil curry

This coconut lentil curry is a quick way to get to something on the table that tastes like it’s been cooking all evening! This is not an authentic Indian or Thai curry, just a coconut lentil curry inspired dish that’s a fast dinner idea. It has a fairly short ingredient list, so it’s feasible to make on a weeknight. The base of the curry is simple: just lentils, coconut milk, Thai curry paste, and tomato paste. It’s also a great way to eat your dark leafy greens! You can throw in handfuls of any of your favorite greens. The easiest is throwing in handfuls of baby spinach that’s prewashed and boxed: or you can also add chopped kale or Swiss chard. When we talk to people about delicious ways to eat leafy greens, a curry is one of our top recs because the greens pick up all flavor of the lentil curry!

Related: 10 Delicious Ways to Eat Leafy Greens

A secret ingredient: Thai curry paste

The secret to this coconut lentil curry is using Thai red curry paste. Thai curry paste has beautifully fresh flavors: garlic, lemongrass, and ginger. Grab a jar from the store in the international aisle, and it keeps for months in the refrigerator. Some Thai curry pastes are spicy and some don’t have too much heat. Our favorite brand of Thai curry paste is Thai Kitchen, and it doesn’t add much heat to the overall dish. If you can’t find it at your local grocery, here’s a link to Thai Kitchen red curry paste on Amazon.

Have you tried our coconut lentil curry? What are your favorite weeknight dinner recipes? Let us know in the comments below.

Looking for more plant based dinner ideas?

Outside of this coconut lentil curry recipe, here are some other favorite healthy dinner ideas (all vegan / plant based recipes!):

Cauliflower and Tomato Coconut Curry Instant Pot Thai Sweet Potatoes with Peanut Drizzle “Can’t Believe It’s Vegan” Spaghetti & Meatballs Thai Salad with Peanut Sauce Stress Reducing Avocado and Quinoa Bowl Moroccan Cauliflower Soup Broccoli and Turmeric Yellow Rice Bowls Our Best Vegan Pizza Looking for more fast and easy dinner recipes?

And, here a few more of our favorite fast and easy dinner recipes:

5 Minute Romesco Gnocchi Sauce Vegan Italian Pasta Salad Penne with Pumpkin Pasta Sauce Chickpea Couscous Bowls with Tahini Sauce Tropical Mango Bowls with Citrus Drizzle Vegan Banh Mi Sandwich Tex Mex Migas Recipe Avocado Black Bean Vegetarian Quesadilla Thai Curry Pizza with Naan Bread All Easy Dinner Ideas! This recipe is…

This coconut lentil curry recipe is vegetarian, gluten-free, vegan, plant-based, and dairy-free.

Print
.tasty-recipes-image { float: right; } .tasty-recipes-print-button { background-color: #666677; display: inline-block; padding-left: 1em; padding-right: 1em; padding-top: 0.5em; padding-bottom: 0.5em; text-decoration: none; } a.tasty-recipes-print-button { color: #fff; } a.tasty-recipes-print-button:hover { color: #fff; } .tasty-recipes-rating.tasty-recipes-clip-10 { -webkit-clip-path: polygon(0 0, 10% 0%, 10% 100%, 0% 100%); clip-path: polygon(0 0, 10% 0%, 10% 100%, 0% 100%); } .tasty-recipes-rating.tasty-recipes-clip-20 { -webkit-clip-path: polygon(0 0, 20% 0%, 20% 100%, 0% 100%); clip-path: polygon(0 0, 20% 0%, 20% 100%, 0% 100%); } .tasty-recipes-rating.tasty-recipes-clip-30 { -webkit-clip-path: polygon(0 0, 30% 0%, 30% 100%, 0% 100%); clip-path: polygon(0 0, 30% 0%, 30% 100%, 0% 100%); } .tasty-recipes-rating.tasty-recipes-clip-40 { -webkit-clip-path: polygon(0 0, 40% 0%, 40% 100%, 0% 100%); clip-path: polygon(0 0, 40% 0%, 40% 100%, 0% 100%); } .tasty-recipes-rating.tasty-recipes-clip-50 { -webkit-clip-path: polygon(0 0, 50% 0%, 50% 100%, 0% 100%); clip-path: polygon(0 0, 50% 0%, 50% 100%, 0% 100%); } .tasty-recipes-rating.tasty-recipes-clip-60 { -webkit-clip-path: polygon(0 0, 60% 0%, 60% 100%, 0% 100%); clip-path: polygon(0 0, 60% 0%, 60% 100%, 0% 100%); } .tasty-recipes-rating.tasty-recipes-clip-70 { -webkit-clip-path: polygon(0 0, 70% 0%, 70% 100%, 0% 100%); clip-path: polygon(0 0, 70% 0%, 70% 100%, 0% 100%); } .tasty-recipes-rating.tasty-recipes-clip-80 { -webkit-clip-path: polygon(0 0, 80% 0%, 80% 100%, 0% 100%); clip-path: polygon(0 0, 80% 0%, 80% 100%, 0% 100%); } .tasty-recipes-rating.tasty-recipes-clip-90 { -webkit-clip-path: polygon(0 0, 90% 0%, 90% 100%, 0% 100%); clip-path: polygon(0 0, 90% 0%, 90% 100%, 0% 100%); } .tasty-recipes-nutrition ul { list-style-type: none; margin: 0; padding: 0; } .tasty-recipes-nutrition ul:after { display: block; content: ' '; clear: both; } .tasty-recipes-nutrition li { float: left; margin-right: 1em; } .tasty-recipes-plug { text-align: center; margin-bottom: 1em; display: -ms-flexbox; display: flex; -ms-flex-align: center; align-items: center; -ms-flex-pack: center; justify-content: center; } .tasty-recipes-plug a { text-decoration: none; box-shadow: none; } .tasty-recipes-plug a img { width: 150px; height: auto; margin: 5px 0 0 8px; display: inline-block; } @media print { .tasty-recipes-no-print, .tasty-recipes-no-print * { display: none !important; } } .tasty-recipes { border: 5px solid #666677; margin-top: 6em; margin-bottom: 4em; } .tasty-recipes.tasty-recipes-has-plug { margin-bottom: 1em; } .tasty-recipes-plug { margin-bottom: 4em; } .tasty-recipes-print-button { display: none; } .tasty-recipes-image-shim { height: 69.5px; clear: both; } .tasty-recipes-entry-header { background-color: #666677; color: #FFF; text-align: center; padding-top: 35px; padding-bottom: 1.5em; padding-left: 2.5em; padding-right: 2.5em; } .tasty-recipes-entry-header.tasty-recipes-has-image { padding-top: 0px; } .tasty-recipes-entry-header .tasty-recipes-image { float: none; text-align: center; transform: translateY(-115px); margin-bottom: 1em; /* Decide if we need this */ } .tasty-recipes-entry-header .tasty-recipes-image img { -webkit-border-radius: 50%; -moz-border-radius: 50%; border-radius: 50%; border: 5px solid #666677; height: 150px; width: 150px; display: inline-block; } .tasty-recipes-entry-header h2 { font-size: 2em; font-weight: 400; text-transform: lowercase; margin-bottom: 0; text-align: center; color: #FFF; margin-top: 0; padding-top: 0; padding-bottom: 0; } .tasty-recipes-has-image .tasty-recipes-entry-header h2 { margin-top: -115px; } .tasty-recipes-entry-header hr { border: 1px solid #B7BBC6; background-color: #B7BBC6; margin-bottom: 1em; margin-top: 1em; } .tasty-recipes-entry-header div.tasty-recipes-rating { text-decoration: none; border: none; } .tasty-recipes-entry-header .tasty-recipes-rating:hover { text-decoration: none; } .tasty-recipes-entry-header div.tasty-recipes-rating { font-size: 1.375em; display: block; } .tasty-recipes-entry-header .tasty-recipes-rating p { margin-bottom: 0; } .tasty-recipes-entry-header span.tasty-recipes-rating { margin-left: .25em; margin-right: .25em; color: #FFF; } .tasty-recipes-entry-header .rating-label { font-style: italic; color: #B7BBC6; font-size: .6875em; display: block; } .tasty-recipes-entry-header .tasty-recipes-details { margin-top: 1em; } .tasty-recipes-entry-header .tasty-recipes-details ul { list-style-type: none; margin: 0; } .tasty-recipes-entry-header .tasty-recipes-details ul li { display: inline-block; margin-left: .5em; margin-right: .5em; font-size: 1em; line-height: 2.5em; color: #fff; } @media only screen and (max-width: 520px) { .tasty-recipes-entry-header .tasty-recipes-details .detail-icon { height: .8em; margin-top: .4em; } .tasty-recipes-entry-header .tasty-recipes-details ul li { font-size: .875em; line-height: 1.75em; } } @media only screen and (min-width: 520px) { .tasty-recipes-entry-header .tasty-recipes-details .detail-icon { height: 1em; margin-top: .6em; } .tasty-recipes-entry-header .tasty-recipes-details ul li { font-size: 1em; line-height: 2.5em; } } .tasty-recipes-entry-header .tasty-recipes-details .tasty-recipes-label { font-style: italic; color: #B7BBC6; margin-right: .125em; } .tasty-recipes-entry-header .tasty-recipes-details .detail-icon { vertical-align: top; margin-right: .2em; display: inline-block; } .tasty-recipes-entry-content { padding-top: 1.25em; } .tasty-recipes-entry-content .tasty-recipes-buttons { margin-bottom: 1.25em; margin-left: 1.25em; margin-right: 1.25em; } .tasty-recipes-entry-content .tasty-recipes-buttons:after { content: " "; display: block; clear: both; } .tasty-recipes-entry-content .tasty-recipes-button-wrap { width: 50%; display: inline-block; float: left; box-sizing: border-box; } .tasty-recipes-entry-content .tasty-recipes-buttons a { text-transform: uppercase; text-align: center; display: block; color: #FFF; background-color: #666677; font-size: 1em; line-height: 1.375em; padding-top: 1em; padding-bottom: 1em; font-weight: bold; margin-top: 0; border: none; border-radius: 0; text-decoration: none; } .tasty-recipes-entry-content a img { box-shadow: none; -webkit-box-shadow: none; } .tasty-recipes-entry-content .tasty-recipes-buttons a:hover { background-color: #979599; text-decoration: none; } .tasty-recipes-entry-content .tasty-recipes-buttons img { vertical-align: top; } .tasty-recipes-entry-content .tasty-recipes-buttons img.svg-print, .tasty-recipes-entry-content .tasty-recipes-buttons img.svg-pinterest { height: 1.25em; margin-right: .375em; margin-bottom: 0; background: none; display: inline-block; } @media only screen and (min-width: 520px) { .tasty-recipes-entry-content .tasty-recipes-button-wrap:first-child { padding-right: .625em; } .tasty-recipes-entry-content .tasty-recipes-button-wrap:last-child { padding-left: .625em; } } @media only screen and (max-width: 520px) { .tasty-recipes-entry-content .tasty-recipes-button-wrap { width: 100%; } .tasty-recipes-entry-content .tasty-recipes-button-wrap:nth-child(2) { padding-top: 1em; } } .tasty-recipes-entry-content h3 { text-transform: uppercase; font-size: .75em; color: #979599; margin-bottom: 1.5em; } .tasty-recipes-entry-content h4 { font-size: 1em; padding-top: 0; margin-bottom: 1.5em; margin-top: 1.5em; } .tasty-recipes-entry-content hr { background-color: #EAE9EB; border: 1px solid #EAE9EB; margin-top: 1em; margin-bottom: 1em; } .tasty-recipes-entry-content .tasty-recipes-description, .tasty-recipes-entry-content .tasty-recipes-ingredients, .tasty-recipes-entry-content .tasty-recipes-instructions, .tasty-recipes-entry-content .tasty-recipes-keywords { padding-left: 1.25em; padding-right: 1.25em; } .tasty-recipes-entry-content .tasty-recipes-description p { margin-bottom: 1em; } .tasty-recipes-entry-content .tasty-recipes-ingredients ul, .tasty-recipes-entry-content .tasty-recipes-instructions ul { list-style-type: none; margin-left: 0; margin-bottom: 1.5em; padding: 0; } .tasty-recipes-entry-content .tasty-recipes-ingredients ul li, .tasty-recipes-entry-content .tasty-recipes-instructions ul li { margin-bottom: .625em; list-style-type: none; position: relative; margin-left: 2.5em; line-height: 1.46; } .tasty-recipes-entry-content .tasty-recipes-ingredients ul li:before, .tasty-recipes-entry-content .tasty-recipes-instructions ul li:before { background-color: #666677; -webkit-border-radius: 50%; -moz-border-radius: 50%; border-radius: 50%; height: .5em; width: .5em; display: block; content: " "; left: -1.25em; top: .375em; position: absolute; } .tasty-recipes-entry-content .tasty-recipes-ingredients ol, .tasty-recipes-entry-content .tasty-recipes-instructions ol { counter-reset:li; margin-left: 0; padding: 0; } .tasty-recipes-entry-content .tasty-recipes-ingredients ol li, .tasty-recipes-entry-content .tasty-recipes-instructions ol li { list-style-type: none; position: relative; margin-bottom: 1em; margin-left: 2.5em; line-height: 1.46; } .tasty-recipes-entry-content .tasty-recipes-ingredients ol li:before, .tasty-recipes-entry-content .tasty-recipes-instructions ol li:before { content:counter(li); counter-increment: li; position: absolute; background-color: #666677; -webkit-border-radius: 50%; -moz-border-radius: 50%; border-radius: 50%; height: 1.45em; width: 1.45em; color: #FFF; left: -1.25em; transform: translateX(-50%); line-height: 1.5em; font-size: .6875em; text-align: center; top: .1875em; } @media only screen and (max-width: 520px) { .tasty-recipes-entry-content .tasty-recipes-ingredients ol, .tasty-recipes-entry-content .tasty-recipes-instructions ol { margin-left: 0; } } .tasty-recipes-entry-content .tasty-recipes-notes { padding: 1.25em; background-color: #EDF0F2; } .tasty-recipes-entry-content .tasty-recipes-notes ol { counter-reset:li; margin-left: 0; padding: 0; } .tasty-recipes-entry-content .tasty-recipes-notes ul { margin-left: 0; padding: 0; } .tasty-recipes-entry-content .tasty-recipes-notes p, .tasty-recipes-entry-content .tasty-recipes-notes ul li, .tasty-recipes-entry-content .tasty-recipes-notes ol li { background-color: #FFF; padding-left: 1.5625em; padding-right: 1.5625em; padding-top: 1.25em; padding-bottom: 1.25em; position: relative; -webkit-clip-path: polygon(20px 0, 100% 0, 100% 100%, 0 100%, 0 20px); clip-path: polygon(20px 0, 100% 0, 100% 100%, 0 100%, 0 20px); margin-bottom: 1.5em; } @media only screen and (min-width: 520px) { .tasty-recipes-entry-content .tasty-recipes-notes p, .tasty-recipes-entry-content .tasty-recipes-notes ul li, .tasty-recipes-entry-content .tasty-recipes-notes ol li { padding-left: 2.5em; } .tasty-recipes-entry-content .tasty-recipes-notes p:before, .tasty-recipes-entry-content .tasty-recipes-notes ul li:before { content: "i"; display: block; background-color: #666677; -webkit-border-radius: 50%; -moz-border-radius: 50%; border-radius: 50%; height: 1.3em; width: 1.3em; font-size: .75em; line-height: 1.3em; text-align: center; color: #FFF; position: absolute; left: 1.167em; top: 1.9em; } .tasty-recipes-entry-content .tasty-recipes-notes ol li:before { content:counter(li); counter-increment: li; position: absolute; background-color: #666677; -webkit-border-radius: 50%; -moz-border-radius: 50%; border-radius: 50%; height: 1.45em; width: 1.45em; color: #FFF; left: 2em; transform: translateX(-50%); line-height: 1.5em; font-size: .6875em; text-align: center; top: 2em; } } .tasty-recipes-entry-content .tasty-recipes-notes p:last-child { margin-bottom: 0; } .tasty-recipes-entry-content .tasty-recipes-keywords { background-color: #EDF0F2; padding-bottom: 1em; padding-top: 1em; } .tasty-recipes-entry-content .tasty-recipes-keywords p { font-size: 0.7em; font-style: italic; color: #979599; margin-bottom: 0; } .tasty-recipes-entry-content .tasty-recipes-keywords p span { font-weight: bold; } .tasty-recipes-nutrifox { text-align: center; margin: 0; } .nutrifox-label { background-color: #EDF0F2; } .tasty-recipes-nutrifox iframe { width: 100%; display: block; margin: 0; } .tasty-recipes-entry-content .tasty-recipes-nutrition { padding: 1.25em; color: #666677; } .tasty-recipes-nutrition .tasty-recipes-label { font-style: italic; color: #B7BBC6; margin-right: .125em; font-weight: 400; } .tasty-recipes-nutrition ul { text-align: center; } .tasty-recipes-nutrition li { float: none; display: inline-block; line-height: 2em; } .tasty-recipes-entry-footer { background-color: #666677; padding-top: 1.5625em; padding-bottom: 1.25em; padding-left: 2.5em; padding-right: 2.5em; text-align: center; } .tasty-recipes-entry-footer .tasty-recipes-footer-content { display: inline-block; } .tasty-recipes-entry-footer img { width: 65px; } .tasty-recipes-entry-footer h3 { color: #B7BBC6; font-size: 1.25em; line-height: 2.25em; margin-top: .5em; margin-bottom: .125em; padding: 0; line-height: 1em; } .tasty-recipes-entry-footer p { margin-bottom: 0; color: #FFF; font-size: .75em; } .tasty-recipes-entry-footer p a { color: #FFF; text-decoration: underline; box-shadow: none; border-bottom: none; } .tasty-recipes-entry-footer:after { content: " "; display: block; clear:both; } @media only screen and (max-width: 520px) { .tasty-recipes-entry-footer h3 { margin-top: .5em; margin-bottom: .5em; } .tasty-recipes-entry-footer { text-align: center; } } @media only screen and (min-width: 520px) { .tasty-recipes-entry-footer img { float: left; } .tasty-recipes-entry-footer h3, .tasty-recipes-entry-footer p { margin-left: 90px; clear: none; text-align: left; } } /* Print view styles */ .tasty-recipes-print-view { font-size: 11px; background-color: #fff; } .tasty-recipes-print-view .tasty-recipes-print-button { display: inline-block; } .tasty-recipes-print { padding:0; font-size: 11px; } .tasty-recipes-print-view .tasty-recipes { margin-top: 1em; } .tasty-recipes-print .tasty-recipes-entry-header { background-color: inherit; color: inherit; padding-bottom: 0; padding-left: 1em; padding-right: 1em; padding-top: 1em; } .tasty-recipes-print .tasty-recipes-entry-header .tasty-recipes-image { float: right; transform: none; } .tasty-recipes-print.tasty-recipes-has-image .tasty-recipes-entry-header h2 { margin-top: 0; } .tasty-recipes-print .tasty-recipes-entry-header h2 { color: inherit; margin-bottom: .5em; } .tasty-recipes-print .tasty-recipes-entry-header hr { display: none; } .tasty-recipes-print .tasty-recipes-entry-header span.tasty-recipes-rating { color: #000; } .tasty-recipes-print .tasty-recipes-entry-header .tasty-recipes-details ul { padding: 0; clear: none; } .tasty-recipes-print .tasty-recipes-entry-header .tasty-recipes-details ul li { line-height: 1.5em; color: #000; } .tasty-recipes-print .tasty-recipes-entry-header .tasty-recipes-details .detail-icon { display: none; } .tasty-recipes-print .tasty-recipes-entry-content img { max-width: 50%; height: auto; } .tasty-recipes-print .tasty-recipes-entry-content .tasty-recipes-ingredients ul li, .tasty-recipes-print .tasty-recipes-entry-content .tasty-recipes-ingredients ol li { margin-bottom: 0.25em; line-height: 1.1; } .tasty-recipes-print .tasty-recipes-entry-content .tasty-recipes-instructions ul li, .tasty-recipes-print .tasty-recipes-entry-content .tasty-recipes-instructions ol li { margin-bottom: 0.5em; line-height: 1.1; } .tasty-recipes-print .tasty-recipes-entry-content .tasty-recipes-ingredients ul li:before, .tasty-recipes-print .tasty-recipes-entry-content .tasty-recipes-instructions ul li:before { top: 0.3em; } .tasty-recipes-print .tasty-recipes-entry-content .tasty-recipes-ingredients ol li:before, .tasty-recipes-print .tasty-recipes-entry-content .tasty-recipes-instructions ol li:before { top: 0; } .tasty-recipes-print .tasty-recipes-entry-content .tasty-recipes-notes p, .tasty-recipes-print .tasty-recipes-entry-content .tasty-recipes-notes ul li, .tasty-recipes-print .tasty-recipes-entry-content .tasty-recipes-notes ol li { padding-top: 0; padding-bottom: 0; background-color: #EDF0F2; clip-path: none; } .tasty-recipes-print .tasty-recipes-entry-content .tasty-recipes-notes p:before, .tasty-recipes-print .tasty-recipes-entry-content .tasty-recipes-notes ul li:before { top: 0; clip-path: none; margin-bottom: 0.5em; } @media print { .tasty-recipes-print .tasty-recipes-entry-footer img { display: none; } } .tasty-recipes-print .tasty-recipes-source-link { text-align: center; } .tasty-recipes { border: 5px solid #4d4d4e; margin-top: 6em; margin-bottom: 4em; } .tasty-recipes-print-button { display: none; } .tasty-recipes-image-shim { height: 69.5px; clear: both; } .tasty-recipes-entry-header { background-color: #4d4d4e; color: #FFF; text-align: center; padding-top: 35px; padding-bottom: 1.5em; padding-left: 2.5em; padding-right: 2.5em; } .tasty-recipes-entry-header.tasty-recipes-has-image { padding-top: 0px; } .tasty-recipes-entry-header .tasty-recipes-image { float: none; text-align: center; transform: translateY(-115px); margin-bottom: 1em; /* Decide if we need this */ } .tasty-recipes-entry-header .tasty-recipes-image img { -webkit-border-radius: 50%; -moz-border-radius: 50%; border-radius: 50%; border: 5px solid #4d4d4e; height: 150px; width: 150px; } .tasty-recipes-entry-header h2 { font-size: 2em; letter-spacing: 1px; margin-bottom: 0; text-align: center; color: #FFF; margin-top: 0; padding-top: 0; padding-bottom: 0; } .tasty-recipes-has-image .tasty-recipes-entry-header h2 { margin-top: -115px; } .tasty-recipes-entry-header hr { border: 1px solid #cacaca; background-color: #cacaca; margin-bottom: 1em; margin-top: 1em; } .tasty-recipes-rating { text-align: center; margin-top: 19px; font-size: 12px; color: #6b6e77; } .tasty-recipes-entry-header .tasty-recipes-rating a { text-decoration: none; text-decoration: none; border: none; } .tasty-recipes-entry-header .tasty-recipes-rating a:hover { text-decoration: none; } .tasty-recipes-entry-header .tasty-recipes-rating-stars { font-size: 1.375em; display: block; } .tasty-recipes-entry-header .tasty-recipes-rating-stars span { margin-left: .25em; margin-right: .25em; color: #FFF; } .tasty-recipes-entry-header .tasty-recipes-rating-label { font-style: italic; color: #cacaca; font-size: .6875em; display: block; } .tasty-recipes-entry-header .tasty-recipes-details { margin-top: 1em; } .tasty-recipes-entry-header .tasty-recipes-details ul { list-style-type: none; margin: 0; } .tasty-recipes-entry-header .tasty-recipes-details ul li { display: inline-block; margin-left: .5em; margin-right: .5em; font-size: 1em; line-height: 2.5em; } .tasty-recipes-entry-header .tasty-recipes-details ul li.author, .tasty-recipes-entry-header .tasty-recipes-details ul li.total-time { display: none; } @media only screen and (max-width: 520px) { .tasty-recipes-entry-header .tasty-recipes-details .detail-icon { height: .8em; margin-top: .4em; } .tasty-recipes-entry-header .tasty-recipes-details ul li { font-size: .875em; line-height: 1.75em; } } @media only screen and (min-width: 520px) { .tasty-recipes-entry-header .tasty-recipes-details .detail-icon { height: 1em; margin-top: .6em; } .tasty-recipes-entry-header .tasty-recipes-details ul li { font-size: 1em; line-height: 2.5em; } } .tasty-recipes-entry-header .tasty-recipes-details .tasty-recipes-label { font-style: italic; color: #cacaca; margin-right: .125em; } .tasty-recipes-entry-header .tasty-recipes-details .detail-icon { vertical-align: top; margin-right: .2em; } .tasty-recipes-entry-content { padding-top: 1.25em; } .tasty-recipes-entry-content .tasty-recipes-buttons { margin-bottom: 1.25em; margin-left: 1.25em; margin-right: 1.25em; } .tasty-recipes-entry-content .tasty-recipes-buttons:after { content: " "; display: block; clear: both; } .tasty-recipes-entry-content .tasty-recipes-button-wrap { width: 50%; display: inline-block; float: left; box-sizing: border-box; } .tasty-recipes-entry-content .tasty-recipes-buttons a { text-transform: uppercase; text-align: center; display: block; color: #FFF; background-color: #4d4d4e; font-size: 1em; line-height: 1.375em; padding-top: 1em; padding-bottom: 1em; font-weight: bold; margin-top: 0; border: none; border-radius: 0; text-decoration: none; } .tasty-recipes-entry-content a img { box-shadow: none; -webkit-box-shadow: none; } .tasty-recipes-entry-content .tasty-recipes-buttons a:hover { background-color: #979599; text-decoration: none; } .tasty-recipes-entry-content .tasty-recipes-buttons img { vertical-align: top; } .tasty-recipes-entry-content .tasty-recipes-buttons img.svg-print, .tasty-recipes-entry-content .tasty-recipes-buttons img.svg-pinterest { height: 1.25em; margin-right: .375em; margin-bottom: 0; background: none; display: inline-block; } @media only screen and (min-width: 520px) { .tasty-recipes-entry-content .tasty-recipes-button-wrap:first-child { padding-right: .625em; } .tasty-recipes-entry-content .tasty-recipes-button-wrap:last-child { padding-left: .625em; } } @media only screen and (max-width: 520px) { .tasty-recipes-entry-content .tasty-recipes-button-wrap { width: 100%; } .tasty-recipes-entry-content .tasty-recipes-button-wrap:nth-child(2) { padding-top: 1em; } } .tasty-recipes-entry-content h3 { text-transform: uppercase; font-size: .75em; color: #979599; margin-bottom: 1.5em; } .tasty-recipes-entry-content h4 { font-size: 1em; padding-top: 0; margin-bottom: 1.5em; margin-top: 1.5em; } .tasty-recipes-entry-content hr { background-color: #EAE9EB; border: 1px solid #EAE9EB; margin-top: 1em; margin-bottom: 1em; } .tasty-recipes-entry-content .tasty-recipes-description, .tasty-recipes-entry-content .tasty-recipes-ingredients, .tasty-recipes-entry-content .tasty-recipes-instructions { padding-left: 1.25em; padding-right: 1.25em; } .tasty-recipes-entry-content .tasty-recipes-description p { margin-bottom: 1em; } .tasty-recipes-entry-content .tasty-recipes-ingredients ul, .tasty-recipes-entry-content .tasty-recipes-instructions ul { list-style-type: none; margin-left: 0; margin-bottom: 1.5em; padding: 0; } .tasty-recipes-entry-content .tasty-recipes-ingredients ul li, .tasty-recipes-entry-content .tasty-recipes-instructions ul li { margin-bottom: .625em; list-style-type: none; position: relative; margin-left: 2.5em; line-height: 1.46; } .tasty-recipes-entry-content .tasty-recipes-ingredients ul li:before, .tasty-recipes-entry-content .tasty-recipes-instructions ul li:before { background-color: #4d4d4e; -webkit-border-radius: 50%; -moz-border-radius: 50%; border-radius: 50%; height: .5em; width: .5em; display: block; content: " "; left: -1.25em; top: .375em; position: absolute; } .tasty-recipes-entry-content .tasty-recipes-ingredients ol, .tasty-recipes-entry-content .tasty-recipes-instructions ol { counter-reset:li; margin-left: 0; padding: 0; } .tasty-recipes-entry-content .tasty-recipes-ingredients ol li, .tasty-recipes-entry-content .tasty-recipes-instructions ol li { list-style-type: none; position: relative; margin-bottom: 1em; margin-left: 2.5em; line-height: 1.46; } .tasty-recipes-entry-content .tasty-recipes-ingredients ol li:before, .tasty-recipes-entry-content .tasty-recipes-instructions ol li:before { content:counter(li); counter-increment: li; position: absolute; background-color: #4d4d4e; -webkit-border-radius: 50%; -moz-border-radius: 50%; border-radius: 50%; height: 1.45em; width: 1.45em; color: #FFF; left: -1.25em; transform: translateX(-50%); line-height: 1.5em; font-size: .6875em; text-align: center; top: .1875em; } @media only screen and (max-width: 520px) { .tasty-recipes-entry-content .tasty-recipes-ingredients ol, .tasty-recipes-entry-content .tasty-recipes-instructions ol { margin-left: 0; } .tasty-recipes-entry-content .tasty-recipes-ingredients ol li, .tasty-recipes-entry-content .tasty-recipes-instructions ol li { } } .tasty-recipes-entry-content .tasty-recipes-notes { padding: 1.25em; background-color: #EDF0F2; } .tasty-recipes-entry-content .tasty-recipes-notes ol { counter-reset:li; margin-left: 0; padding: 0; } .tasty-recipes-entry-content .tasty-recipes-notes ul { margin-left: 0; padding: 0; } .tasty-recipes-entry-content .tasty-recipes-notes p, .tasty-recipes-entry-content .tasty-recipes-notes ul li, .tasty-recipes-entry-content .tasty-recipes-notes ol li { background-color: #FFF; padding-left: 1.5625em; padding-right: 1.5625em; padding-top: 1.25em; padding-bottom: 1.25em; position: relative; -webkit-clip-path: polygon(20px 0, 100% 0, 100% 100%, 0 100%, 0 20px); clip-path: polygon(20px 0, 100% 0, 100% 100%, 0 100%, 0 20px); margin-bottom: 1.5em; } @media only screen and (min-width: 520px) { .tasty-recipes-entry-content .tasty-recipes-notes p, .tasty-recipes-entry-content .tasty-recipes-notes ul li, .tasty-recipes-entry-content .tasty-recipes-notes ol li { padding-left: 2.5em; } .tasty-recipes-entry-content .tasty-recipes-notes p:before, .tasty-recipes-entry-content .tasty-recipes-notes ul li:before { content: "i"; display: block; background-color: #4d4d4e; -webkit-border-radius: 50%; -moz-border-radius: 50%; border-radius: 50%; height: 1.3em; width: 1.3em; font-size: .75em; line-height: 1.3em; text-align: center; color: #FFF; position: absolute; left: 1.167em; top: 1.9em; } .tasty-recipes-entry-content .tasty-recipes-notes ol li:before { content:counter(li); counter-increment: li; position: absolute; background-color: #4d4d4e; -webkit-border-radius: 50%; -moz-border-radius: 50%; border-radius: 50%; height: 1.45em; width: 1.45em; color: #FFF; left: 2em; transform: translateX(-50%); line-height: 1.5em; font-size: .6875em; text-align: center; top: 2em; } } .tasty-recipes-entry-content .tasty-recipes-notes p:last-child { margin-bottom: 0; } .tasty-recipes-nutrifox { text-align: center; margin: 0; } .tasty-recipes-nutrifox iframe { width: 100%; display: block; margin: 0; } .tasty-recipes-entry-content .tasty-recipes-nutrition { padding: 1.25em; color: #4d4d4e; } .tasty-recipes-nutrition .tasty-recipes-label { font-style: italic; color: #cacaca; margin-right: .125em; font-weight: 400; } .tasty-recipes-nutrition ul { text-align: center; } .tasty-recipes-nutrition li { float: none; display: inline-block; line-height: 2em; } .tasty-recipes-entry-footer { background-color: #4d4d4e; padding-top: 1.5625em; padding-bottom: 1.25em; padding-left: 2.5em; padding-right: 2.5em; text-align: center; } .tasty-recipes-entry-footer .tasty-recipes-footer-content { display: inline-block; } .tasty-recipes-entry-footer img { width: 65px; } .tasty-recipes-entry-footer h3 { color: #cacaca; font-size: 1.25em; line-height: 2.25em; margin-top: .5em; margin-bottom: .125em; padding: 0; line-height: 1em; } .tasty-recipes-entry-footer p { margin-bottom: 0; color: #FFF; font-size: .75em; } .tasty-recipes-entry-footer p a { color: #FFF; text-decoration: underline; box-shadow: none; border-bottom: none; } .tasty-recipes-entry-footer:after { content: " "; display: block; clear:both; } @media only screen and (max-width: 520px) { .tasty-recipes-entry-footer h3 { margin-top: .5em; margin-bottom: .5em; } .tasty-recipes-entry-footer { text-align: center; } } @media only screen and (min-width: 520px) { .tasty-recipes-entry-footer img { float: left; } .tasty-recipes-entry-footer h3, .tasty-recipes-entry-footer p { margin-left: 90px; clear: none; text-align: left; } } /* Print view styles */ .tasty-recipes-print-view .tasty-recipes-print-button { display: inline-block; } .tasty-recipes-print { padding:0; } .tasty-recipes-print-view .tasty-recipes { margin-top: 1em; } .tasty-recipes-print .tasty-recipes-entry-header { background-color: inherit; color: inherit; padding-bottom: 0; padding-left: 1em; padding-right: 1em; } .tasty-recipes-print .tasty-recipes-entry-header .tasty-recipes-image { float: right; transform: none; } .tasty-recipes-print.tasty-recipes-has-image .tasty-recipes-entry-header h2 { margin-top: 0; } .tasty-recipes-print .tasty-recipes-entry-header h2 { color: inherit; margin-bottom: .5em; } .tasty-recipes-print .tasty-recipes-entry-header hr { display: none; } .tasty-recipes-print .tasty-recipes-entry-header .tasty-recipes-rating-stars span { color: #000; } .tasty-recipes-print .tasty-recipes-entry-header .tasty-recipes-details ul { padding: 0; clear: both; } .tasty-recipes-print .tasty-recipes-entry-header .tasty-recipes-details ul li { line-height: 1.5em; } .tasty-recipes-print .tasty-recipes-entry-header .tasty-recipes-details .detail-icon { display: none; }
Coconut Lentil Curry with Greens

1 Star (3 votes, average: 5.00 out of 1)

5 from 3 reviews

Author: a Couple Cooks Prep Time: 10 minutes Cook Time: 20 minutes Total Time: 30 minutes Yield: 4 Category: Main Dish Method: Stovetop Cuisine: Thai Inspired
Description

This Coconut Lentil Curry is a 30 minute easy dinner idea that’s healthy and full of flavor; it’s a plant based recipe flavored with Thai curry paste.

Ingredients 2 cups uncooked white or brown basmati rice, to serve 2 cups brown or green lentils 8 cups chopped leafy greens: spinach, kale, or chard 1 tablespoon olive oil 15-ounce can coconut milk 3 tablespoons Thai red curry paste 2 tablespoons tomato paste 1 teaspoon kosher salt Fresh ground black pepper
Instructions Cook the rice according to the package instructions. Place the lentils in a saucepan with 6 cups warm water. Bring to a low boil, then boil for about 20 minutes until tender (taste to assess doneness). Drain, then add a few pinches of salt. Meanwhile, wash the greens, remove the stems and chop the leaves. (If using prewashed baby spinach, you can skip this step.) In your largest skillet, heat the olive oil over medium high heat. Add the greens and sauté for several minutes until tender and bright green. When the lentils are done, add them to the skillet with the greens. Over medium high heat, stir in the coconut milk, Thai red curry paste, tomato paste, kosher salt, and fresh ground black pepper. Cook for a few minutes until heated through and the sauce is thickened. Taste and add a few pinches of salt if desired. Serve with rice.

Keywords: Coconut Lentil Curry, Lentil Curry, Vegan, Vegetarian, Gluten Free, Healthy Dinner Ideas, Healthy Dinner Recipe,


A Couple Cooks - Healthy, Whole Food, Vegetarian Recipes

Cookie and Kate
Hearty Sweet Potato, Arugula & Wild Rice Salad with Ginger Dressing

hearty sweet potato, arugula, wild rice salad with ginger dressing recipe

Thank you so much to everyone who filled out our 2019 reader survey. With over 5,000 responses (holy moly!), I’m still reading through and taking notes on your answers.

Thank you for your kind encouragement and suggestions. I’ve already implemented a few of the most frequent requests. You’ll now find a “jump to recipe” button at the top of every recipe post, in case you’re in a hurry or working on your grocery list.

I’m also investigating better search solutions, and I’ve fixed an issue with the mobile version of the menu so you now have easier access to all of the recipe filters.

salad ingredients

I’m carefully considering your responses. Since I’m both the website developer and recipe developer, working on one side takes time from the other. I love stretching my brain in both directions, though, and keeping the Cookie and Kate team small. I’d rather grow slowly than burn out, because this is my absolute dream job.

These things take time. I also need time to sleep, and Cookie wants to go on more walks. Maybe I’ll make another cookbook. I’m definitely going on more vacations and hope you do, too.

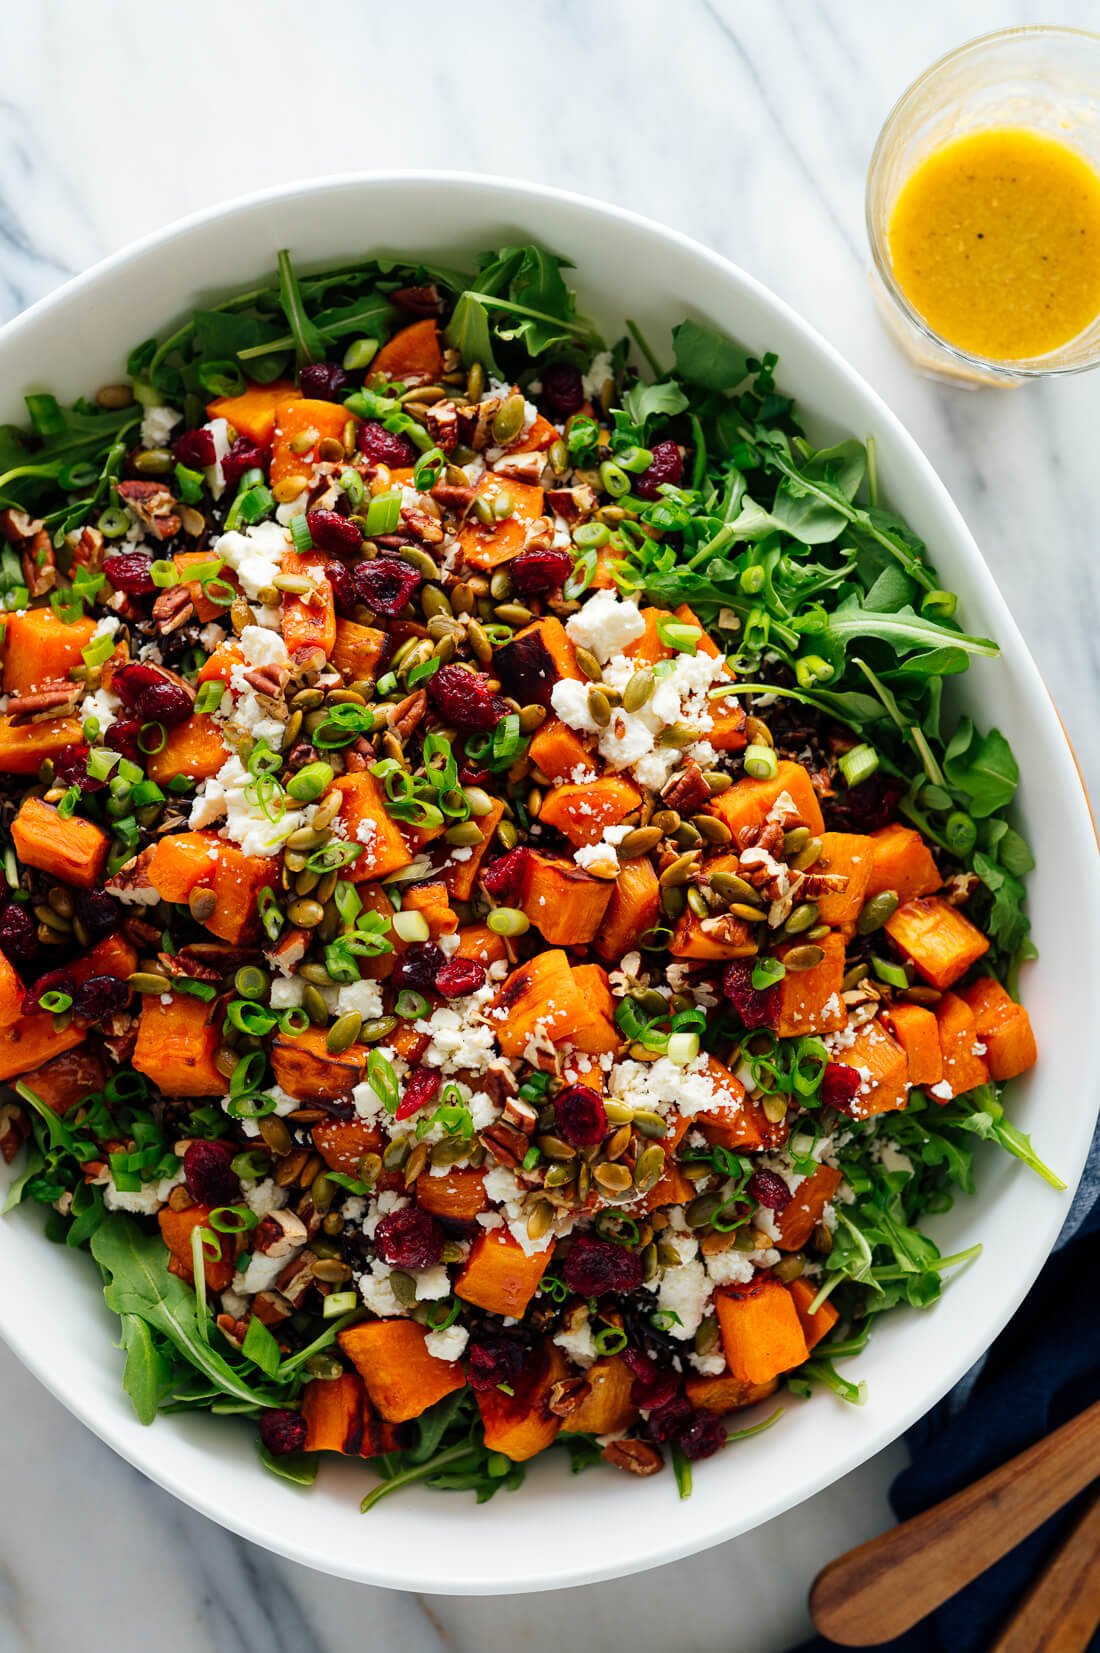
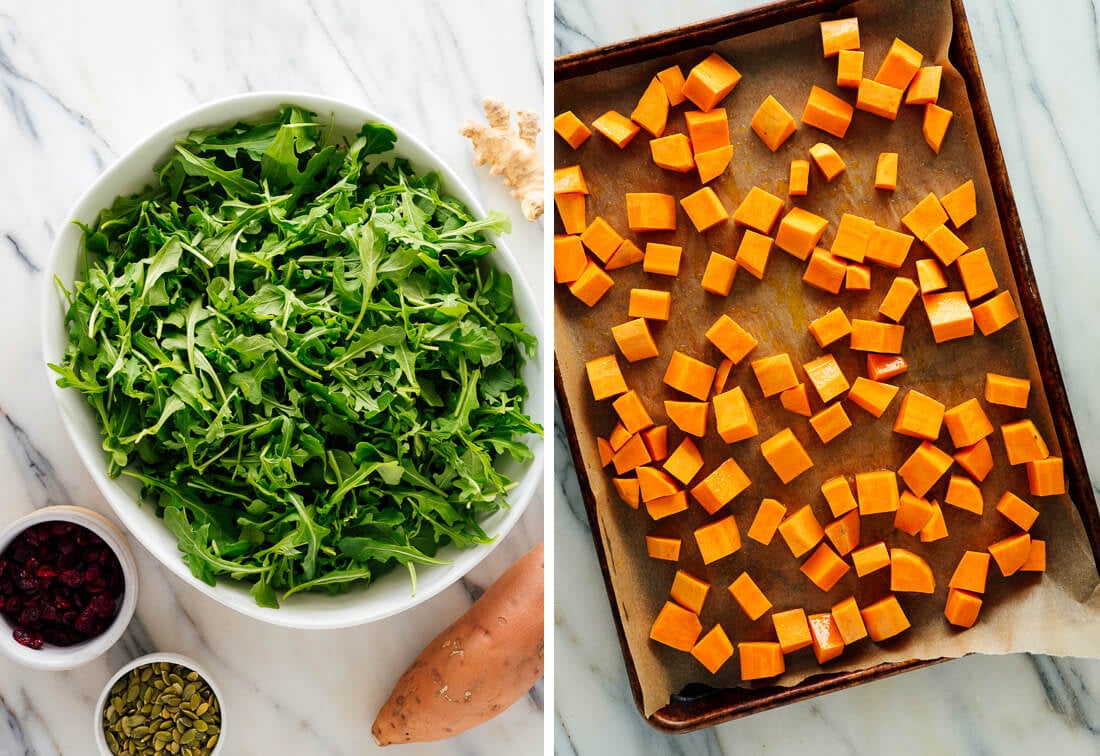
Anyway, let’s move on to the main attraction—this stunner of a salad! Cheers to many more fresh and wholesome recipes this year. Thank you for being here.

Continue to the recipe...

The post Hearty Sweet Potato, Arugula & Wild Rice Salad with Ginger Dressing appeared first on Cookie and Kate.

A Sweet Pea Chef
Loaded Cauliflower Tots Recipe

Loaded Cauliflower Tots. I repeat: LOADED CAULIFLOWER TOTS!  These babies taste just like a baked potato, all wrapped up in a delicious and savory cauliflower tot!

Loaded Cauliflower Tots. I repeat: LOADED CAULIFLOWER TOTS! These babies taste just like a baked potato, all wrapped up in a delicious and savory cauliflower tot! | A Sweet Pea Chef

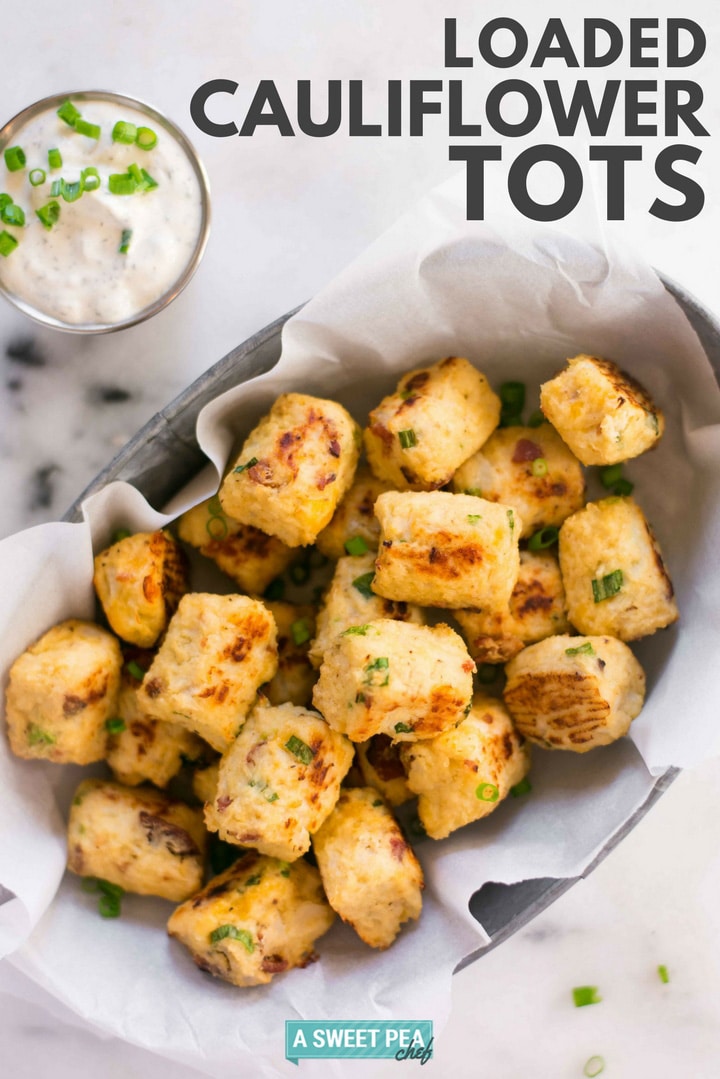
Friends, the time has come for you to go make yourselves these LOADED Cauliflower Tots.

They’re simply delicious and will blow your mind with the texture, flavor, and — yet — healthiness, all in tater tot form.  Amazing!

This is the moment we’ve all been waiting for.

These tasty tater tots are loaded with all the deliciousness of a baked potato, yet are low in carbs (just 1.5 carbs)!  From one tot lover to the next, these are next level tater tots.  Plus, you only need 8 ingredients to make them right now!

Make sure to dip your cauliflower tots in THIS greek yogurt ranch dip to be in healthy tater tot heaven.

All the ingredients required to make the loaded cauliflower tots, separated on a countertop, including green onions, fresh cauliflower, bacon, cheddar cheese, sea salt, pepper, garlic powder, an egg, and almond meal.Bowl filled with cauliflower florets that are raw, which are ready to be steamed and then mashed to make the loaded cauliflower tots.

HOW TO MAKE CAULIFLOWER TATER TOTS

Let me tell you something. Learning how to make homemade tater tots is easy. So, naturally, learning how to make cauliflower tots is just as easy. FACT – all veggie tots are easy to make.

Amazeballs.

Here’s how to make cauliflower tots:

Start by preheating the oven to 400 degrees F. Line a baking sheet with parchment paper and set aside. Break the cauliflower head into florets. Cook the cauliflower florets in a steamer basket over high heat. Prep the rest of the ingredients for the cauliflower tater tots recipe. Mash the cauliflower. How to mash cauliflower? Use a potato masher or a food processor and mash until the cauliflower is evenly mashed. Mix the mashed cauliflower with the egg and the rest of the ingredients needed to make loaded tater tots and stir until everything is mixed together. Form the cauliflower veggie tots using your hands. How to cook tater tots? Bake them! Baking the cauliflower veggie tots means less oil and healthier tater tots!

How to make cauliflower tots paleo:

Making cauliflower tots paleo is actually pretty easy.  Since we’re already avoiding breadcrumbs and lots of oils and processed foods, we’re on the right track for paleo cauliflower tots.  Depending on your paleo beliefs, you may or may not choose to eat dairy.  Since dairy is the only thing in this recipe that isn’t 100% paleo, you can remove the shredded cheddar cheese and greek yogurt to make it paleo.

You could use a paleo cheese substitute, but it’s not necessary.  Those ingredients are added especially to make these loaded cauliflower tots taste, well, loaded.  They’re not essential for the tots to hold together when baked.  This is also how you would make these cauliflower tots non-dairy, too.

How to make cauliflower tots without eggs:

This cauliflower tots recipe uses one egg to help hold it all together, but it’s easy to replace the egg if you’d like to make these tots without eggs.  You can just try to form them together without an egg, which will be more difficult, but not impossible, or you can make a flax egg substitute.  Flax “eggs” are a great alternative for those who have allergies to eggs.  To do so, you’ll need to make one flax egg, which is made by combining flaxseed meal and water.

To make 1 flax egg, combine:

1 tablespoon of ground flaxseed 3 tablespoons of water

Stir well, and then allow the mixture to set for about 5-10 minutes.  Then, use as you would a regular egg.  This can also be done using ground chia seeds.

How to make cauliflower tots with almond flour (without breadcrumbs):

Since I mostly follow a clean eating lifestyle, I don’t use breadcrumbs in my recipes.  Instead, I love to replace them with almond meal.  Adding almond meal not only helps to make this recipe gluten-free, clean, and paleo, it also adds in additional nutrients and protein, without any of the empty carbs that you would get from breadcrumbs.

In order to make cauliflower tots with almond flour, just replace 1:1 the amount of breadcrumbs you would normally use.  The almond flour (or almond meal) will work perfectly and you’ll never even notice the difference with the taste!

Mixing bowl filled with all the ingredients for the loaded cauliflower tots, including the mashed cauliflower florets, sliced green onions, chopped bacon, greek yogurt, shredded cheddar cheese, sea salt, garlic powder, black pepper, ready to mix together.Mixing bowl with everything mixed together and ready to shape into cauliflower tots.

CAULIFLOWER VS BROCCOLI TATER TOTS

When I made broccoli tots for the first time, my mind was totally blown at how easy it could be to turn something that’s super not good for you into something that’s actually healthy.  My kids still ask me to make them broccoli tots ALL the time.  Broccoli tots!  Super cool.  BTW if you want my broccoli tots recipe, you can click here.

Then, I made crispy sweet potato tots because YES and we all need sweet potato tots in our lives.  These were a big hit, too.

Recently, I have started to realize all the possibilities of turning lower carb, higher nutrients veggies into tots.  A great veggie to turn into a tot is cauliflower.  I figured I would try out cauliflower tots since cauliflower looks so similar to potatoes and can mimic them in so many ways (see my cauliflower mashed potatoes and cauliflower gratin posts for more on that). For realz, veggie tots are totes amazing!

While I love the broccoli tots and sweet potato tots we’ve made, too, there’s just something about the cauliflower — maybe it’s the color or the fact that it’s loaded with all sorts of goodness, they’re probably my fave.

Baking sheet lined with tin foil with the formed cauliflower tots laid out in rows, ready to be placed into the oven and baked.Baking sheet that has been removed from the oven and has the baked cauliflower tots, ready to eat.

HOW MANY CARBS ARE IN CAULIFLOWER?

This is the beautiful thing about using cauliflower instead of potato to make your homemade tots recipe — you’re already reducing the carbs a significant amount. Plus, when baked, we don’t have to worry about any unnecessary oils to fry them in so you’re making cauliflower tots low carb. Ok, so, how many carbs are in cauliflower? Consider this: 1 cup of cooked potato is 26 carbs. Compare that to 1 cup of cooked cauliflower, which is just 5 carbs.  Pretty drastic, right?

In one serving of these tots, which I’d say is about 6, you just have 1.5 carbs.  That’s it!  Crazy, right?  All the stuff we add to make it loaded are also low carb, namely the dairy and bacon, which are both higher in protein and fat to make the tots filling.  It’s a beautiful thing!

Hand holding a single cauliflower tot to show the size and texture of the baked cauliflower tot.

HOW TO BAKE CAULIFLOWER TATER TOTS

Baking the cauliflower tater tots instead of frying them results in healthier tater tots, for sure. Not sure how to bake tater tots and for how long to bake tater tots? Don’t worry, I have the answers!

To bake the cauliflower tots…

Place tater tots on a baking sheet lined with parchment. Place the baking sheet in the oven and bake the cauliflower tots until the bottom side is golden brown. This should take approximately 20 minutes. Flip the cauliflower tots and bake for additional 5-10 minutes. Tin of baked loaded cauliflower tots that are ready to grab and enjoy. HOW TO MAKE LOADED TATER TOTS WITH CAULIFLOWER

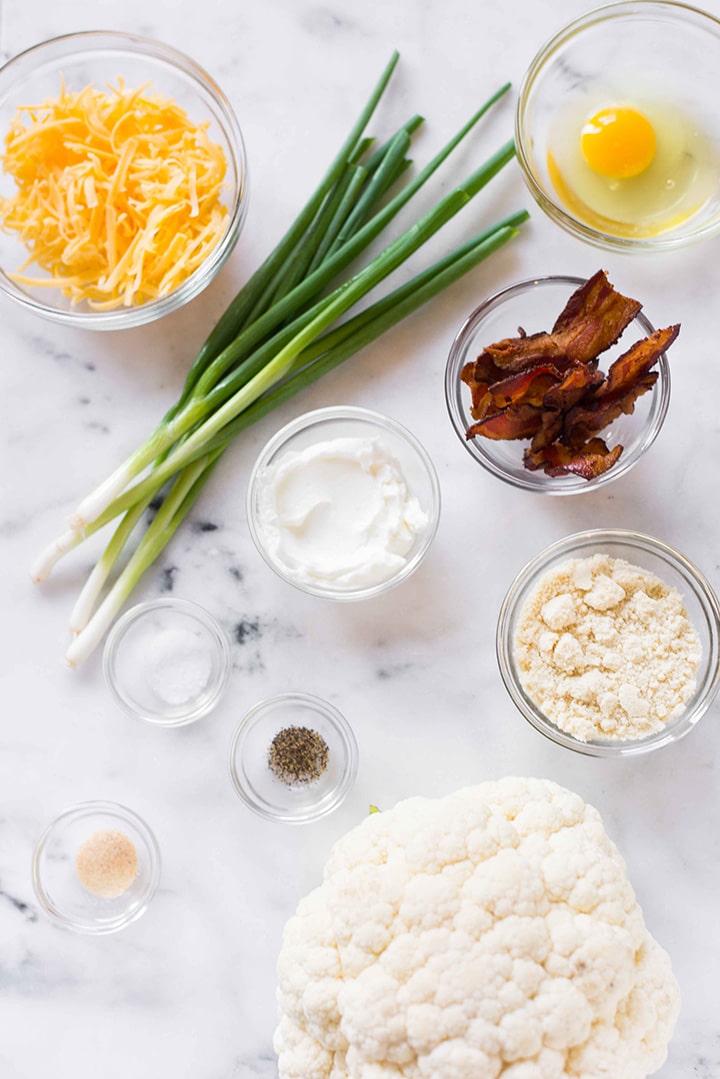
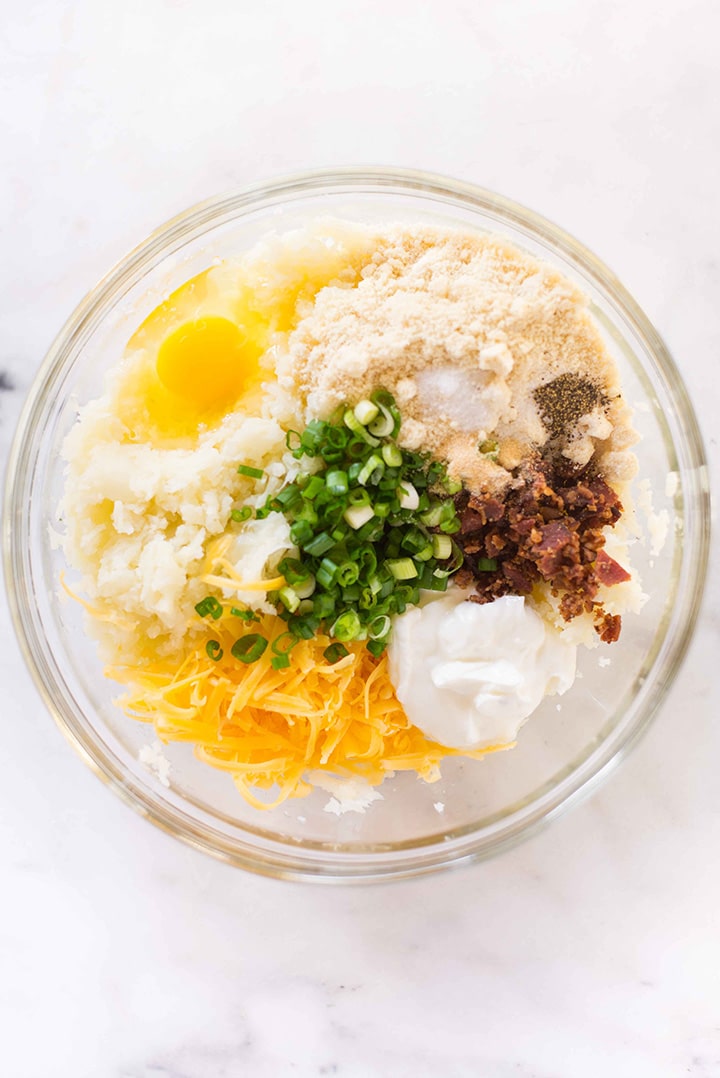
To add more flavor and texture into the cauliflower tots, we made them loaded with all the yummy and savory flavors of a baked potato, like crispy bacon, sliced green onion, and cheddar cheese.  I also added greek yogurt, sea salt, garlic, and pepper to make sure the loaded tater tots are PERFECTION.

OMG, these are my new fave.

Hand dipping one loaded cauliflower tot into the greek yogurt ranch dipping sauce, ready to eat.

HOW TO FREEZE CAULIFLOWER TATER TOTS

If you want to freeze cauliflower tater tots for later…

Place them in a Ziploc bag before baking; squeeze the excess air out of the Ziploc bag; freeze the cauliflower tots.

To cook tater tots from frozen…

heat the oven to 350 degrees F; bake for 20 minutes on one side; flip the cauliflower tots on the other side and bake for 20 more minutes.

However, if you don’t want to freeze them and you just want to know how to reheat tater tots, here’s what you have to do:

preheat the oven to 350 degrees F; place the cauliflower tater tots in an oven-safe dish and cover them with aluminum foil; heat them up for 10-15 minutes or until warmed through.

I wouldn’t recommend microwaving the tater tots because that will result in a soggy mushy mess.  A tasty mess, but not very tater totty.

Tin filled with loaded cauliflower tots and then topped with sliced green onion, setting next to greek yogurt ranch dipping sauce for serving.

3 MORE HEALTHY CAULIFLOWER RECIPES

Did this baked cauliflower tots recipe make you fall in love with cauliflower? I hope it did! Because I have more awesome, delicious and healthy cauliflower recipes for you.

CREAMY PARMESAN CAULIFLOWER MASHED POTATOES

I already mentioned this Creamy Parmesan Cauliflower Mashed Potatoes recipe. And it’s time to talk about it more because it’s truly amazing.

Horizontal image of the cauliflower mashed potatoes that are garnished with sliced chives.

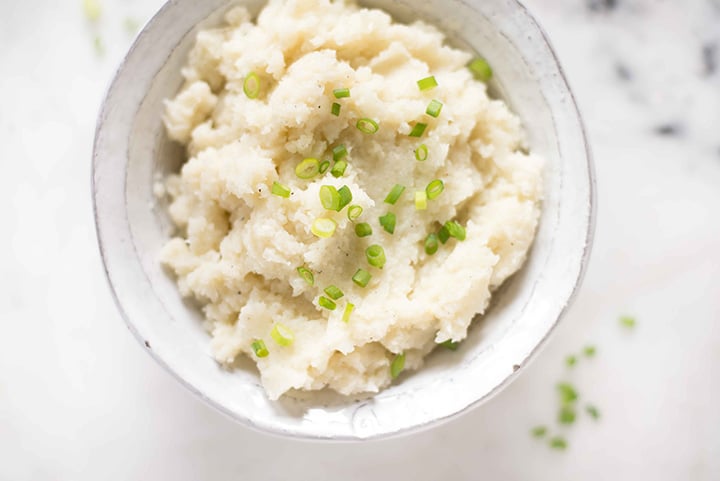
Cauliflower mashed potatoes are a great low-carb alternative for mashed potatoes and, with my tips, a clean and healthy recipe, too. Without compromising the texture and flavor. So tasty! Get the recipe.

CAULIFLOWER TORTILLAS

Cauliflower is so versatile. These Cauliflower Tortillas prove cauliflower’s versatility. And they are so amazing.

Cauliflower Tortillas | Learn how to make these low carb, high fiber Cauliflower Tortillas. These healthy tortillas are so awesome and the perfect grain-free tortilla substitute! | A Sweet Pea Chef

These grain-free tortillas are only 42 calories each and they are perfect for Mexican dishes. Enchiladas, burritos, tacos – all made low-carb with the Cauliflower Tortillas. How amazing, right? Get the recipe.

HOW TO MAKE CAULIFLOWER PIZZA CRUST

Speaking of delicious comfort foods made low-carb. Learn How To Make Cauliflower Pizza Crust and enjoy everybody’s favorite food guilt-free.

How To Make Cauliflower Pizza Crust | Pizza lovers, rejoice! www.asweetpeachef.com

This Cauliflower Pizza Crust is easy to make and perfect for satisfying your pizza cravings. Get the recipe.

Loaded Cauliflower Tots

Loaded Cauliflower Tots

Loaded Cauliflower Tots. I repeat: LOADED CAULIFLOWER TOTS! These babies taste just like a baked potato, all wrapped up in a delicious and savory cauliflower tot!

1 large head cauliflower, (broken into florets) 1 egg 4 slices nitrate-free bacon 1/2 cup almond meal 1 cup cheddar cheese, (shredded) 1/4 cup plain greek yogurt 2 green onions, (sliced) 1/2 tsp. sea salt 1/4 tsp. garlic powder 1/8 tsp. black pepper greek yogurt ranch dip, (for serving)

Preheat your oven to 400 degrees F and line a baking sheet with parchment paper. Set aside.

Break the cauliflower into florets.  

Place the cauliflower florets into a steamer basket and cook, over high heat, until tender.  Once they’re cooked, set them aside to cool.

Cook nitrate-free bacon in a skillet over medium-high heat until it’s crispy, then chop it into small pieces. Set this aside.

Mash the cooked cauliflower in a mixing bowl until it’s evenly mashed. You can use either a potato masher or a food processor.

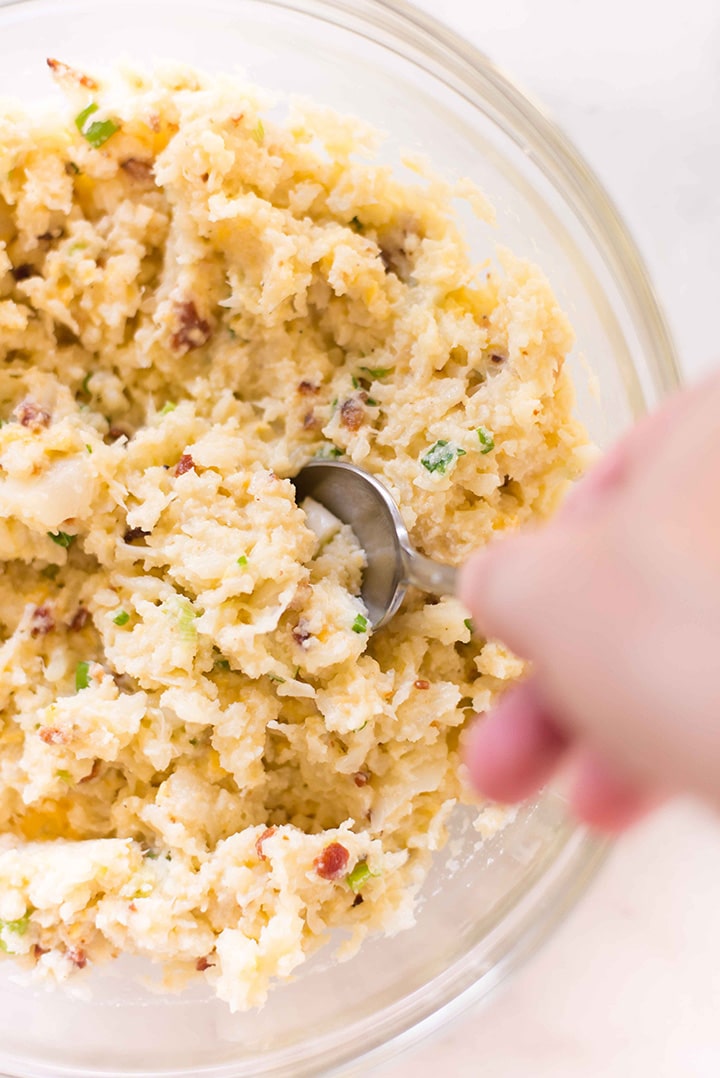
Take 3 cups of the mashed cauliflower and add it to a large mixing bowl, and then add an egg, the chopped bacon, almond meal, shredded cheddar cheese, plain greek yogurt, sliced green onions, sea salt, garlic powder, and pepper. Stir this together until completely mixed. Scoop approximately 1 heaping tablespoon of this mixture using your hands and gently press between your fingers to form a ball, then shape into a tater-tot shape. Place the tot on the prepared baking sheet, and then repeat with the remaining mixture.

Place in the oven and bake until golden brown and crispy, about 25-30 minutes, turning after 20 minutes, once the bottom side is golden brown.  (Be careful when you flip them, as they can stick to the parchment paper.)

This post contains affiliate links for products I use regularly and highly recommend.

The post Loaded Cauliflower Tots Recipe appeared first on A Sweet Pea Chef.

Healthy Slow Cooker Split Pea Soup

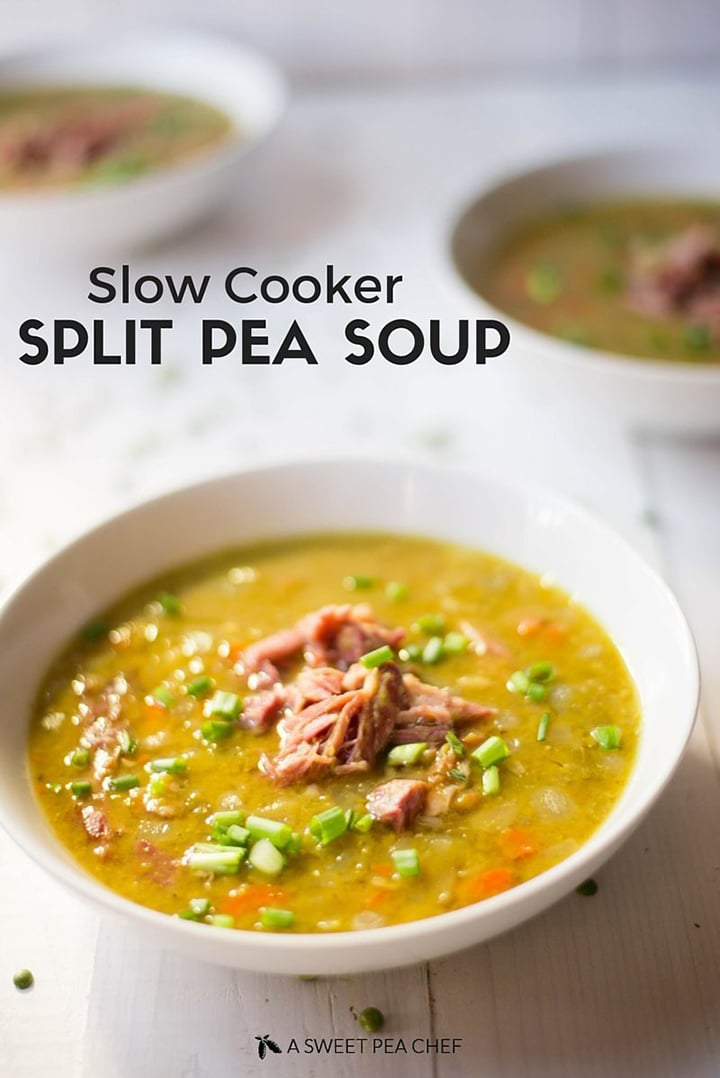
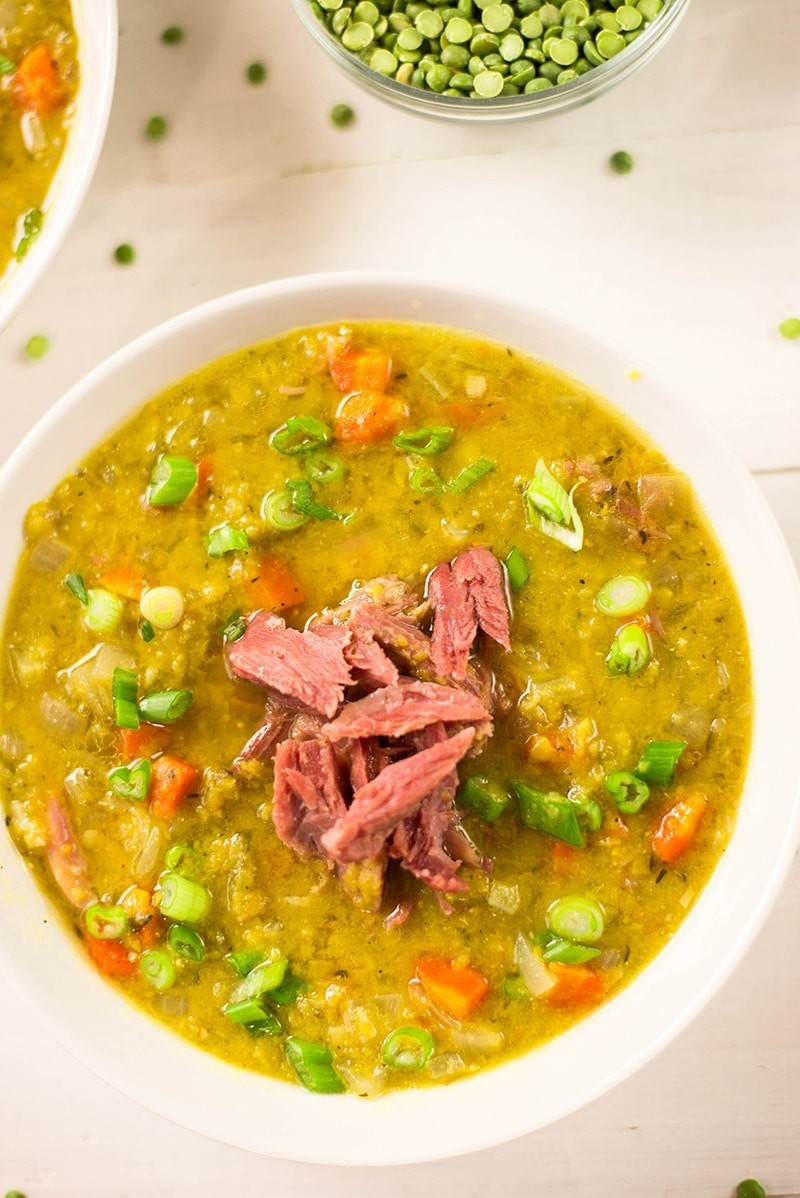
This delicious and healthy slow cooker split pea soup requires just 5 minutes of prep time and contains 21 grams of fiber and 28 grams of protein in just one bowl!

Healthy Soup Recipes: Slow Cooker Split Pea Soup

Growing up in Southern California, my parents would always take my brother and me to Pea Soup Andersen’s for their famous split pea soup whenever we were in the area.  I loved going there because I was a big fan of eating at restaurants with my family and this particular restaurant had tasty bread and pea soup —  so what’s not to love?

Thinking about it now, it had probably been a good 15 years since I either ate at Pea Soup Andersen’s with my family or even had pea soup.

Wowza, that’s kinda insane.

All of a sudden, a couple months back, I had a craving for split pea soup.  I thought back on how much I enjoyed my dinners and lunches out with my family and had a pang for California and the past.  I decided I wanted to try making this old favorite for myself.

Naturally, I turned to my trusty slow cooker.

And, as always, it certainly didn’t let me down.

Here’s to making new memories, reliving old, cherished memories, and being healthy all at the same time.  And slow cookers. And, of course, slow cooker split pea soup.

Slow Cooker Split Pea Soup | Easy, protein-packed, and delicious! www.asweetpeachef.comSlow Cooker Split Pea Soup | Easy, protein-packed, and delicious! www.asweetpeachef.com

HOW TO MAKE SPLIT PEA SOUP IN A SLOW COOKER

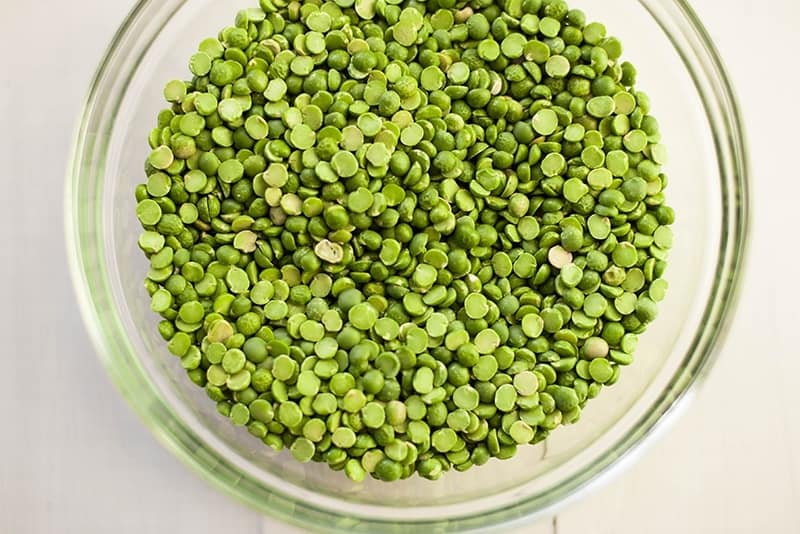
I had actually never purchased split peas before so this was all very new to me.  I learned you can get a great deal on split peas in the bulk section, which is awesome because I will absolutely be making this recipe for years to come.

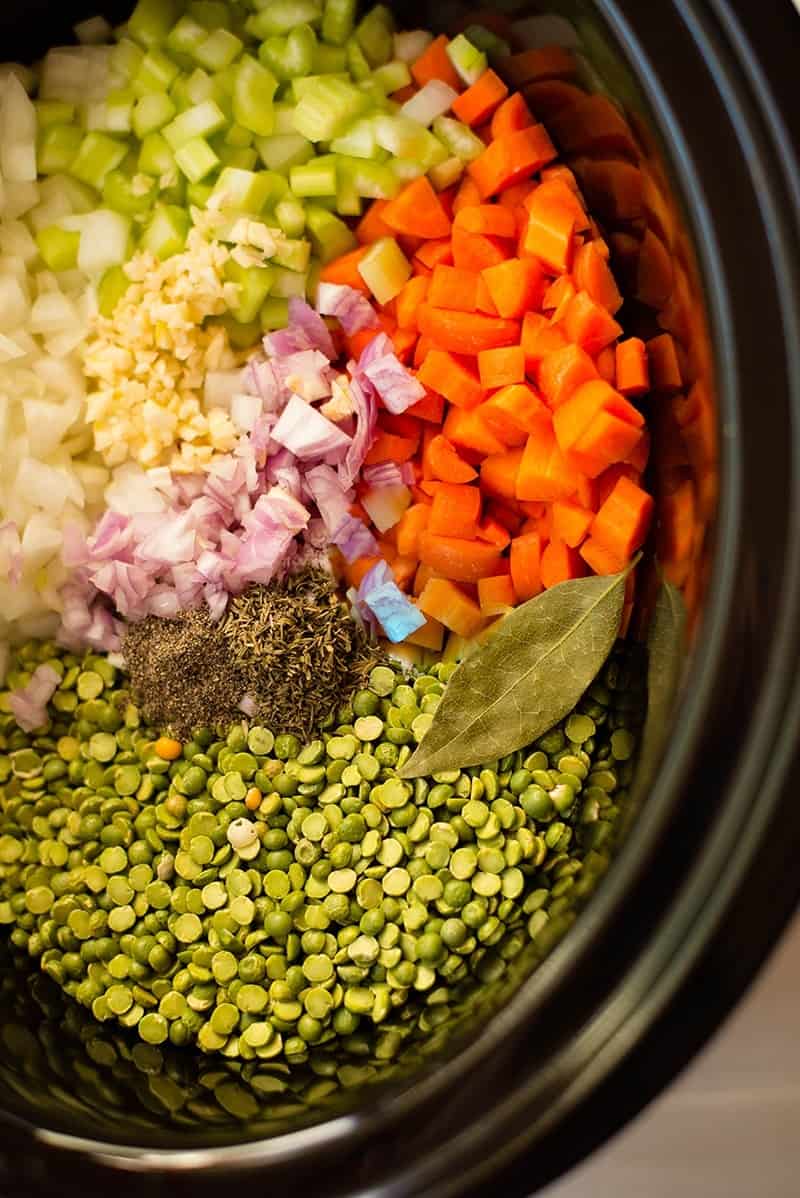
Wondering how to make split pea soup in a crockpot?

This split pea and ham soup slow cooker recipes seriously couldn’t be any easier.  You literally add all the ingredients to the slow cooker and then walk away while it cooks up one of the most fabulous, heart-warming, and rich split pea soups you’ve ever had the fortune to eat.

And, remember, I grew up on the stuff.

How to thicken split pea soup

I never ran into this problem but if the slow cooker split pea soup doesn’t have your desired consistency because you accidentally added too much water, you can easily fix it by…

adding pureed peas to the watery split pea soup and stirring until the soup reaches the desired thickness; mixing 1 tablespoon of whole-wheat flour with 3 tablespoons of water and adding the mixture to the split pea soup. Stir until the soup reaches the desired thickness.

Now that you know how to make split pea soup in a slow cooker, let’s discuss what to serve with split pea soup. You can opt for:

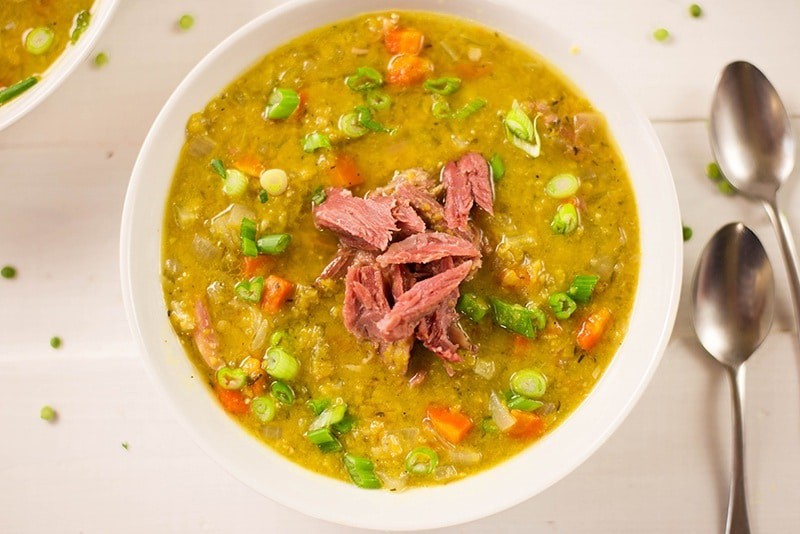
ham – as I did; pita or another type of healthy bread (homemade croutons are also great); fresh herb such as parsley to garnish the soup. Slow Cooker Split Pea Soup | Easy, protein-packed, and delicious! www.asweetpeachef.com 
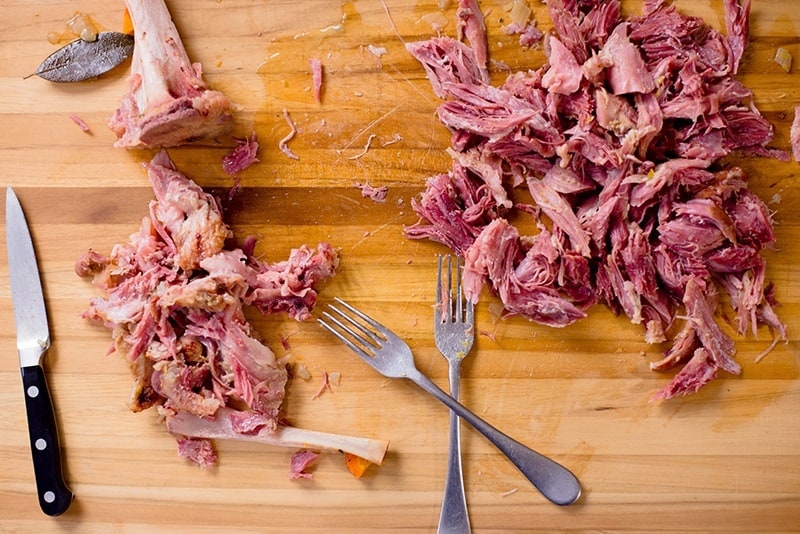
WHAT IS SPLIT PEA SOUP?

Split Pea Soup is a satisfying and hearty soup, made with split peas and, usually, ham bone or ham. Holiday leftover ham is amazing in split pea soup BTW. A sweet, smoky, comforting bowl of deliciousness, in other words.

What are split peas?

Not sure what’s the difference between peas and split peas, well, split peas are dried, peeled, and split in half peas that are used in various dishes including curries and soups.

Slow Cooker Split Pea Soup | Easy, protein-packed, and delicious! www.asweetpeachef.com

IS SPLIT PEA SOUP HEALTHY?

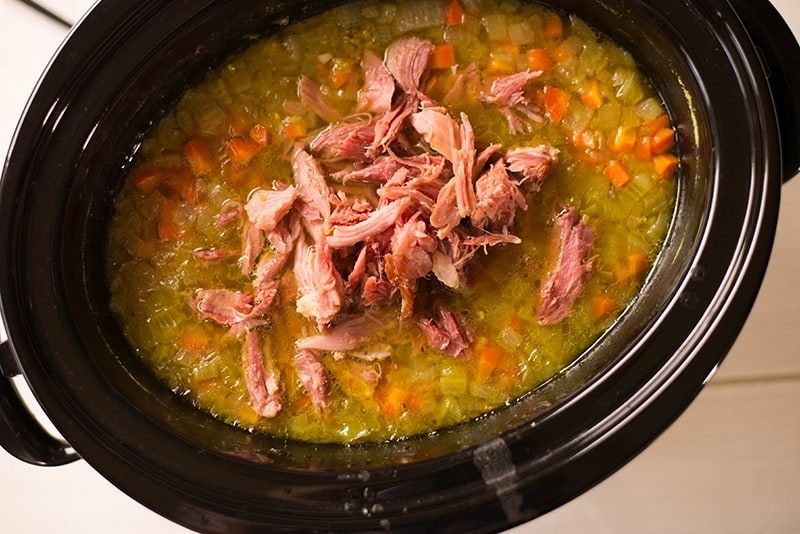
All in all, this is one extremely tasty, hearty, and filling soup.  I love how healthy split pea soup is and how good for you as well – just one bowl of this soup will not only fill you up, but it will provide you with 21 grams of fiber and 28 grams of protein, among tons of other nutritional goodness.  Not too bad, my friends.

One of the best things, I’ve found, about making your own split pea soup using a slow cooker is that you can control the salt content and the amount of meat.  The split pea soups I’ve had in the past weren’t chock full of delicious, tender ham – but just dusted with it.

Fixed that problem and then some!  I also didn’t need to add a single drop of salt, since I used the natural saltiness of the ham to season the soup which worked perfectly. Love it when I reduce the need for salt!

Slow Cooker Split Pea Soup | Easy, protein-packed, and delicious! www.asweetpeachef.com

HEALTH BENEFITS OF SPLIT PEAS

Split peas, like other legumes, are packed with healthy nutrients that are good for you. Eating split peas…

reduces the risk of heart disease; reduces the risk of chronic illness; reduces the risk of certain types of cancer; helps in weight loss.

Now, let’s take a look at the split peas nutrition to better understand the amazingness of split peas, shall we?

Split peas…

are low in calories – only 231 calories per cup; are a great source of protein; are a great source of fiber; contain vitamins including: vitamin K; vitamin A; vitamin B; are rich in minerals such as: iron; magnesium; manganese; phosphorus; potassium; zinc. Slow Cooker Split Pea Soup | Easy, protein-packed, and delicious! www.asweetpeachef.com 
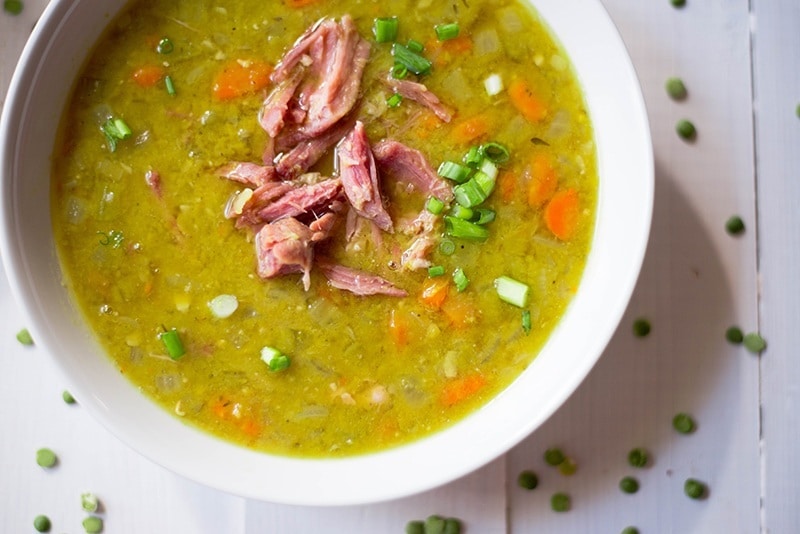
HOW TO MAKE VEGETARIAN SPLIT PEA SOUP

This split pea soup recipe is made with ham but if you’re looking for how to make split pea soup without ham or pork, it’s very easy to do.  You’ll just need to not add it in. You’ll still have all the flavor of the vegetables, and the protein from the split peas and other veggies.

To make vegetarian split pea soup, you can also replace the chicken broth with vegetable broth.

Slow Cooker Split Pea Soup | Easy, protein-packed, and delicious! www.asweetpeachef.com

HOW LONG DOES SPLIT PEA SOUP LAST?

If you store it in an airtight container, split pea soup lasts for 3-4 days in the fridge.

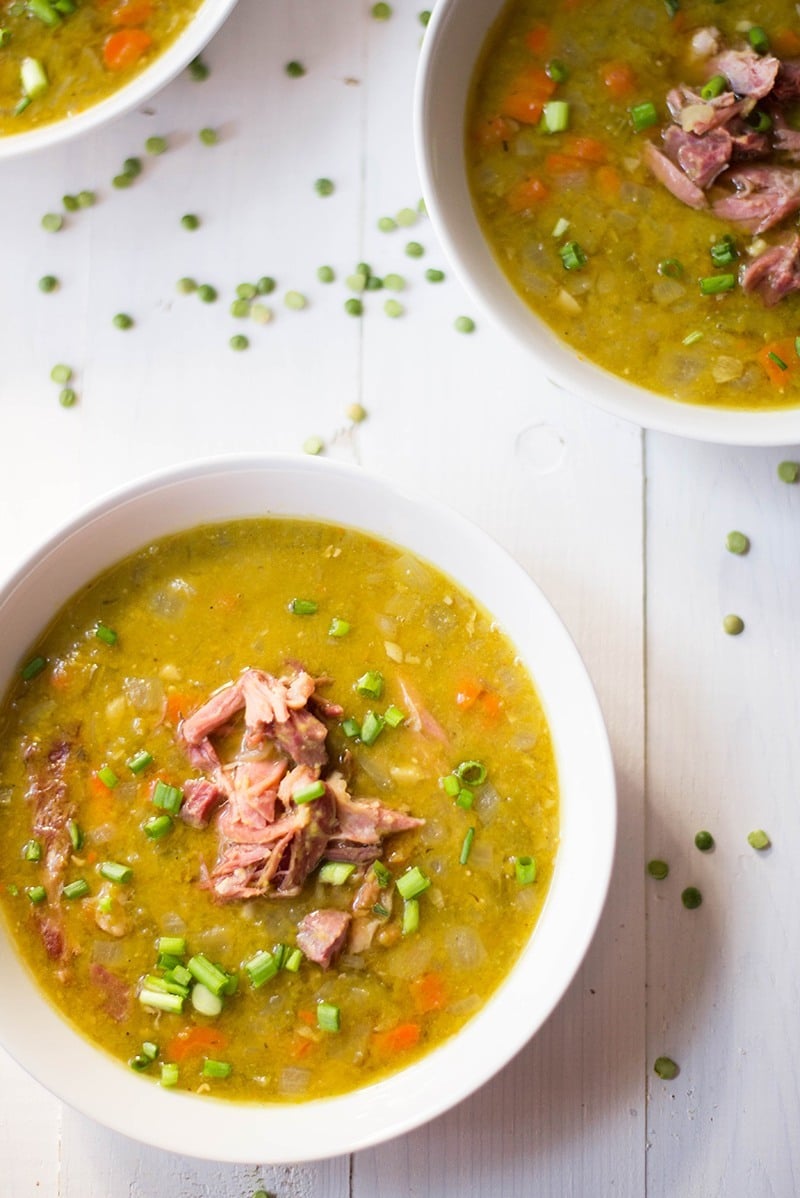
Since this split pea soup recipe makes quite a lot of split pea soup, you’ll likely find yourself with plenty of leftovers. The good news is you can easily freeze leftover slow cooker pea soup for quick family meals or in pre-portioned, nutritious lunches.   Here are some tips for how to freeze split pea soup:

Allow the soup to cool completely. Since slow cookers retain heat very well, you may want to transfer to a large bowl and place in the refrigerator to cool more quickly.

Freeze in either gallon– or quart-sized freezer bags or freezer safe containers for easy thawing and storage.

Leave enough space at the top of the bag to allow for expansion during freezing. Squeeze as much air as possible out of the top of the bag and seal securely.

Place the soup-filled freezer bags in the freezer, in a single, flat layer (using a rimmed baking sheet is helpful). Allow to freeze completely. Then, stack them on top of each other or standing side by side.

Thaw bags of frozen split pea soup in the refrigerator overnight.

Slow Cooker Split Pea Soup | Easy, protein-packed, and delicious! www.asweetpeachef.com

3 MORE HEALTHY SLOW COOKER SOUP RECIPES

If this slow cooker split pea soup made you excited about slow cooker soups, I have 3 more healthy slow cooker recipes that are just as good as this split peas soup. Learn more about them and get your slow cooker ready for more deliciousness.

SLOW COOKER CHICKEN TORTILLA SOUP

This Slow Cooker Chicken Tortilla Soup is healthy, hearty, and flavorful. The soup is also comforting and perfect for weeknight Winter dinners.

Slow Cooker Chicken Tortilla Soup | Yes, you can make chicken tortilla soup in a slow cooker!  Yes, you can make slow cooker chicken tortilla soup healthy!  Yes, it's amazingly easy AND delicious and it freezes well, too! | A Sweet Pea Chef

The Slow Cooker Chicken Tortilla Soup is made with fresh ingredients only which makes it more flavorful than usual and it is topped with cheese for even more flavor and texture. Get the recipe.

SLOW COOKER HOT AND SOUR SOUP

Another great slow cooker soup is this Slow Cooker Hot And Sour Soup that takes only 10 minutes to prep. The soup is healthy, clean, and totes delicious.

Slow Cooker Hot And Sour Soup | It takes just 10 minutes to prep this flavorful and healthy slow cooker hot and sour soup. With just 206 calories and only 14g of carbs per serving you can enjoy this comfort food without any guilt. | A Sweet Pea Chef

Only 206 calories per serving, 17 g of protein, and only 14 g of carbs in a bowl of yummy you can enjoy for lunch or a light dinner. Get the recipe.

CROCK POT CHICKEN ENCHILADA SOUP

If you love enchilada, this Crock Pot Chicken Enchilada Soup is for sure a soup you’ll love. A lot.

Crock Pot Chicken Enchilada Soup | Easy to make and perfect for a cold day! | A Sweet Pea Chef

Rich, savory, yummy but low-carb and healthy, the Crock Pot Chicken Enchilada Soup is a great way to enjoy enchiladas without feeling guilty or without compromising your healthy diet. Get the recipes.

Slow Cooker Split Pea Soup

This delicious slow cooker split pea soup requires just 5 minutes of prep time and contains 21 grams of fiber and almost 28 grams of protein in just one bowl!

16 oz dried split peas ((about 2 cups)) 1 1/2 lb ham bone 3 carrots, (diced) 1 yellow onion, (diced) 1 shallot, (diced) 2 stalks celery, (diced) 3 cloves garlic, (minced) 1 tsp dried thyme 1/2 tsp ground black pepper 1 bay leaf 6 cups low sodium chicken stock
In the bowl of a slow cooker, combine the split peas, carrots, yellow onion, shallot, celery, garlic, thyme, pepper, bay leaf, and chicken stock. Mix well. Add the ham bone on top and nestle into the contents of the slow cooker. Cover and cook on Low for 5-6 hours, or until ham is tender and easily pulls off the bone. Remove the ham and shred into bite-size pieces using two forks, then return the ham meat to the slow cooker, and discard the bone. Remove the bay leaf and serve.

This post contains affiliate links for products I use regularly and highly recommend.

The post Healthy Slow Cooker Split Pea Soup appeared first on A Sweet Pea Chef.

Ambitious Kitchen
Curry Roasted Cauliflower Sweet Potato Salad (whole30, vegan & gluten free)
Vegan and gluten free curry roasted cauliflower sweet potato salad with a creamy curry tahini dressing. This salad is everything you could ever want. Easy to make, packed with veggies and absolutely addicting!

Vegan and gluten free curry roasted cauliflower sweet potato salad with a creamy curry tahini dressing. This salad is everything you could ever want. Easy to make, packed with veggies and absolutely addicting! Remember that unbelievable delicious chickpea broccoli salad from last year? This recipe might just top that one. SERIOUSLY, IT’S THAT GOOD. And [...]

The post Curry Roasted Cauliflower Sweet Potato Salad (whole30, vegan & gluten free) appeared first on Ambitious Kitchen.