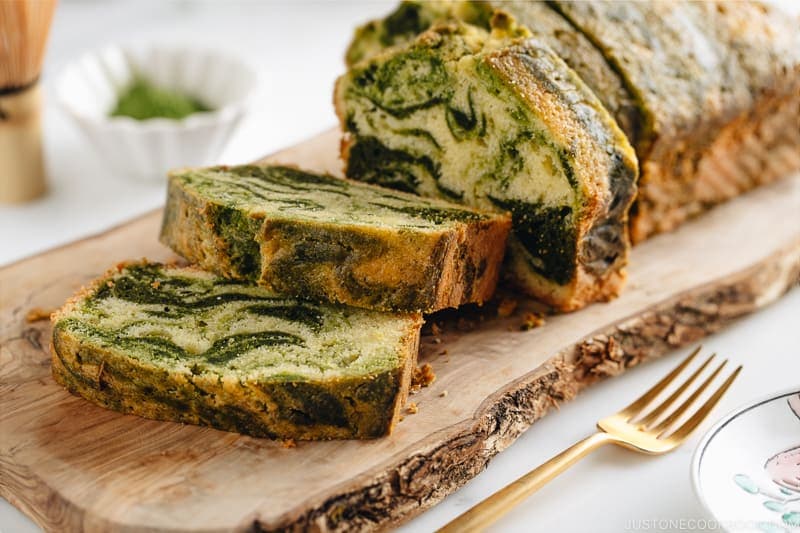
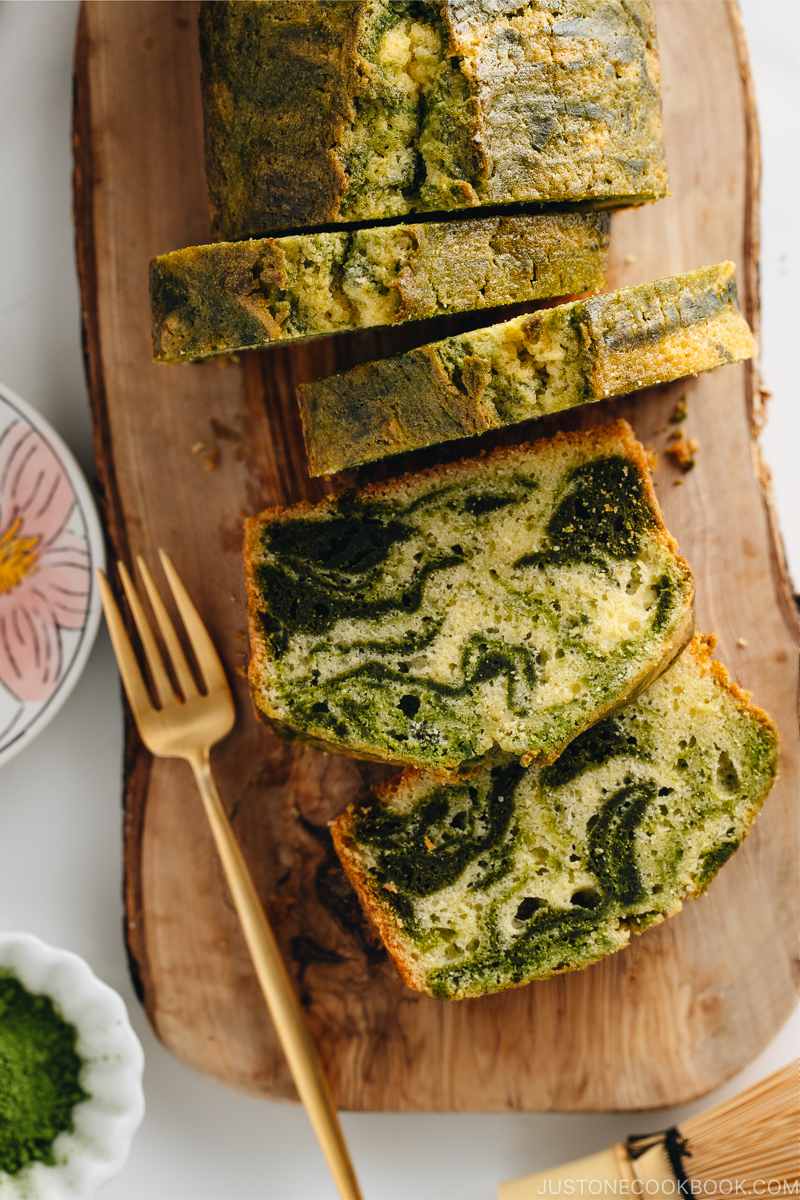
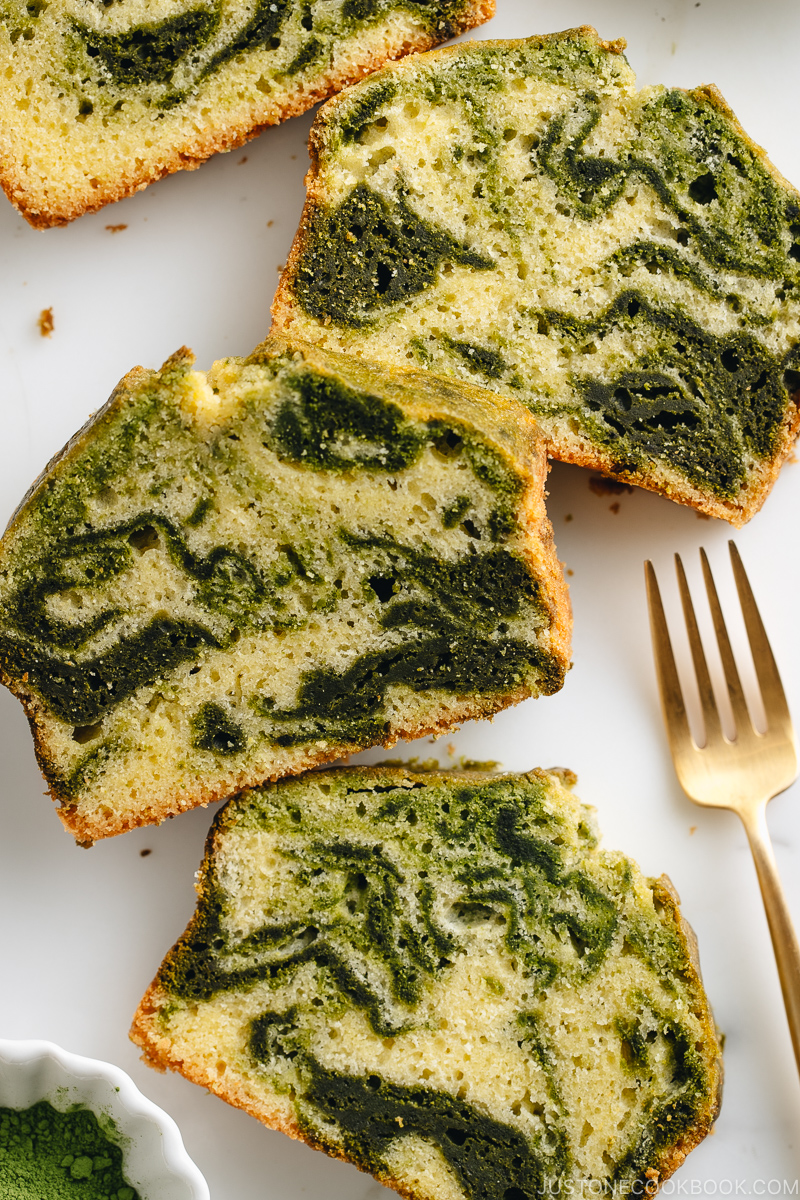
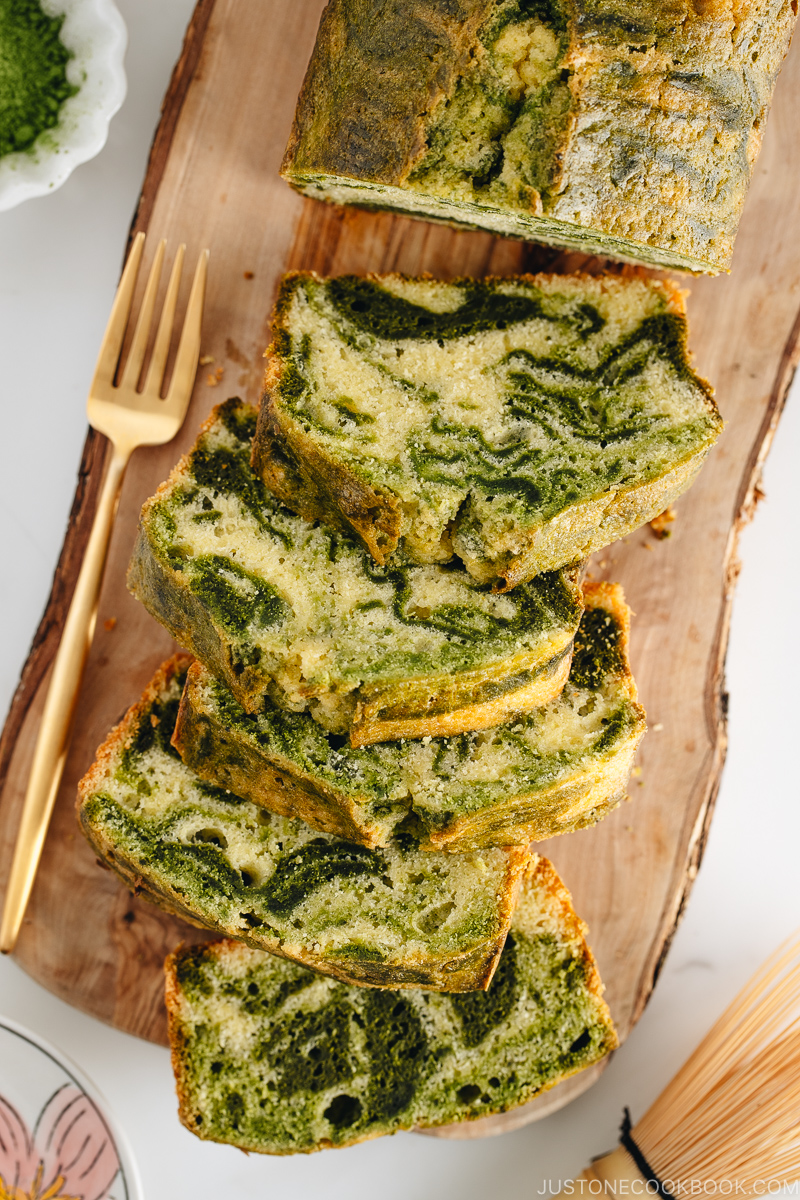
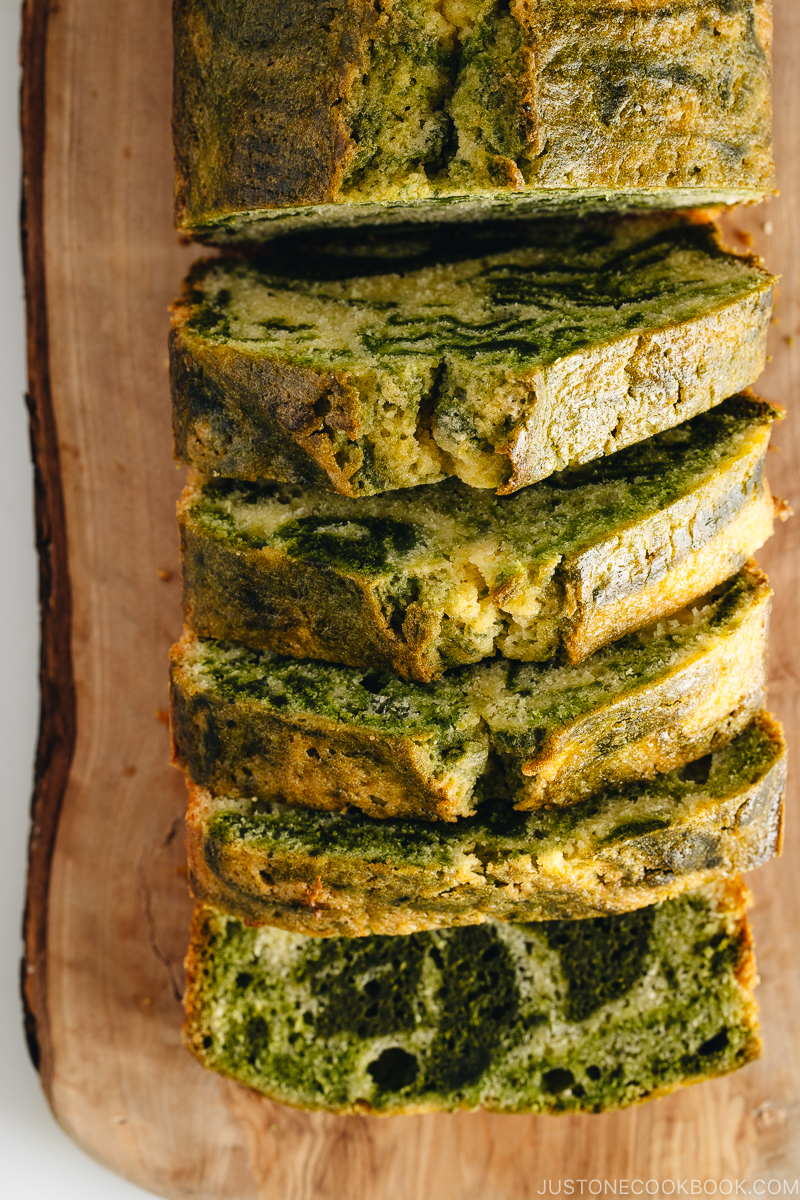
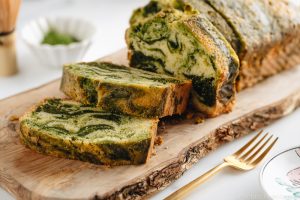
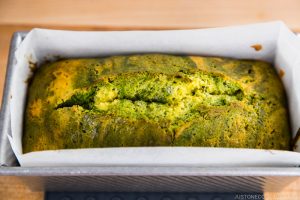
Rustic and delectable, with its rich green tea swirls, this buttery Matcha Marble Pound Cake perfectly accompanies that afternoon cup of coffee or tea enjoyed with friends.
Do you have a good pound cake recipe in your repertoire that you gift to a friend or bring to a gathering? Today, I’ll show you how to make one of my favorites – Matcha Marble Pound Cake (抹茶マーブルパウンドケーキ). It’s buttery, tender and bursting with a unique green tea flavor – plus the striking emerald swirls make it feel like a luscious, special-occasion treat.
Whether you’re making it for a Sunday afternoon treat or to take to a party, this Japanese-inspired pound cake is going to be your new keeper!
Matcha for Pastries & Baked Goods
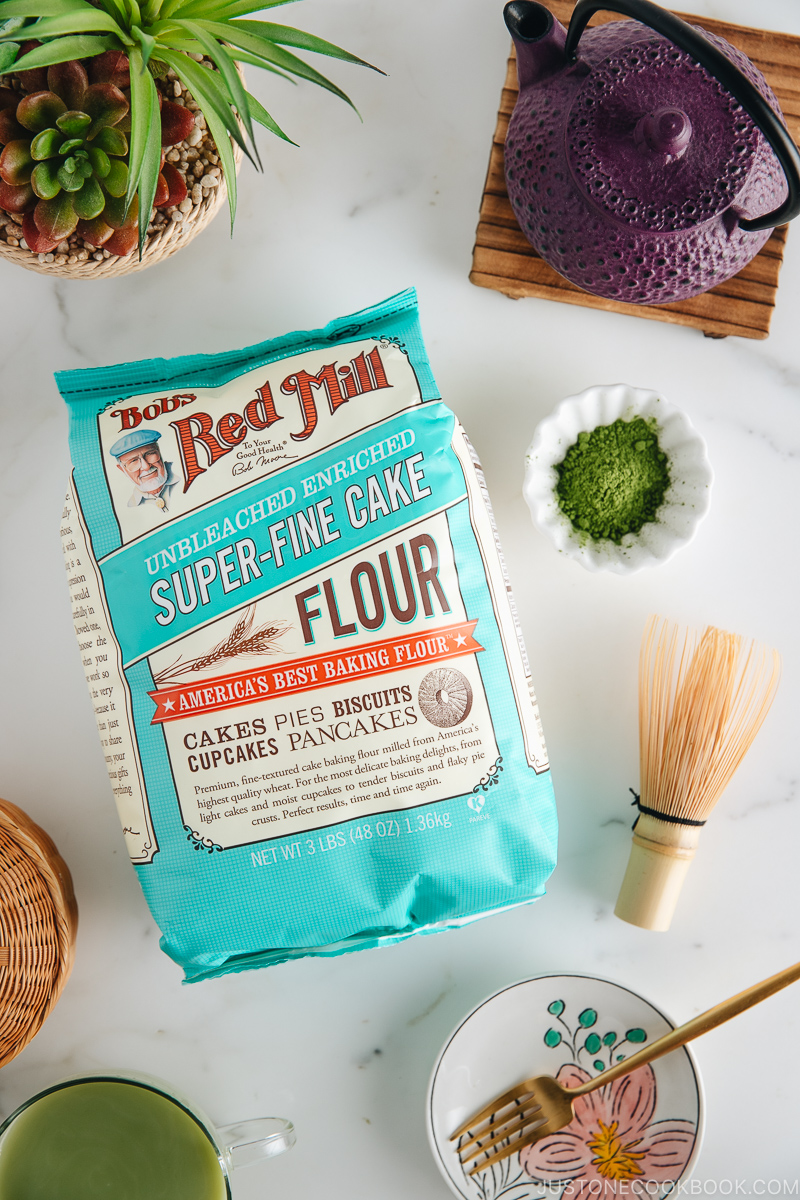
Matcha (抹茶) is literally powdered green tea, made of top quality tea leaves that are covered before picking, then stone-ground into a delicate fine powder.
With its earthy, slightly bitter and vanilla undertone, matcha has been used as a mainstream key flavoring in making all kinds of sweets, pastries, and baked goods in Japan. I personally love the flavor of matcha. It’s especially great in baked goods as it keeps the flavor from tasting too sweet. Another beauty of baking with matcha? The bright green hue it lends to the final good that is sure to make an impression.
There are various grades of matcha, sometimes labeled as “culinary-grade” and “ceremonial-grade”, which have a slightly different flavor profile. For making desserts and baking, you can go for “culinary-grade” but the color of green will not be as beautiful as “ceremonial-grade”.
Substitute Idea
If you do not like matcha or do not want to use it, you can substitute with pure cocoa powder in this recipe.
What should I look for when purchasing Matcha?
When buying matcha powder, the first quality to look for is its color. Matcha comes in a vibrant bright green, not yellowish or brownish green. Sugar and natural flavorings should not be included in the ingredients. You should also look for the country of origin for any matcha product. And remember to check the expiration date.
As matcha should be consumed within 2-3 weeks after opening, you should get a package that contains 1 oz (30g), which is a standard matcha size in Japan. Do not buy a big bag of matcha even though it seems like a “good deal”.
Where to Get Matcha
- Amazon: Maeda-en ($11; great quality for this price range), Naoki Matcha ($23; used in this recipe)
- Japanese grocery stores: Nijiya Market, Mitsuwa Market, Marukai Market, etc
Use Cake Flour for Matcha Marble Pound Cake
Many recipes ask for all-purpose flour when making pound cake, but in Japan, cake flour is always used to make a pound cake. It makes the pound cake extra tender.
To achieve the perfect texture for the pound cake, I used Super-Fine Unbleached Cake Flour from Bob’s Red Mill®. Because it is sifted to a very fine texture, the cake flour is fantastic for all sorts of cakes. You should be able to find this cake flour at any major grocery stores. Alternatively, you can also buy it on Amazon.

How to Create the Marble Effect for Pound Cake
There are two ways to make a marble effect:
- Make the swirl with the green and yellow batter inside the cake pan.
- Make the swirl with the green and yellow batter in the bowl and then transfer to the cake pan.
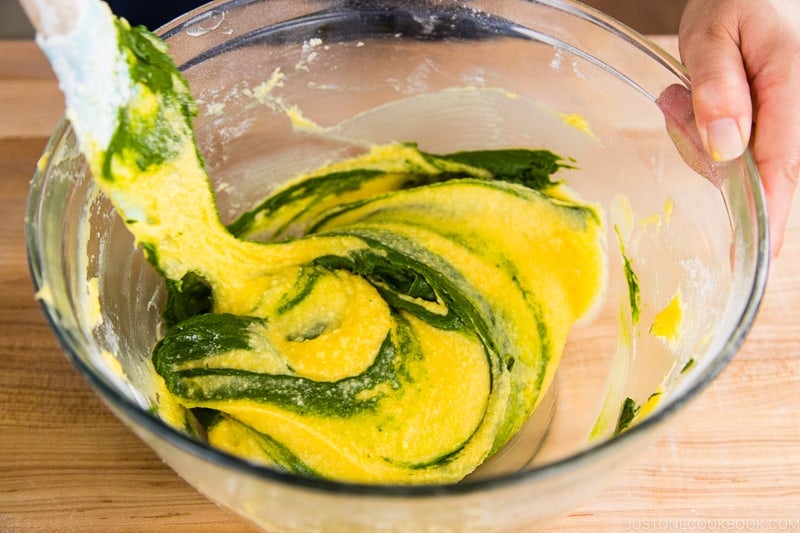
I personally prefer the second method because I can see how the two colors are combined before pouring into the pan. With this approach, I feel that the swirls look more dynamic and you can control the balance of the colors.
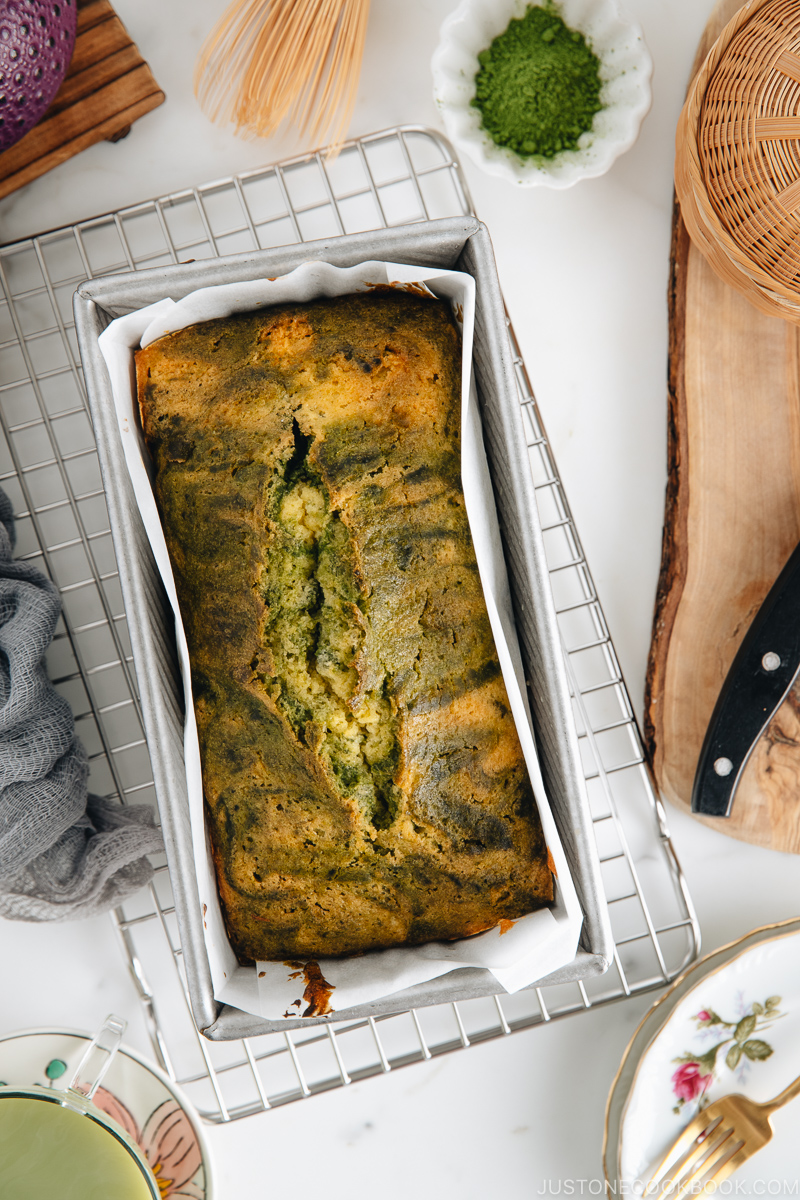
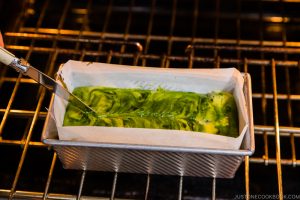
The Crack on The Pound Cake
Did you know the pound cake is supposed to crack on the top? Pound cakes are denser than most cakes. The exterior of the cake starts to bake first in the oven, and as the heat that is released from the still-baking batter reaches the center of the cake, it needs to expand through the top of the cake since all sides have set. So a pound cake is defined by the crack which gives it a rustic appearance. However, the crack doesn’t usually appear perfectly centered in the cake.
If you wish to achieve a perfectly cracked pound cake where the rupture sets right in the middle, there are two tricks you can do:
Trick 1: After 12-15 minutes into baking, insert a knife into the top of the cake batter in the pan and score a straight line. Do it quickly so you won’t lose the oven heat.
Trick 2: Before putting the cake pan into the oven, cut a very thin strip of cold butter and lay it on top of the cake batter. Or put soften butter into a plastic bag and squeeze out from a small tip to create a line on the cake batter.
See this image if you need a visual guide. I use Trick 1 as it’s easy to do, but both tricks work beautifully. Since pound cakes are supposed to crack, it’s nice to know how to control the cracking so you get the best looking pound cake possible.
2 Most Important Tips to Make Delicious Matcha Marble Pound Cake
These two tips are important to make sure that the pound cake rises properly and the cake won’t end up with a tough texture.
Tip 1: Cream the Room Temperature Butter
It’s very important that your butter is at room temperature before you start. Beat the butter until it is light and fluffy and lots of little tails foam around the beaters, about 1-2 minutes.
Add the sugar to the whipped butter and beat thoroughly about 3-5 minutes. The sharp sugar grains cut through the butter and create tiny air pockets that aerate the batter and cause leavening. The mixture should be creamy but grainy.
Tip 2: Slowly Add Room Temperature Egg to the Creamed Butter
Again, it’s also important that all the eggs are at room temperature. If you forget to take out the eggs from the refrigerator ahead of time, you can submerge the cold eggs in warm (body temperature) water for 10 minutes.
To achieve a smooth batter (not a curdled mixture), add in a very small amount (1 Tbsp) of the beaten egg in the mixture and beat well after each addition. The eggs contain water and the yolks and the butter are fats. Remember, oil and water will not mix without an emulsifier (in this case, the yolks), which suspends fat molecules in water making a smooth mixture.
If there is a slightly curdled appearance to the batter after adding the eggs, don’t worry. The emulsification is usually complete enough that the batter will become smooth. The addition of flour helps as it absorbs some of the excess water.
I hope you enjoy this Matcha Marble Pound Cake recipe as much as my family does! It also makes the most gorgeous edible gift if you are thinking to make someone smile today.
Sign up for the free Just One Cookbook newsletter delivered to your inbox! And stay in touch with me on Facebook, Pinterest, YouTube, and Instagram for all the latest updates.
Matcha Marble Pound Cake
Rustic and delectable, with its rich green tea swirls, this buttery Matcha Marble Pound Cake perfectly accompanies that afternoon cup of coffee or tea enjoyed with friends.
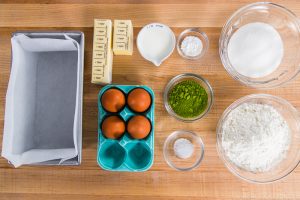
- 160 g unsalted butter ((1 ½ stick) (at room temperature))
- 160 g sugar ((¾ cup))
- 4 large eggs
- 60 ml milk ((¼ cup))
- 20 g matcha (green tea powder) ((1 Tbsp matcha = 6 g))
- 200 g cake flour ((1 ½ cup))
- 1 tsp baking powder
- ¼ tsp salt (kosher or sea salt; use half if using table salt)
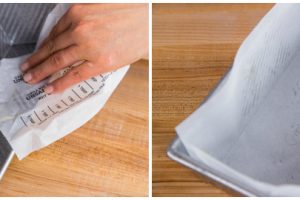
- Gather all the ingredients. Make sure the butter, eggs, and milk are all at room temperature. It’s important! Center a rack in the oven and preheat the oven to 350 ºF (180 ºC).
-
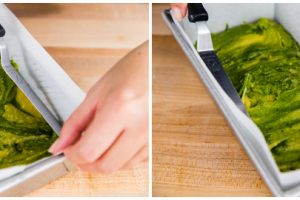
I use the leftover butter on the butter wrapping paper to grease the pan. Then place the parchment paper inside the pan (paper will stick to the butter).
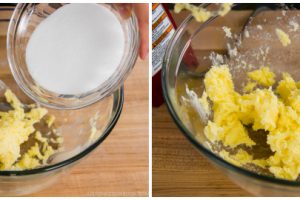
- Put the softened butter in a large bowl and beat it until it is light and fluffy and lots of little tails foam around the beaters, about 1-2 minutes.
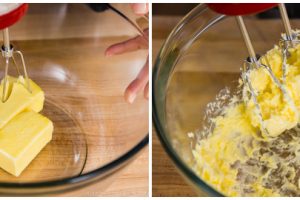
- Add the sugar to the whipped butter and beat thoroughly, about 5 minutes. The sharp sugar grains cut through the butter and create the tiny air pockets that aerate the batter and cause leavening. The mixture should be creamy but grainy.
- Crack the eggs in a small bowl and whisk well.
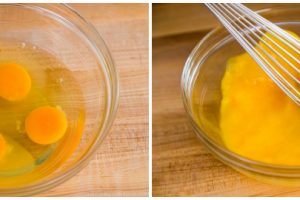
- IMPORTANT: To achieve a smooth mixture (not a curdled mixture), add in a very small amount (1 Tbsp) of the whisked egg in the mixture and beat well after each addition. TIP: The eggs contain water and the yolks and the butter are fats. Remember, oil and water will not mix without an emulsifier (in this case, the yolks), which suspends fat molecules in water making a smooth mixture.
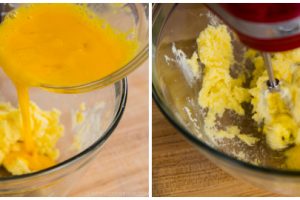
- TIP: If there is a slightly curdled appearance to the batter after adding the eggs, don’t worry. The emulsification is usually complete enough that the batter will become smooth with the addition of flour. The flour helps absorb some of the excess water.
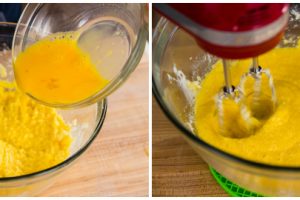
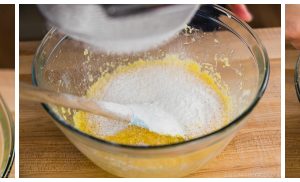
- Add the dry ingredients in 3 additions. In a fine-mesh strainer/sifter, add 200 g (1 ½ cup) cake flour, 1 tsp baking powder, and ¼ tsp salt in a fine-mesh strainer and sift a third of it over the egg mixture. Switch to a silicone spatula (or with mixer on the lowest speed), and mix by hand so you can scrape to the bottom of the bowl to get any little pockets of flour.
-
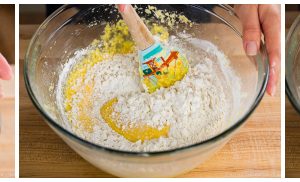
Now add another third of the dry ingredients and mix.
-
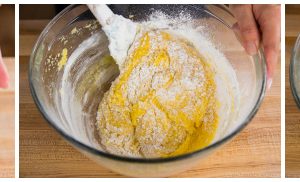
Stir in the last third addition. Mix only until the batter is smooth. Even though we are using a low protein cake flour, excess mixing will develop the gluten and create a tougher cake.
-
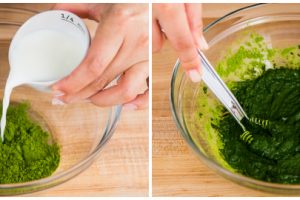
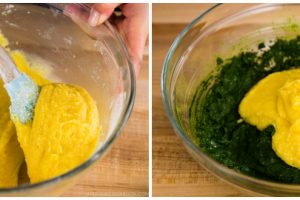
Heat 60 ml (¼ cup) milk in a microwave or saucepan until warm (roughly body temperature) and add to 20 g (3 Tbsp) matcha in the bowl. Whisk well till combined. TIP: Warm liquid is easier to blend matcha.
-
Take ⅓ of the batter and add to the bowl with matcha.
- Fold in just until the batter is smooth and homogenous. Do not overmix.
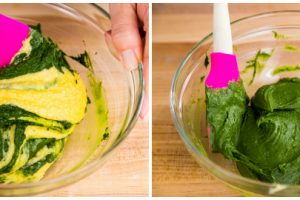
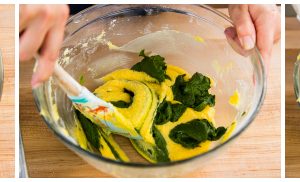
- Add 6-8 dollops of match batter into the original batter. Then fold the entire batter from the bottom of the bowl THREE (3) times.
-
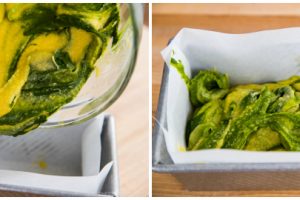
Pour the batter into the pan without mixing the batter, keeping the swirl effect. Tap the cake pan on the countertop once to release the trapped air.
-
Using the offset spatula, smooth out the surface without mixing too much.
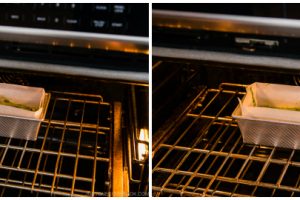
- Put the cake pan in the oven and lower the oven temperature to 340 ºF (170 ºC) oven for 50 to 60 minutes.
-
After 15 minutes, open the oven and quickly score the top of the cake with a sharp knife. Continue to bake.
- The cake is done when a wooden skewer inserted in the center of the cake comes out clean.
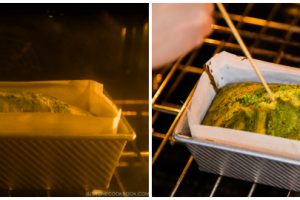
- Remove from the oven and allow the cake to rest in the pan for 15 minutes on a wire rack before taking the cake out of the pan to cool completely.
Japanese Ingredient Substitution: If you want to look for substitutes for Japanese condiments and ingredients, click here.
Recipe by Namiko Chen of Just One Cookbook. All images and content on this site are copyright protected. Please do not use my images without my permission. If you’d like to share this recipe on your site, please re-write the recipe in your own words and link to this post as the original source. Thank you.d link to this post as the original source. Thank you.