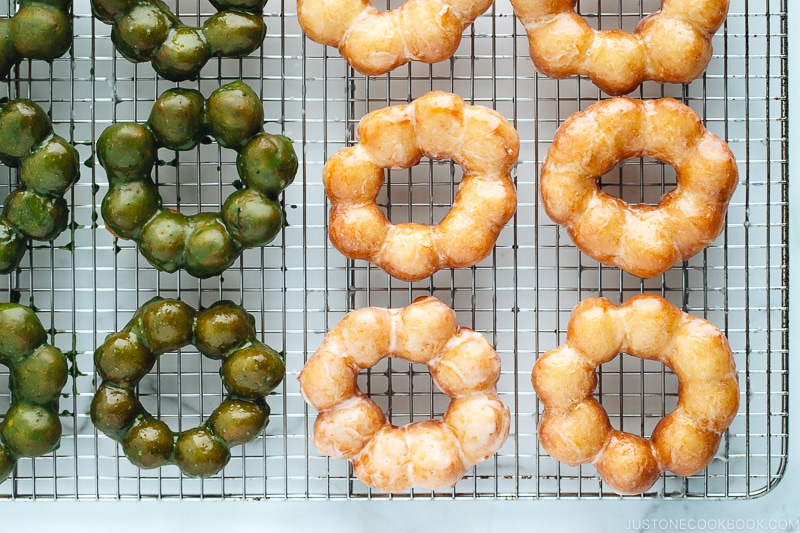
Here’s the copycat recipe for the wildly popular Pon de Ring donut from Mr. Donut in Japan! They are soft, airy, bouncy, and chewy all at the same time! It’s hard not to take a second look at these playful looking donuts, but what makes these babies a standout is its unique mochi-like texture. What’s your choice: classic glaze? matcha glaze? I’d say both.
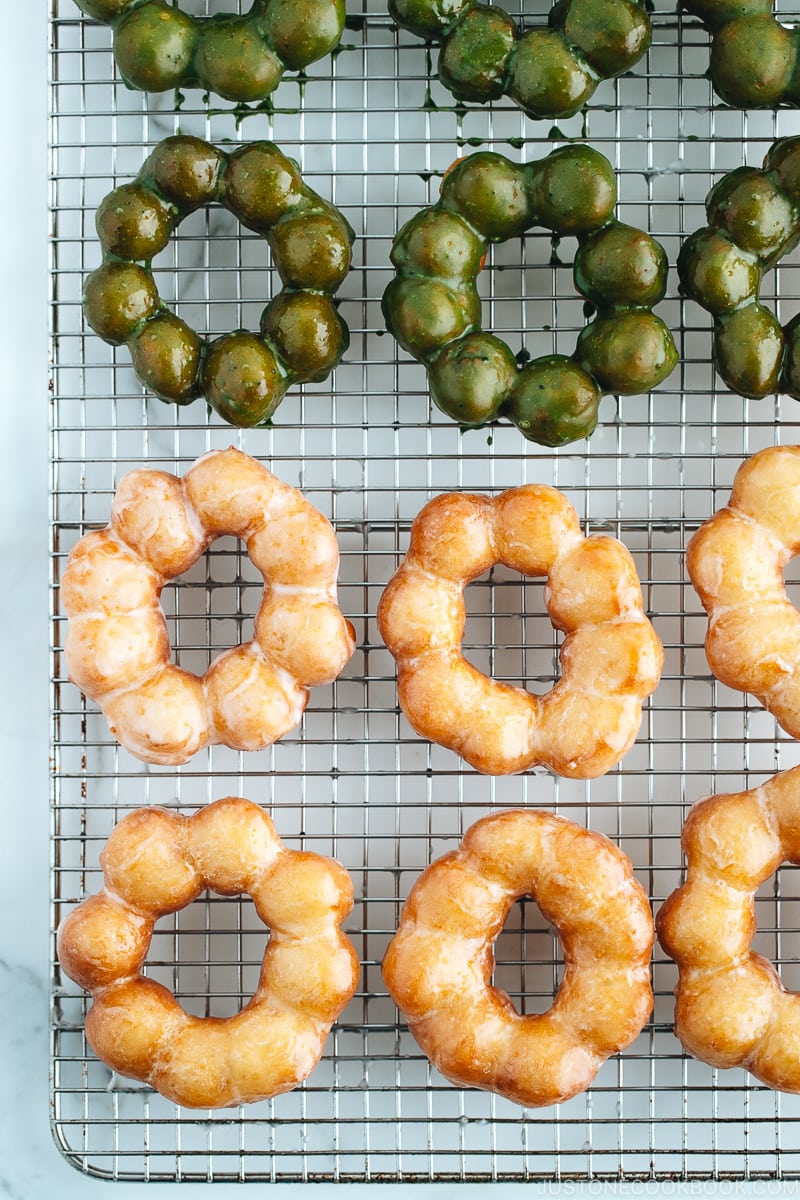
When we talk about Japanese donuts, Pon de Ring Donuts (ポンデリング) from Mr. Donuts instantly comes top in my mind. Have you seen them before? Yeah, I’m talking about these slightly quirky, ‘baby teething ring’ looking donuts that hit the sweet spot when snack time is calling.
Besides the funky outlook, Pon de Ring Donuts have a unique chewy (we call it the mochi-mochi) texture that set them apart from the regular donuts. I will say that they are GOOD. And dangerous. My family is crazy about these donuts whenever we’re in Japan, so I’ve challenged myself to make them at home!
What is Pon de Ring?
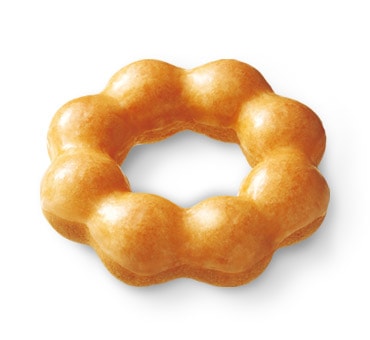
Pon de Ring (ポンデリング) is a Mister Donut’s signature donut in Japan, which is made of a connected circle of 8 dough balls. The name Pon de loosely came from Pao de Queijo, a popular savory Brazillian cheese ball made of tapioca flour.
In case you’re not familiar with Mister Donut, it is the largest donut chain in Japan with over 1,300 stores and across Asian countries such as Taiwan, South Korea, and Thailand. What’s really interesting is Mister Donuts originated from the US and opened their first store in Osaka in 1971. While Japan’s Mister Donuts was expanding over the past four decades, almost all the Mister Donuts in the US changed their name over to Dunkin Donuts due to mergers and acquisitions.
You can find the classic Pon de Ring flavors (below) at almost every single Mister Donut in Japan and they also release many seasonal and unique flavors:
- Pon de Ring (with simple glaze)
- Pon de Kokuto (dusted with brown sugar)
- Pon de Strawberry (with strawberry glaze)
- Pon de Angel (cream-filled)
- Pon de Chocola (made with chocolate dough)
- and more!
If you’re curious about all the current and past donut flavors at Mister Donut, you can check out this official page (it’s in Japanese, but use Chrome to translate).

Pon de Ring vs. Mochi Donut
Some of you may be wondering if Pon de Ring is (or is similar to) Mochi Donut. But I have to tell you Pon de Ring is NOT Mochi Donut and here’s why.
Pon de Ring
- Made of tapioca flour and wheat flour (officially mentioned by Mister Donut)
- Soft, airy, bouncy, and chewy
Mochi Donut
- Made of glutinous rice flour
- Dense and chewy
- Not sold in Japan, but pretty popular in the US
As you can see, the ingredients and texture of these two donuts are very different. If you have tried Pon de Ring in Japan, you would be able to tell them apart. Even though some of the mochi donuts might look like a copycat of Pon de Ring.
In Japanese, we describe Pon de Ring’s mochi-like texture as mochi-mochi (モチモチしてる) or mocchiri (モッチリしている) texture, but it does not always mean that the food being described is made of mochi. For example, bagels with a chewy texture can be described as it has a mochi-like texture.
If you have tried and loved the texture of mochi donuts, check out Mandy’s website, Lady and Pups for the recipe. I’ve made it before and they were excellent.

My Pon de Ring Making Journey (read, only if you’re interested)
Mr. JOC and I spent 2 weeks figuring out the Pon de Ring recipe, sometimes making donuts several times a day! Our focus from the beginning was to achieve the right airy but mochi-like texture of Pon de Ring. If we can’t make it the same due to lack of machinery or unnatural ingredients, we wanted to at least achieve the best possible quality.
Challenge #1: Choosing the right flour(s)
We started by working out the main ingredients – specifically flours. We tried the following flours in chronological order:
- glutinous rice flour only – It tasted like Mochi Donut, but not the same as Pon de Ring.
- glutinous rice flour + tofu (with different ratios) – You’ll find tons of Japanese “Pon de Ring-like (ポンデリング風)” recipes online using the glutinous rice flour and tofu combination, so I had to try at least once. Just like everyone claimed, this is almost Pon de Ring-like donuts but not quite right at all. Why tofu, you may ask? Any food made of rice (in this case, glutinous rice flour) becomes hard naturally when it’s cool. Adding tofu (and decreasing rice component in the mixture) helps the texture to stay a bit softer.
- tapioca flour only – After further research, I learned that Mister Donut officially said Pon de Ring contains tapioca flour. So I tried making the donut with 100% tapioca flour but couldn’t achieve the right texture.
- glutinous rice flour + tapioca flour (with 3 different ratios) – I thought I should combine glutinous rice flour and tapioca flour and see what happens. The glutinous rice made the donuts denser as expected from our trial #1 and #2.
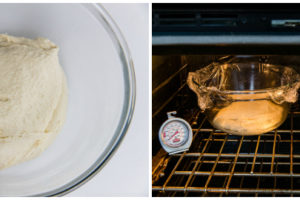
- all-purpose flour + tapioca flour (with different ratios) – We researched more. This time we found this YouTube video that allowed a camera to go into the Mister Donut’s kitchen. Mr. JOC saw a thermometer in the donut dough (see below) and he also remembered seeing a thermometer in the video clip that was looping inside Mister Donut in Japan. This was our turning point! We realized that they are a donut shop after all and also use flour and yeast for Pon de Ring, just like making other donuts! So we tested different ratios of flour and tapioca flour to find out the right texture.
- bread flour + tapioca flour – We also tried using bread flour (more gluten) to increase the bouncy texture. The donuts came out with a good mochi-mochi texture but they weren’t airy and light.
Challenge #2: Dealing with the sticky soft dough
In the YouTube video I mentioned earlier, you can see Mister Donut’s Pon de Ring dough is quite sticky and soft when kneading.
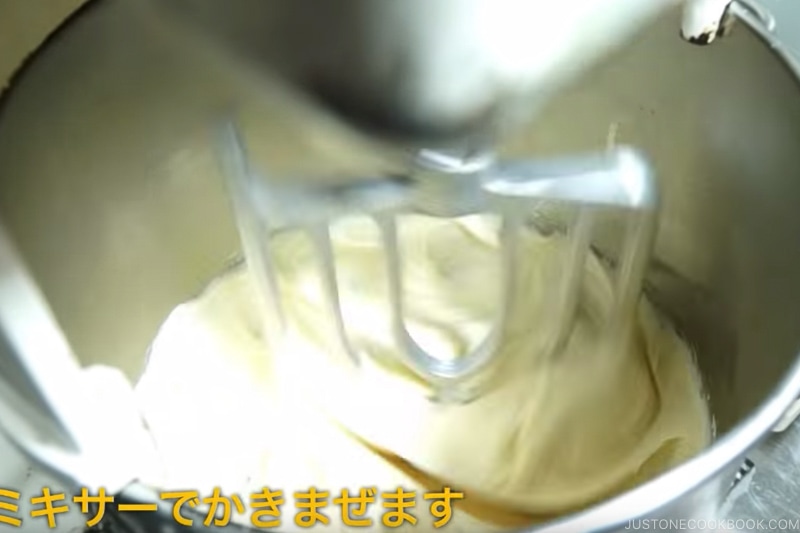
And the final stage of the dough (see below) is still pretty sticky and soft.
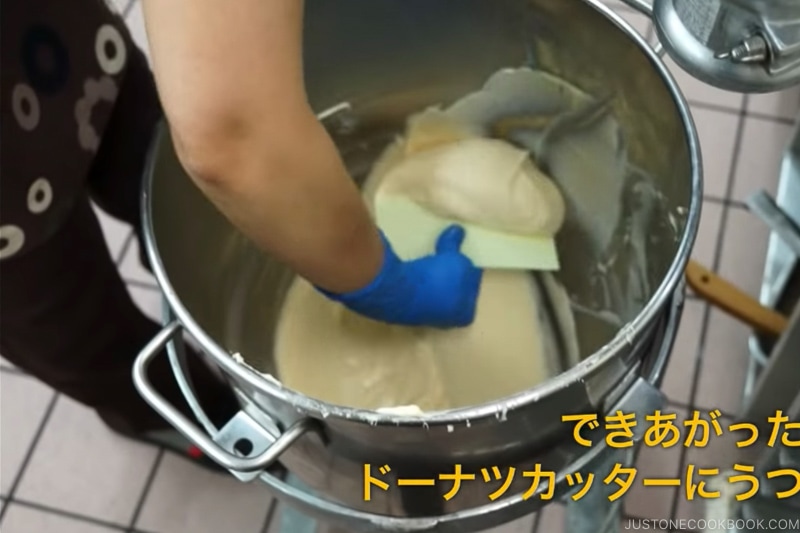
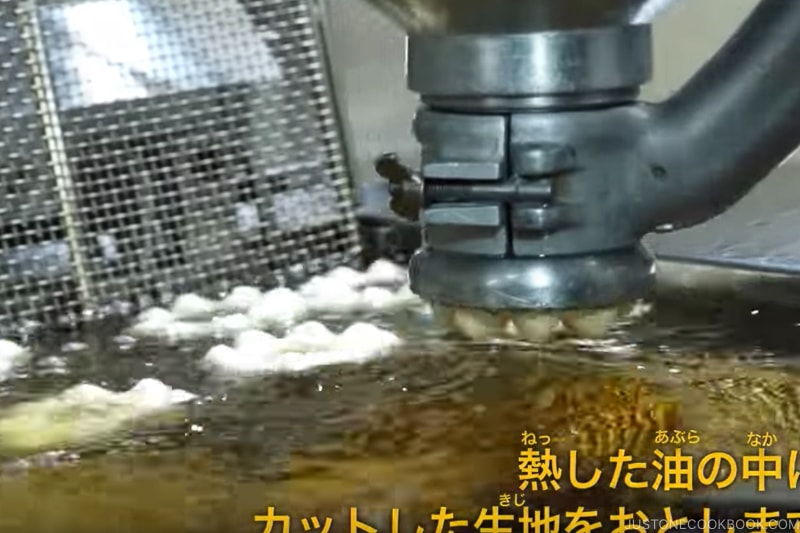
Mister Donut does not need to shape the dough into Pon de Ring shape by hands. The machine squeezes out the dough to create its funky ring shape and shot directly into the hot oil. Obviously, I don’t have that machine in the kitchen and subject to shaping the sticky dough with my hands.
I tested all-purpose flour and tapioca flour ratios to see if I can achieve the dough that’s easier to deal with. However, the ratio for tapioca flour needs to be higher and it yields a pretty soft dough. When you increase the flours, the final texture of the donuts become denser and cakey. So I just learned to deal with the soft and sticky dough and figured out some tricks to shape the connected bubbles ring of the donuts.
Key Ingredients & Tools for Making Pon de Ring
1. Tapioca Flour and All-Purpose Flour
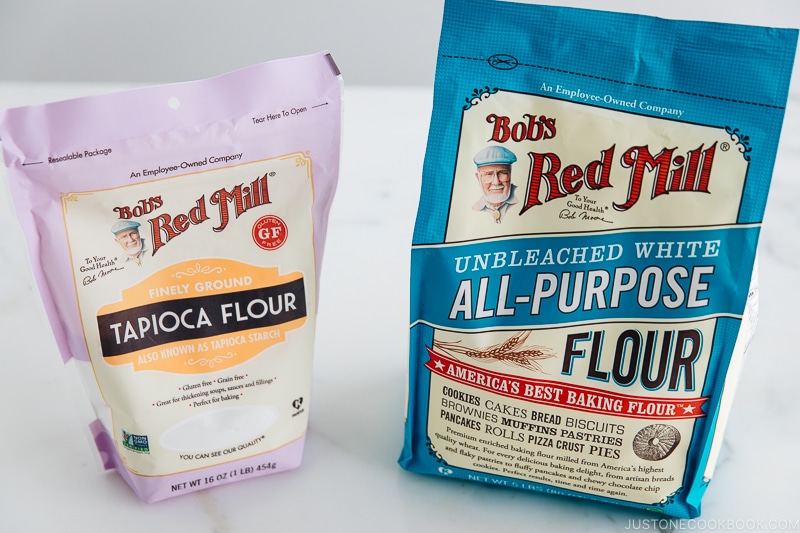
To achieve the perfectly airy, and mochi-like texture for the Pon de Ring donuts, I’ve partnered with Bob’s Red Mill® and used their Tapioca Flour and All-Purpose Flour.
When comes to baking and flour products, I highly recommend Bob’s Red Mill. The quality of the flours is unbeatable and I genuinely admire the company for their honest ingredients and the processes used in producing the products.
You should be able to find these flours at any major grocery stores. Alternatively, you can also buy on Amazon (Tapioca and AP Flour).
2. Instant Yeast
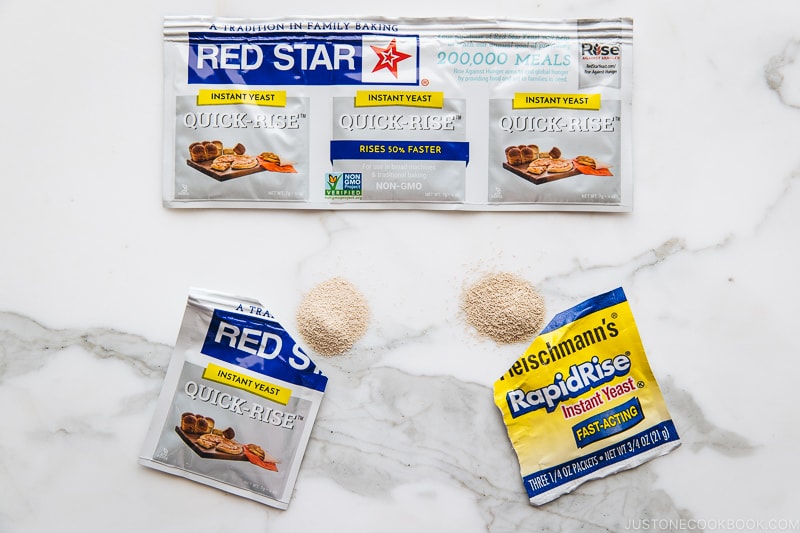
The two most common dry yeasts are Instant (Quick/Rapid-Rise) Yeast and Active Dry Yeast. You can read this detailed information about different types of yeasts.
The major difference is that active dry yeast always needs to be dissolved in warm liquids (water or milk) before using while instant yeast can be mixed right into the dough. For convenience, I like using Instant Yeast.
The two popular instant yeast brands are Red Star and Fleischmann’s and you can find them at grocery stores. I have tried both brands before, and for this recipe, I used Red Star Quick-Rise instant yeast to make my donuts.
After reading this page on instant yeast, I’ve decided to hydrate/dissolve my instant yeast (even though it’s not active dry yeast) in warm milk (110 ºF or 43 ºC – slightly warmer than body temperature) to give it a good start. It allows the yeast to become very active and ready to work in my dough.
3. Deep Frying Oil – Safflower Oil
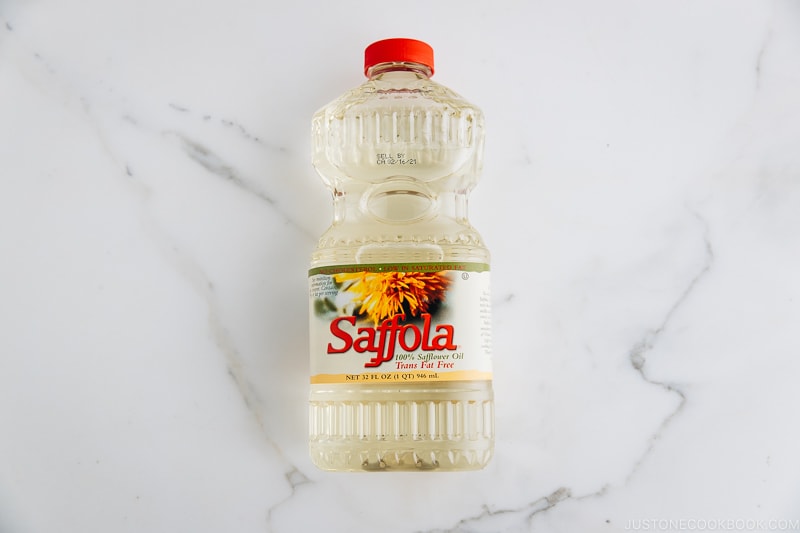
From Mister Donut website and other public articles online, we learned that their donuts are deep-fried in lard, and possibly a combination of other oils such as vegetable shortening. They are both saturated fats that stay solid at room temperature, which allows the donuts to stay crisp and not “wet” after deep frying.
As I wanted to avoid lard or vegetable shortening, we tried deep frying the donuts in our go-to oils for its neutral flavor and high smoke point – vegetable oil and canola oil. However, we did not like the vegetable oil taste that’s been left on the donuts.
After reading this article, we gave safflower oil a try and we agreed that it’s the best oil for frying donuts.
4. Pastry Card
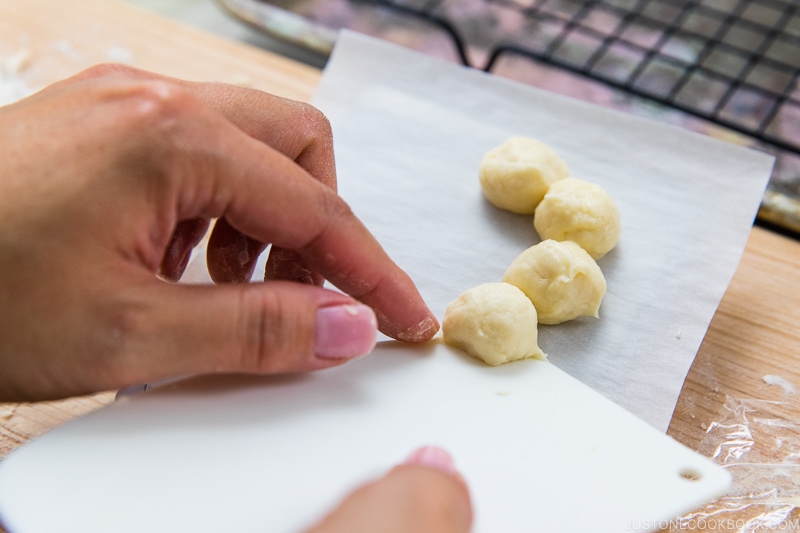
To work with the sticky dough, I learned that this thin plastic pastry card (shown above) became very handy! If I was only using my fingertips, the dough sticks and grows spike tips everywhere I touch and loses its round shape.
This pastry card also helps to divide, scrape, and transfer the mini dough balls, and I didn’t let go from my right hand (except for the time when I was rolling the dough ball with my palms).
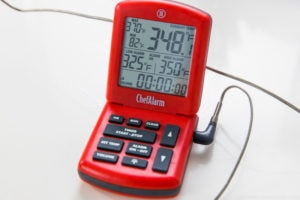
5. Thermaworks ChefAlarm
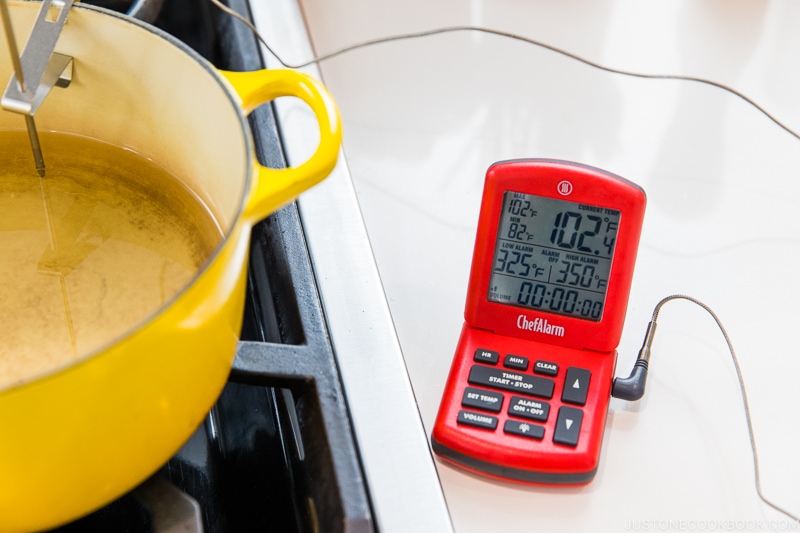
After deep-frying Japanese croquettes, Chicken Karaage, and Tempura for over 20 years at home, I can deep-fry comfortably without a thermometer.
On the contrary, Mr. JOC loves “high tech” gadgets, and set up my deep frying station with our Thermaworks ChefAlarm. I started deep frying and noticed that ChefAlarm warns me when the oil temperature exceeds the low and high temperatures. I didn’t realize how super convenient and helpful it was until I got busy juggling deep-frying and glazing the hot donuts at the same time.

5 Helpful Tips to Remember
- Knead the dough well to activate the gluten – I highly recommend using a stand mixer to knead the sticky dough. To achieve mochi-mochi texture, the strong gluten needs to be formed. We did try kneading without a stand mixer but the final texture of the donut was not optimal.
- Try not to add too much flour – With tapioca flour being the majority of the ingredients, the dough should be soft. To get the ultimate texture for Pon de Ring, try not to add additional flours. I prepared 2 tablespoons of additional all-purpose flour to dust my work surface and my hands. However, I didn’t finish using all the extra flour.
- Don’t deep fry at high temperature – The optimal deep-frying temperature for Pon de Ring donuts is between 325 ºF (168 ºC) and 350 ºF (177 ºC). When the oil is too hot, the donuts will turn brown too soon and the texture of the donut skin gets too crispy. When the oil temperature is too low, the donuts don’t look appetizing and absorbs too much oil.
- Use a paper towel to drain oil – From my countless recipe testings, I learned that draining oil on sheets of paper towel works better than on a wire rack. After draining, transfer the donuts to a wire rack to cool and glaze.
- Put glaze when donuts are still hot – You MUST glaze your Pon de Ring donuts while they are hot! The remaining heat from the donut spreads the glaze beautifully when you flip over. Don’t wait until you finish deep frying all the donuts. Multitask deep frying and glazing at the same time could be hectic so find a partner for this project.
For the donut fans and baking aficionados out there, I hope you would try your hand at Pon de Ring. The donut making was no doubt an endeavor, but we were glad that we perfected the recipe and the reward paid off. Otherwise, add the Pon de Ring donuts to your list of must-eats when you visit Japan.
Japanese Ingredient Substitution: If you want to look for substitutes for Japanese condiments and ingredients, click here.
Sign up for the free Just One Cookbook newsletter delivered to your inbox! And stay in touch with me on Facebook, Pinterest, YouTube, and Instagram for all the latest updates.
Pon de Ring Donut

Here’s the copycat recipe for the popular Pon de Ring donut from Mr. Donut in Japan! They are soft, airy, bouncy, and chewy all at the same time! The mochi-like texture is unique and different from traditional donuts. Enjoy them with classic glaze or matcha glaze.
- 85 g unsalted butter ((6 Tbsp))
- 2 large eggs ((roughly 100 g))
- 240 ml whole milk ((1 cup; Heat to 110 ºF or 43 ºC – slightly warmer than body temperature; See Notes))
- 1 tsp instant yeast
- 50 g granulated sugar ((¼ cup))
- 1 tsp pure vanilla extract
- 320 g tapioca flour ((2 ½ cups + 2.5 Tbsp; See Notes))
- 180 g all-purpose flour ((1 ¼ cups + 1 Tbsp; See Notes))
- ½ tsp salt (kosher or sea salt; use half if using table salt)
- 1000 ml safflower oil ((1 QT or 4 cups for deep frying; See Notes))
Glaze
- 240 g confectioners’ sugar ((2 cups))
- 60 ml whole milk ((4 Tbsp or ¼ cup))
- ½ tsp pure vanilla extract
- 1 Tbsp matcha green tea powder ((6 g; optional))
-
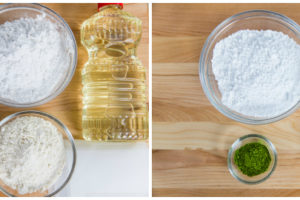
Gather all the ingredients and measure everything ahead of time. I've used a kitchen scale to measure my flours. Prepare 24 sheets of 4” x 4” (10 x 10 cm) parchment paper.
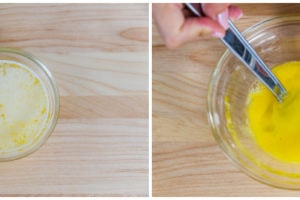
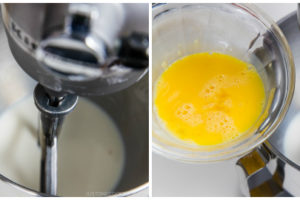
- Melt the butter in the microwave or in a saucepan over the stove and let slightly cool. Crack 2 eggs in a bowl and beat them with a whisk. Set aside.
-
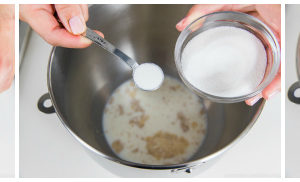
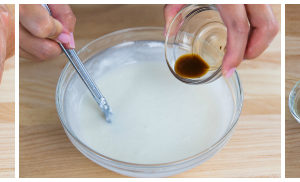
In the bowl of a stand mixer (or a large mixing bowl), combine whole milk (110 ºF or 43 ºC – slightly warmer than body temperature) and instant yeast, and then add ½ tsp sugar from the 50 g (¼ cup) sugar you prepared. Whisk the mixture well. Set aside for 5-10 minutes. NOTE: If you wonder why I hydrated instant yeast (even though it’s not Active Dry Yeast), please read the post.
-
Prepare a large mixing bowl and sift the tapioca flour and all-purpose flour through a fine-mesh sieve. Whisk to combine.
-
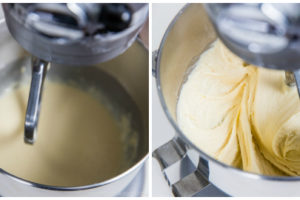
Set the stand mixer with a flat beater attachment. Add the rest of the sugar and beaten egg to the milk mixture.
-
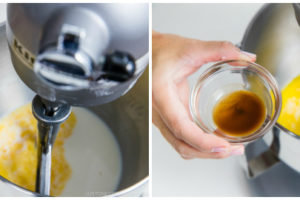
Add the melted butter and vanilla.
-
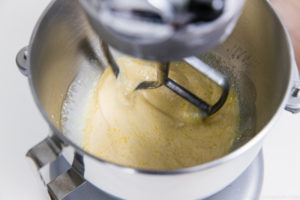
Beat on low speed for 1 minute until combined (Or, stir with a wooden spoon).
-
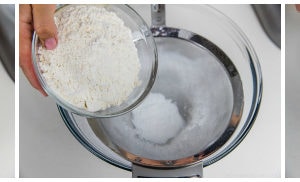
Add roughly 2 cups flour mixture and beat on low speed until well combined.
-
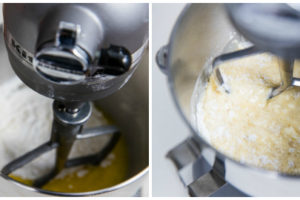
With the stand mixer running on low speed, add the remaining flour mixture one scoop at a time and salt. By the way, keep the mixing bowl that flours were in. We’ll use it after this step). The dough mixture has thickened.
-
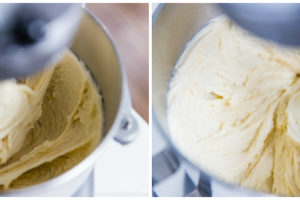
Now change to medium-high speed (Speed 6) and beat for 3-4 minutes, or until smooth and elastic. Note that this is a sticky dough, so do not add additional flours. Tip: Kneading develops the structure of the dough by folding and stretching strands of gluten. Hand Kneading: Because of the nature of this dough, it’s hard to knead the dough by hand. You can add 1-2 tablespoons of flour if it’s too wet to handle, but do not add any more flour than that. Hand-knead for 5-6 minutes.
-
Now bring back the large mixing bowl (that has flours in it earlier). Add a little bit of oil and grease it with a paper towel.
- When you remove the flat beater from the stand mixer, you can see the stretchy, sticky dough.
-
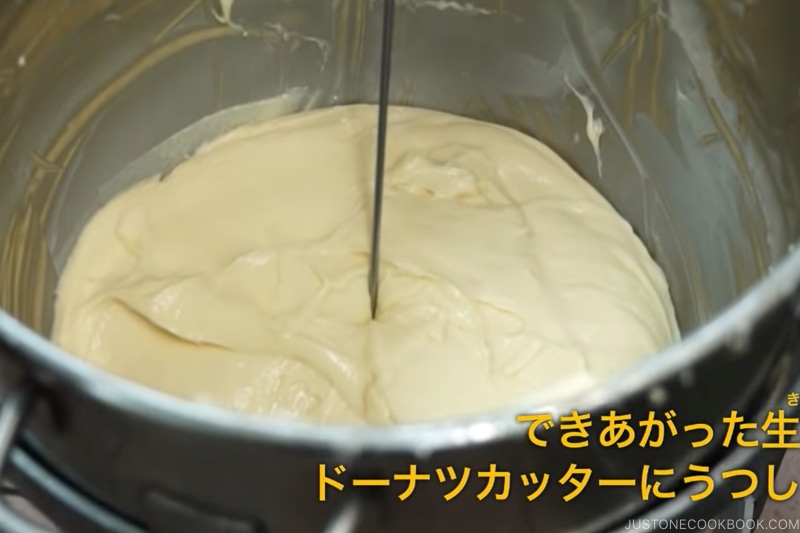
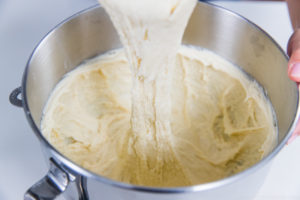
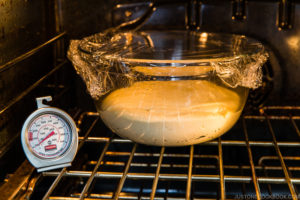
Using the pastry card, transfer the dough into the greased bowl. Try to scrape down the dough from the sides, collect the dough into one big mass, then gently scrape it down to the greased bowl. The key here is to make sure the surface of the dough is mostly smooth (so that it will rise nicely). Loosely cover the bowl with plastic wrap (or a shower cap) and place it in a warm environment to rise until doubled, about 70-80 minutes. I use my “Proof” oven setting at 100 ºF (38 ºC). I put warm/hot water (away from the dough) to keep the inside of the oven moist. Tip: Make sure the proof temperature is not too high. If the dough gets too warm, it will ferment too quickly (or over ferment) and impair the flavor.
-
After 70-80 minutes, pour the oil into the Dutch oven. If you have a thermometer, set up. I used Thermowork’s ChefAlarm. A probe clip attaches the probe right to the side of the dutch oven holding it securely in place, keeping it from flopping it around. Set your alarm thermometer to 325 ºF (168 ºC) as the lowest and 350 ºF (177 ºC) as the highest.

- In a medium bowl, combine all the glaze ingredients except for matcha powder. Whisk really well to make sure there are no lumps of confectioners’ sugar. Keep the matcha powder on the side for now.
-
The picture below shows the dough doubled in size, after 75 minutes of proofing.
-
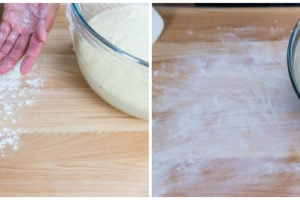
Prepare 1-2 Tbsp of all-purpose flour and put it at the corner of your work surface. Lightly flour the work surface and your hands.
-
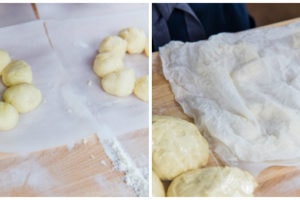
Using the pastry card, remove the dough from the bowl and transfer to the lightly floured surface. Sprinkle some flour on top of the dough and press the dough down with your hands to release any air bubbles.
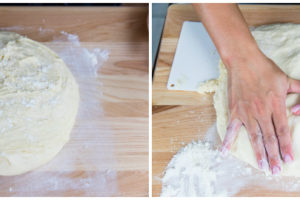
- With the pastry card, shape the dough into a rough log shape and cut it in half.
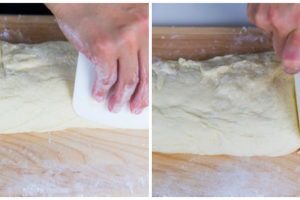
- Shape the half into a ball and cover with plastic wrap. Cut the other half into 4 pieces, and roll them into 4 balls. Keep 3 dough balls under the plastic wrap.

-
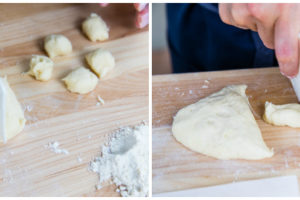
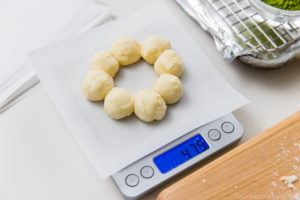
Each dough balls will make roughly 3 Pon de Ring donuts. Using the pastry card, cut the dough into small balls. Each ball size should be ½ – ¾ inches (1.5 cm) in length and width. Or if you have a digital kitchen scale, each ball should be 5 grams.
-
Roll the ball between your hands, but try not to spend too much time. Over-kneaded dough often ends up with hard crust and a dense, dry interior. Since the dough is very sticky, this pastry card is very helpful.
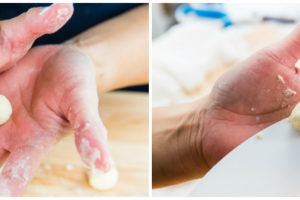
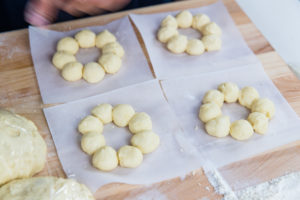
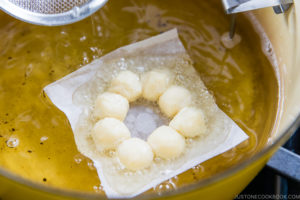
- Use the pastry card to transfer each ball to a 4” x 4” parchment paper. You will need 8 balls to make a Pon de Ring shape.

- The total weight of Pon de Ring should be roughly 40 grams (5 g each ball).
- Continue with the rest of the dough.
-
To make sure the balls won’t separate in the hot oil, use a pastry brush to dab water on the dough where balls attach to neighboring ones. Cover the donuts with a damp paper towel or light cloth (make sure it’s not heavy) and allow to rest for 15-20 minutes. Continue with the rest of the dough. If you are taking a very long time (especially first time), it’s very helpful if you work with a partner so the dough won’t be over-proofed.
-
When you’re finishing up with the last batch of dough, start heating the oil to 350 ºF (177 ºC). Prepare the first baking sheet lined with a paper towel and second baking sheet lined with a parchment paper and put a wire rack on top.
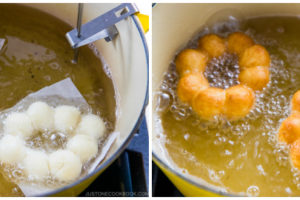
- Using your hands or fine-mesh skimmer (a kind that has a flat mesh), submerge the donut into the oil.
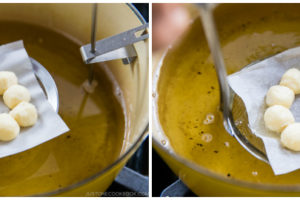
-
Let go of the donut and set the timer for 1 minute 15 seconds for the first side. Tip: Only add enough donuts for a 5-10 degree drop in temperature (I only add 2 donuts per batch). If the oil cools down too much, the donuts won’t fry properly.
-
When the 1 minute 15 seconds timer beeps, flip the donuts quickly using chopsticks or tongs. Fry the second side for 45 seconds.
-
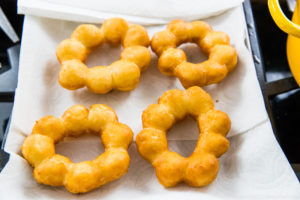
When the 45-second timer beeps, scoop up the donut and drain well. Then transfer to the paper towel to drain excess oil. Repeat with remaining donuts, then turn off the heat.
- While the donuts are still hot, dip each donut into the glaze, making sure to coat well.
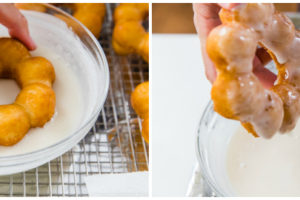
-
Place it onto the prepared rack to allow excess glaze drip down. The glaze will set and harden on the donuts after 30 minutes.

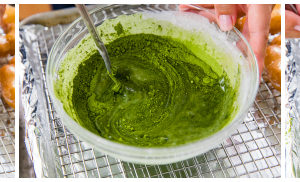
- After making 12 glazed donuts, you can add the matcha to the leftover glaze. Whisk really well to combine.
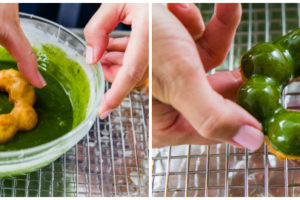
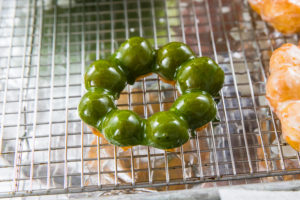
- Dip each donut into the matcha glaze, making sure to coat well. Place it onto the rack to allow excess glaze drip down. The glaze will set and harden on the donuts after 30 minutes
-
Just like any other deep-fried foods, it’s best to eat the donuts when they are warm. Enjoy!
To Store
- Enjoy the donuts on the same day. You can keep at room temperature for a day in an airtight container. Reheat in the microwave for 15-20 seconds before eating.
Whole Milk: Use whole milk for best result. I do not recommend low fat or skim milk.
Tapioca Flour: ¼ cup Bob’s Red Mill Tapioca Flour is 30 g.
All-Purpose Flour: ¼ cup Bob’s Red Mill AP Flour is 34 g.
Oil: Avoid using vegetable oil (read my post). Please adjust the amount of oil based on how wide/tall your pot is. My Dutch oven is 3.5 QT and I used 1 QT (1000 ml, 4 cups) of Sufflower Oil. The Dutch oven is heavy and thick, and it conducts and retains heat very efficiently. The high sides also help prevent splatters during frying. What to do with leftover oil? Please read this post.
Helpful Tools: Stand mixer, pastry card, kitchen scale, thermometer, Dutch oven or heavy bottomed pot. Please read the post.
Recipe by Namiko Chen of Just One Cookbook. All images and content on this site are copyright protected. Please do not use my images without my permission. If you’d like to share this recipe on your site, please re-write the recipe and link to this post as the original source. Thank you.