Thursday, 1 August 2019

Frozen Hot Chocolate

Missing hot chocolate when it’s hot outside? Solution: FROZEN hot chocolate! It’s an iced version of the drink that’s out of this world good.

Frozen hot chocolate

Oh boy, are we excited to share this one! I had never heard of frozen hot chocolate until Alex introduced me to the concept. Wait it’s hot chocolate, but it’s frozen? It seemed a little unnecessary to me. Then he made the recipe, and wowza, is this a fun summer drink! It’s iced and chocolate-y, a little like a milkshake but lighter and frothier. The smooth chocolate flavor goes down easy, and if you want to top it with homemade whipped cream? It’s a little creamy too. There’s a plant-based version of it too. Basically, this frozen hot chocolate is everything you need to beat the heat in these sweltering temps! But we’re planning to eat it all year round, because: look at it.

Blender with milkshake

How to make frozen hot chocolate

First off, what is frozen hot chocolate? Well, it’s everything the name implies. Take some hot chocolate and blend it with ice until it’s frothy. It’s basically like a caffeine-free frappacino, without the coffee flavor. (Ha!) This is our new favorite summer drink, and especially is a favorite of our 2 year old, Larson. He guzzled it down as an after dinner “treat”. (Whenever we say “Want a treat?” he is suddenly incredibly attentive!)

For Alex and my version of this frozen hot chocolate, of course we wanted to give it a healthy spin. Many recipes you’ll find online are very sugar forward, some calling for melted chocolate and boatload of sugar. So instead, we decided to start from our Homemade Hot Cocoa made of whole food ingredients: milk, cocoa powder, and maple syrup. You’ll make a base of this, and then mix it together with ice until a frothy, milkshake-like texture forms.

Here’s how to make frozen hot chocolate:

  • In a small saucepan, heat milk, cocoa powder, maple syrup, and vanilla until it just combines, then remove from the heat.
  • Add the remaining milk to cool the mixture.
  • Place the chocolate mixture in a blender and whiz until a frothy, milkshake-like texture forms.
Frozen hot chocolate

Serve with whipped cream?

Do you drink hot chocolate with whipped cream? I’m one of those people who never does: I find it’s way too sweet for me with a creamy dollop! The main reason we served this frozen hot chocolate with whipped cream was for the photograph: doesn’t it look lovely? (Ha.) While I typically would prefer serving without, we did find whipped cream added a nice creaminess when stirred into the frozen chocolate: so it actually does add a nice element if you’re looking for a decadent dessert.

There are a few different homemade whipped cream recipes that we’d recommend serving with this frozen hot chocolate:

  • Homemade Whipped Cream: a classic whipped cream made with heavy cream, sweetened with powdered sugar and flavored with vanilla.
  • Dairy Free Whipped Cream: Did you know you can make whipped cream using coconut milk? This version comes out thick and lightly coconut scented.
  • Yogurt Whipped Cream: this version uses equal parts yogurt and heavy cream for a healthy spin. It ends up with a tangy flair! While we typically think of this one with fruit desserts, you could get away with it here for a lower calorie version too!
Frozen hot chocolate

Dairy free frozen hot chocolate, too

If you’d like a plant based version of this frozen hot chocolate: we’ve got your back! For a vegan and dairy free version, simply use your favorite version of dairy-free milk. We’d recommend a thicker milk like coconut milk or some brands of soy milk. We’ve found that almond milk can be a bit too watery: but if you eat vegan on a regular basis you probably know more than we do! Let us know what your favorite stand in for dairy milk is in the comments below.

And then of course, top it with our vegan whipped cream: or omit it altogether! It will still be a magnificent taste treat, we promise.

Summer drinks

Looking for more drink recipes?

Outside of this frozen hot chocolate recipe, here are a few more of our favorite drink recipes — including lots of frozen drinks for summer!

Frozen hot chocolate

This frozen hot chocolate recipe is…

Vegetarian and gluten-free. For dairy-free, vegan, and plant-based, use the vegan variation!

Print
Frozen hot chocolate

Frozen Hot Chocolate


1 Star2 Stars3 Stars4 Stars5 Stars (No Ratings Yet)

  • Author: Sonja Overhiser
  • Prep Time: 10 minutes
  • Cook Time: 0 minutes
  • Total Time: 10 minutes
  • Yield: 6 servings

Description

Missing hot chocolate when it’s hot outside? Solution: FROZEN hot chocolate! It’s an iced version of the drink that’s out of this world good.


Ingredients


Instructions

  1. In a saucepan over low heat, gently warm 1 cup milk, the cocoa powder, maple syrup, and vanilla and whisk until just combined: do not boil! Warm it just enough so that it combines, but not so much that it’s hot or boiling. Immediately remove from the heat. Pour the mixture into a liquid measuring cup and add the remaining 1 cup milk. (Here you can refrigerate until serving, or go directly into the next step.)
  2. If serving with whipped cream, prepare the Homemade whipped cream or vegan whipped cream.
  3. Place the chocolate mixture in a blender with the ice cubes. Blend until smooth. Serve in chilled glasses, topped with whipped cream if desired.

  • Category: Drink
  • Method: Blended
  • Cuisine: American

Keywords: Frozen hot chocolate, homemade whipped cream, Hot chocolate smoothie,

A Couple Cooks - Healthy, Whole Food, Vegetarian Recipes


* This article was originally published here

Simmered Koyadofu 高野豆腐の煮物

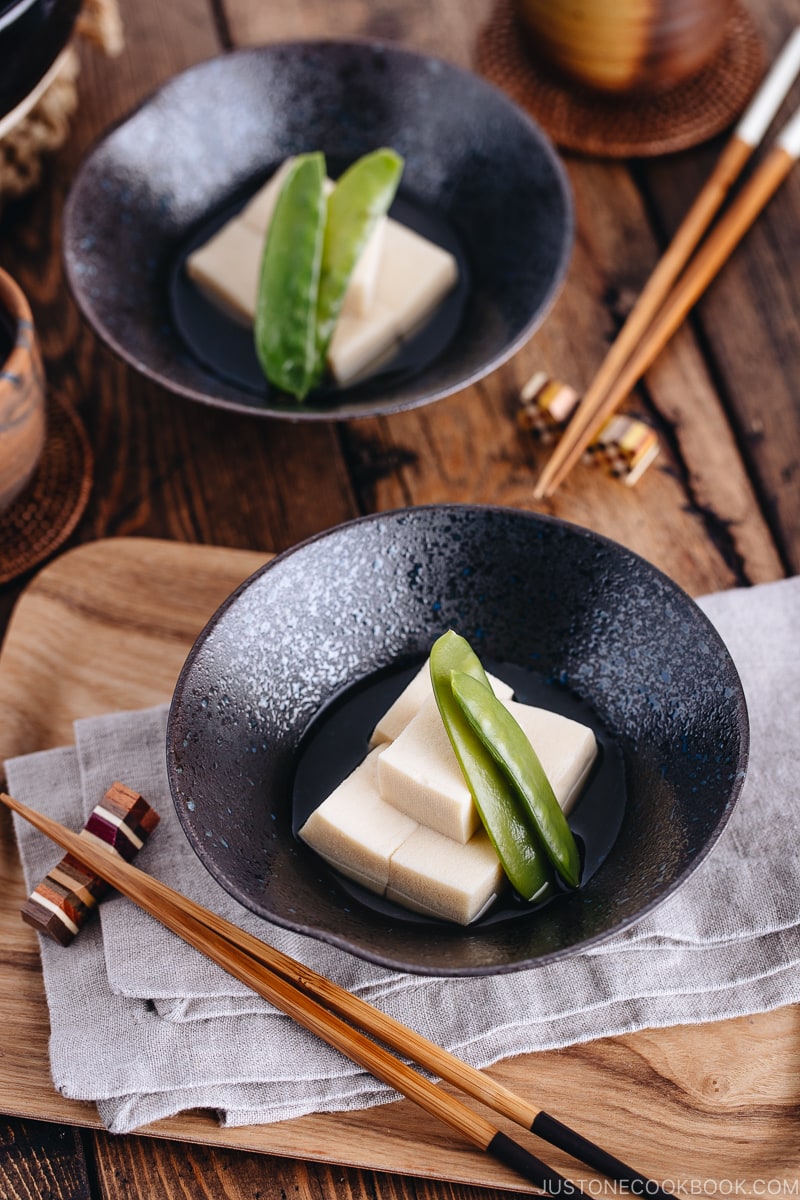
Simmered koyadofu with snow peas in a black ceramic bowl.

Made with freeze-dried tofu, this Simmered Koyadofu soaked in soy-dashi broth is a classic Japanese side dish to enjoy all year round. You can prepare ahead of time and serve it chilled, hot, or room temperature.

Simmered koyadofu with snow peas in a black ceramic bowl.

Koyadofu (高野豆腐) or freeze-dried tofu is a common pantry staple you can always find in the Japanese kitchen. When you’re running out of fresh ingredients or desperately need one more dish to round up a meal, you can always reach out to Koyadofu. Today I’ll show you a classic Simmered Koyadofu (高野豆腐の煮物) recipe. It’s easy to prepare and makes a great meal prep dish.

Watch How to Make Simmered Koyadofu

Made with freeze-dried tofu, this Simmered Koyadofu soaked in soy-dashi broth is a classic Japanese side dish to enjoy all year round. You can prepare ahead of time and serve it chilled, hot, or room temperature.

Koyadofu | Easy Japanese recipes at JustOneCookbook.com

What is Koyadofu?

The origin of Koyadofu (高野豆腐) can be traced back to the Kamakura period (1185 to 1333). Records show that the tofu product was developed by the monks at the Buddhist temple on the Mount Koya in Wakayama prefecture. As the mountain is located in higher elevation and experiences harsh winter, the monks accidentally discovered freezing was a good way to preserve fresh tofu. The well-preserved food became popular and spread from Mt. Koya to the Kansai region.

Healthy High Nutritional Food

Koyadofu may look like a hard sponge, but did you know it is prized for its exceptionally high nutritions?

The flash freezing and cooling method allow the soy proteins to mature in a natural manner. Through the process, the tofu develops new textures and profiles while preserving the maximum nutritious value of the tofu. The phytonutrients found in tofu can also become more concentrated and more bioavailable. It makes an excellent source of protein, iron, calcium, and can help to lower the risk of conditions such as heart disease, diabetes, and obesity. Another great example of a naturally preserved food.

Koyadofu | Easy Japanese recipes at JustOneCookbook.com

Does Koyadofu need to be reconstituted and rinsed?

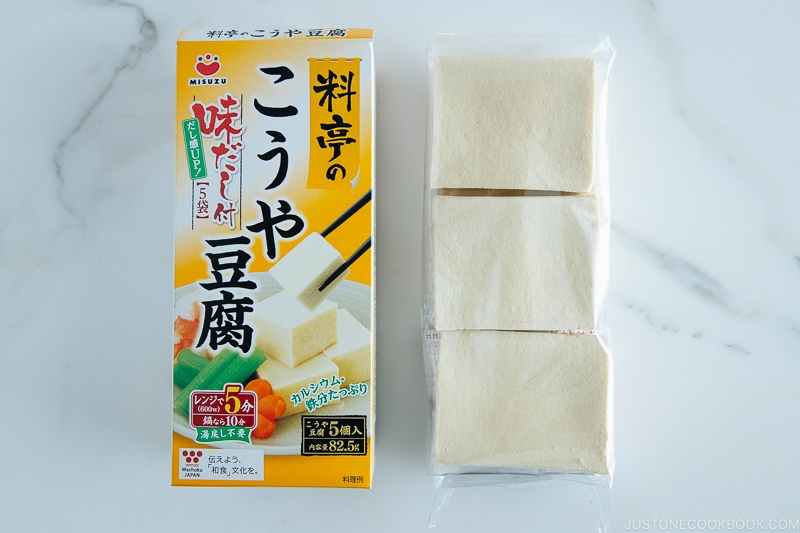
Some brands (like Misuzu brand above) say there is no need to reconstitute Koyadofu. However, I still encourage you to soak the tofu in hot water and wash before simmering in the broth.

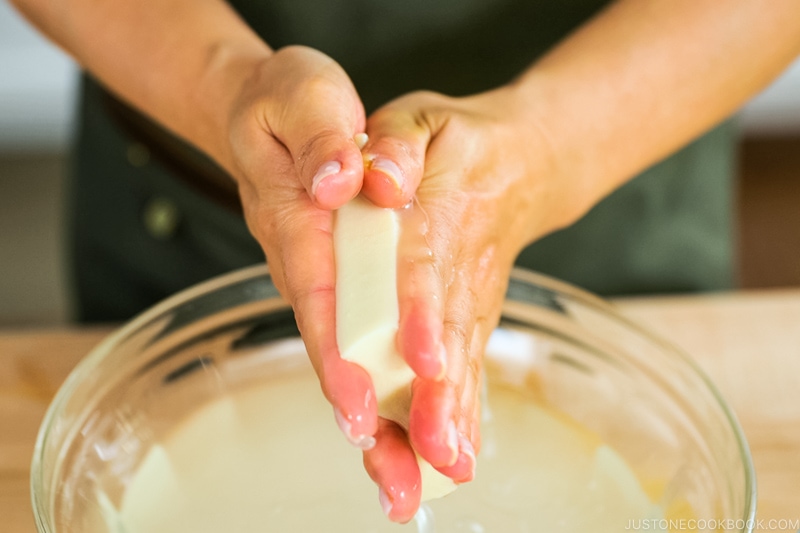
In my step by step images below (and in the video), you can see cloudy water coming out from the tofu. Therefore, I highly recommend cleaning the koyadofu first in order to yield a clear broth and allow the tofu absorbs more flavors.

Simmered koyadofu with snow peas in a black ceramic bowl.

Helpful Tips on Serving Simmered Koyadofu

  • Serve chilled, hot, or at room temperature. My favorite is chilled Simmered Koyadofu. On a hot day, the taste of slightly sweet dashi broth seeping out from the koyadofu is quite refreshing.
  • I like mine to be a bit sweeter as koyadofu is a rather plain dish.
  • Make ahead of time and let the koyadofu soak in broth for a longer time.
  • You can serve blanched greens, simmered root vegetables or shiitake mushrooms together with Simmered Koyadofu.
  • When you pack koyadofu in your bento, squeeze out the broth from the tofu and pack.

The Simmered Koyadofu stores well in the refrigerator for up to 4 days, and freeze beautifully for up to a month. It is a simple yet elegant side dish that can grace any Japanese or Asian meal. I hope you enjoy!

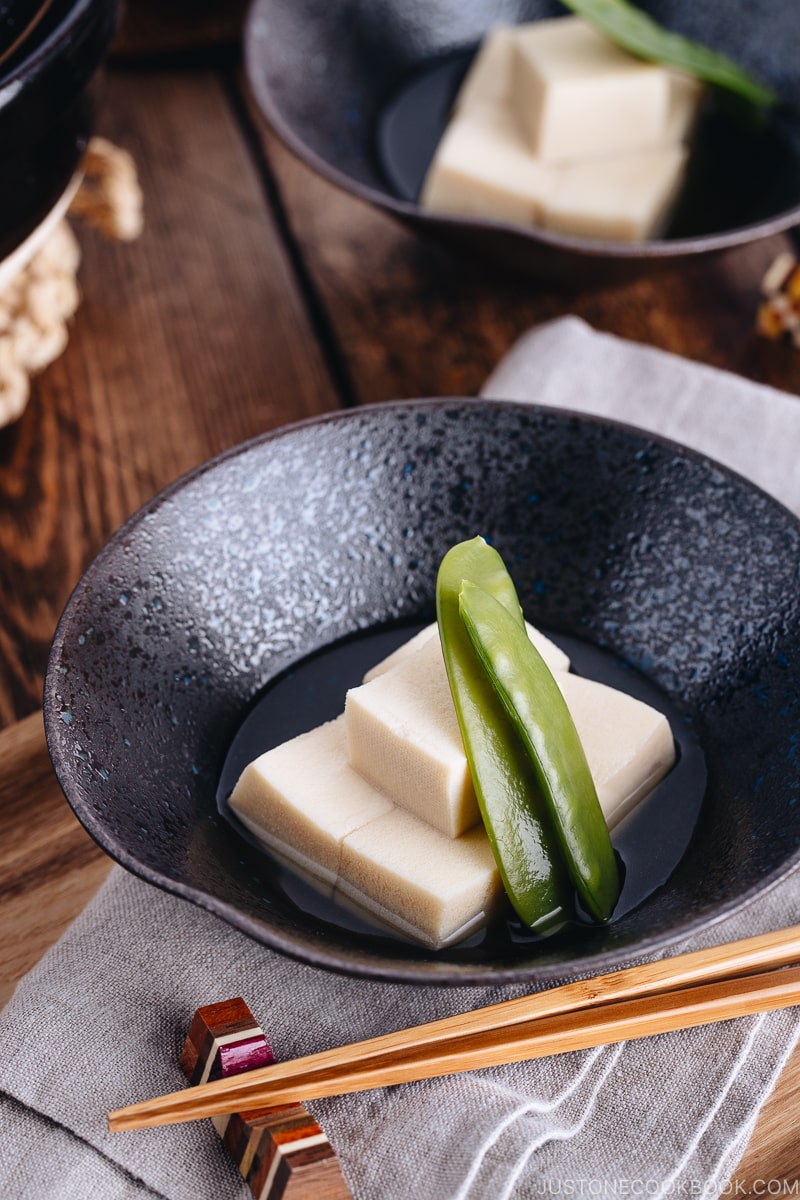
Simmered koyadofu with snow peas in a black ceramic bowl.
Japanese Ingredient Substitution: If you want to look for substitutes for Japanese condiments and ingredients, click here.

Sign up for the free Just One Cookbook newsletter delivered to your inbox! And stay in touch with me on Facebook, Pinterest, YouTube, and Instagram for all the latest updates.

Simmered Koyadofu

  • 5 koyadofu (freeze-dried tofu)
  • 2 ½ cup dashi ((I use vegan/vegetarian-friendly Kombu dashi. See Notes.) (600 ml))
  • 5 snow peas

Seasonings

  • 2 Tbsp mirin
  • 2 Tbsp sake
  • 1 Tbsp soy sauce ((I use Usukuchi (light color) Soy Sauce))
  • 4 Tbsp sugar
  • ½ tsp salt (kosher or sea salt; use half if using table salt)
  1. Gather all the ingredients.
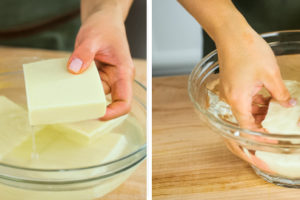
  2. The box says you do not need to soak, but I still recommend washing the koyadofu. Put the koyadofu in a bowl and pour hot water. The koyadofu will expand in about 10 minutes.

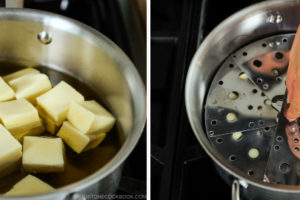
  3. While you wait for the koyadofu to expand, put dashi in a pot. I use cold brew kombu dashi for this recipe, leaving the kombu behind. Add mirin and sake.

  4. Add soy sauce, sugar, and salt.
  5. Mix all together and slowly bring it to boil.
  6. While waiting for the broth to boil, wash the koyadofu in clean cold water once it expands. Be careful with the koyadofu as the inside still contains hot water.

  7. Like a sponge, let the koyadofu soak up the clean water and push it out a few times to clean. Hold the tofu flat between your hands. Squeeze the cloudy water from the inside of the koyadofu by pressing hard.

  8. Change the water in the bowl several times to clean all the koyadofu. Thoroughly wash out the cloudy water by repeating this process several times. Give it a final squeeze.

  9. Cut each koyadofu into 6 square pieces.
  10. Once the dashi-soy broth is boiling, add the koyadofu and cover with a drop lid (Otoshibuta – if you don’t have one, make one with aluminum foil). You do not use a regular lid on top. Simmer for 10 minutes on medium-low heat.

  11. When it’s about to finish simmering, prepare the snow peas by removing the tough strings. Add the snow peas in the saucepan.
  12. Cook for 1-2 minutes. Then transfer the koyadofu to a glass container.
  13. Make sure the glass container is big enough to hold the koyadofu and the broth. I stack the koyadofu neatly.
  14. You can serve hot, at room temperature, or chilled after refrigerating for a few hours or overnight. Put the koyadofu, snow peas, and broth in a bowl and serve.

To Store

  1. You can keep in the refrigerator for up to 3-4 days and in the freezer for up to a month. If it’s frozen, reheat before serving.

Soy Sauce: I use Usukuchi Soy Sauce (light color soy sauce) to keep the broth light in the color.


Kombu: I use cold brew kombu dashi.


Recipe by Namiko Chen of Just One Cookbook. All images and content on this site are copyright protected. Please do not use my images without my permission. If you’d like to share this recipe on your site, please re-write the recipe and link to this post as the original source. Thank you.

36 Hours in Belfast


By NELL McSHANE WULFHART from NYT Travel https://ift.tt/2YIrbpG

Five Places to Visit on the Athens Riviera


By AMY TARA KOCH from NYT Travel https://ift.tt/2ZoVApN

An Art Museum in Your Hotel Lobby


By CHARU SURI from NYT Travel https://ift.tt/2GFMwFJ